Contents
- Introduction, setup, and use
- User guide contents
- Features overview
- Partyline mode (Common Party) overview
- Step 1 – Create your Partyline account
- Step 2 – Start a party
- Step 3 – Participate in the party
- Step 4 – Screen sharing
- Step 5 – Picture-in-Picture feature
- Step 6 – Intercom – Private conversation feature
- Step 7 – Creating a group or private written chat
- Adding a Co-host
- Collaboration option
- Adding a TVU device
- Mosaic mode (Gallery view) overview and operations
- Step 1 – Opening the Gallery view
- Step 2 – Participate in the Gallery view
- Step 3- Mosaic mode output
- Step 4 – Moving participants
- Step 5 – Lock, rename, and tag a participant’s name
- Kiosk mode overview and operations
- Pressline (Conference mode) overview and operations
- Appendix A – Using Partyline with TVU Producer
- Step 1 – Sign up or register for a TVU Producer account
- Step 2 – Signing in to your Producer account
- Step 3 – Log into the Partyline Web page
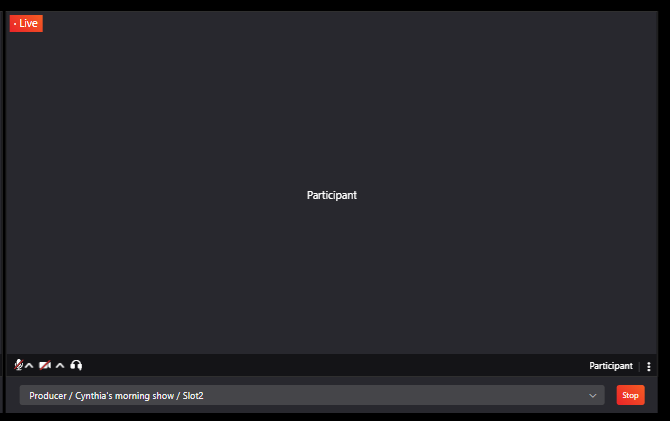
- Step 4 – Route all participants to TVU Producer
- Step 5 – Move the Producer return feed into the Partyline Main window
- Appendix B – Using Partyline with a receiver
- Step 1 – Log into the Partyline Web page
- Step 2 – Sending the video feed from a receiver to Partyline
- Step 3 – Send a participant to the receiver feed
- Appendix C – Using TVU Anywhere with TVU Partyline
- Step 1 – Download and install the TVU Anywhere App
- Step 2 – Participate in the party
TVU Partyline Quick Start User Guide

TVU Partyline is a Real-Time Interactive Layer (RTIL) that can operate with several TVU solutions.
Chapter 1 – Introduction, setup, and use
Partyline overview
TVU Partyline is a Real-Time Interactive Layer (RTIL) that can operate with several TVU solutions. It uses TVU’s patented IS+ transmission protocol to ensure broadcast-quality video, audio, and signal resiliency throughout a TVU Partyline session over the public internet, regardless of the number of participants.
Partyline integrates with TVU Producer and version 9.0 and above of the TVU Anywhere App, which provides video conferencing capabilities between multiple participants or remote participants in a live production.
System requirements
- A PC with an i7 processor or above with 16 GB or above memory
- Minimum screen resolution of 1366 x 768
- Internet bandwidth at 32 Mbps (download) and 10 Mbps (upload)
- Windows 10 or later, Mac OS 11.0 or later
TVU compatible products
- Receiver (Build 8120) and above
- TVU Anywhere (Android): 10.3.18 above
- TVU Anywhere (iOS) 10.3.18 above
- TVU Anywhere (MAC) 10.2.13 above
- TVU RPS One (Build 81349) and above
- TVU One v3 (Build 80043) and above
- TVU One v2 (Build 7561) and above
- MLink v7 (Build 73034) and above
Partyline bandwidth requirements:
Participants can join Partyline with the following resolution/bitrate based on the Internet bandwidth availability:
Note: The host can run low or high quality (720p).
- 360p 30 fps, 600k-1000k (Low/high quality)
- 480p 30 fps 750k-1000k (high quality)
- 720p 30 fps 2000k-2300k (high quality)
- 1080p 30 fps 3000k-3200k (high quality)
Bandwidth requirements to run a standard Partyline session on a PC, Mac, or TVU Anywhere:
- 2 Mbps per participant when the host allows each participant to run in high quality at 720p.
- Whether you are a host or a participant, the average download requirement to run a regular Partyline is (2 Mbps + (Number of Participants at 2 Mbps)), considering all participants come in high quality at 720p resolution.
- If there are 16 participants, the download bandwidth requirements are 2 + (2 at 16) = 34 Mbps. The upload Bandwidth required to run the regular Partyline is a minimum of 2 to 4 Mbps.
Bandwidth requirements to run Partyline on a PC, Mac, or TVU Anywhere in Mosaic or Conference mode:
- The bandwidth requirements for the host or co-host remain the same whether it is a regular party, mosaic, or conference mode.
- However, the participant’s bandwidth requirement will be 2 Mbps (download), and 2 Mbps upload speed when running at high-quality 720p resolution.
To ensure optimized performance, use a Chrome browser, turn off VPN, and confirm no other conferencing room software is running in the background (e.g., Zoom) that may have possession
of your camera.
User guide contents
This TVU Partyline Quick Start User Guide provides a general overview of each feature and instructions for remote collaboration and conferencing for live video production.
This user guide provides details for the following topics:
Partyline setup and use:
- Create a Partyline account.
- Download and install the TVU Anywhere App to your iOS smart mobile device.
- Log into the Partyline Web page.
- Start a Common party.
- Participate in the party.
- Using the Partyline source window.
- Sharing the screen.
- Starting an intercom – private conversation.
- Creating a group or private chat
- Using the Collaborate feature
- Using the Co-host feature
- Adding TVU devices
Using Partyline with TVU Producer:
- Sign up or register for a Producer account.
- Start your Producer session.
- Route all participants to TVU Producer.
- Move the TVU Producer feed into the Partyline Main
- window.
Using Partyline with a receiver:
- Sending the video feed from a receiver to Partyline.
- Sending a participant to the receiver feed.
- Using single or multiple receivers.
- Using the Mosaic mode (Gallery view).
- Using Pressline (Conference mode).
- Using the Kiosk mode.
Features overview
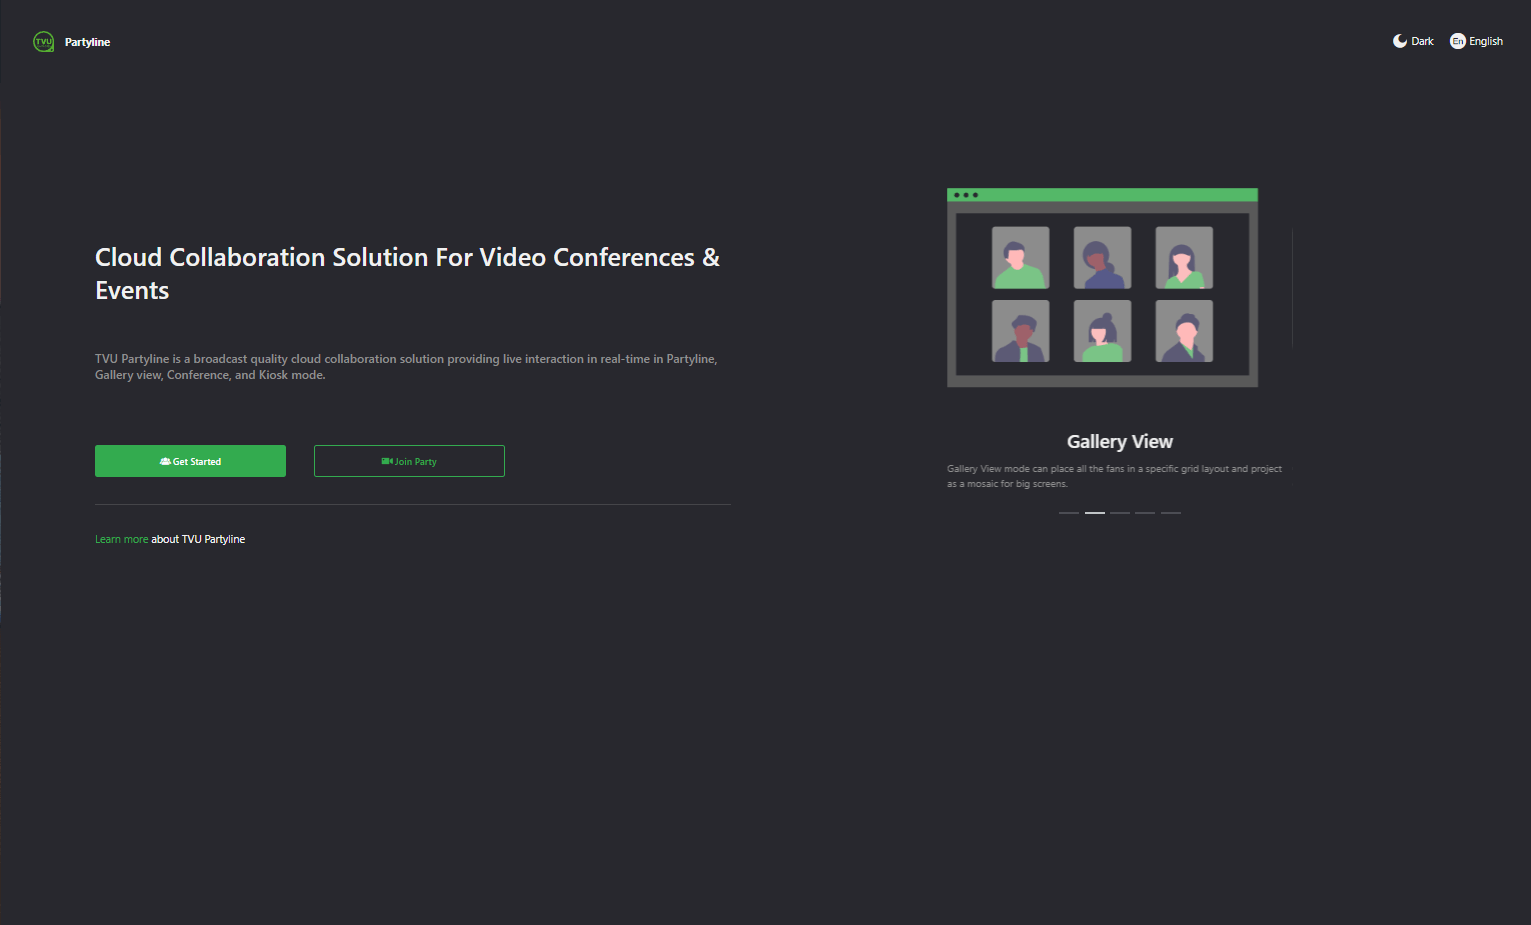
- Partyline Welcome screen – Allows users to switch from dark to light mode before starting or joining a party.
- Join with a simple Web link or QR code – TVU Partyline is a Real-Time Interactive Layer that sits on top of other production tools, permitting remote interaction and participant collaboration. The participants only need access to the public internet to connect. They can join a conference room from any web browser using the link, QR code, or the meeting ID provided by the host, as well as from any smartphone using the TVU Anywhere mobile app.
- IS+ Transmission – TVU Partyline uses TVU’s patented IS+ transmission protocol to ensure high-quality HD video and signal resiliency throughout the session, no matter how many participants join. IS+ supports any video feed, including 4K and 5G signals, to meet the needs of traditional media and new media workflows. Its patented Inverse StatMux (statistical multiplexing) transmission algorithm removes potential delivery issues to ensure high-quality video at the lowest latency possible during transmission.
- Multiple screen share – When using TVU Partyline, participants can share their entire desktop, a specific application, device, video, and TVU Anywhere screen. The desktop share gets added as a separate participant for easy viewing. Any of those sources can be used for live production in high quality.
- Add multiple participants – It can manage hundreds of callers within a single session and is scalable to handle larger and smaller production crews. The host and participants can chat during a Partyline session. The chat can be private or in a group and include message notifications.
- Control and management – Easily enable and disable private communication between producer and anchor without additional IFB channels. The producer can also create groups, so certain participants have limited access to the production discussion. A voice-only mode is also available, and audio can be output to the left or right channel, so talent and crew instructions are not grouped with comments from outside contributors.
- Lazy Audio control icon – When enabled in the Settings cog, the Lazy Audio button displays in each pip. The host and the participant can control this feature. If Lazy Audio is disabled, the left audio channel is output to the Receiver. When Lazy Audio is enabled, the right audio channel is output to the Receiver, and other participants won’t hear it.
- Private/Text chat – The host and the participants can chat during a Partyline session. The chat can be private or in a group and include message notifications.
- Automated mix minus – TVU Partyline delivers HD video and two-channel stereo audio, and mix-minus audio engineering eliminates echoes and feedback, so there’s no need for headphones. The awkward pauses commonly experienced in traditional video conferencing platforms are eliminated because all participants are synced in the same constant millisecond delay.
- Supports major workflows – Beyond cell phones, TVU Partyline is compatible with external audio and video sources, including SDI, NDI, and SRT. TVU Partyline can receive content from connected sources via TVUPack, TVU MLink, TVU Nano, and TVU Grid.
- Cloud based – TVU Partyline sessions are created and managed in the cloud. As a result, if the producer who begins the meeting signs off or loses internet connectivity, the live session continues. The loss of any participant will not stop the live interaction – TVU Partyline continues without interruption.
- Adding a Co-host – Use the TVU Partyline Co-host feature to add a co-host to your partyline. The Partyline host invites a Partyline co-host via email. Once the co-host accepts the invitation, the co-host inherits the same controls as the host. A co-host can accept or decline an invitation and can remove themselves as co-host without the host’s intervention.
- Collaborate option – When selected from the User Management drop-down menu, the host can invite and enable collaborators via email to pull a production into their Partyline or send sources from the host’s Partyline to a TVU Producer account. This feature is a global configuration that applies to all parties.
Chapter 2 – Partyline mode (Common Party)
Overview
TVU Partyline allows remote (and distributed) video production teams and crews to collaborate and interact.
All members can interact with each other on a regular or common Partyline as if they are all in the same control room. Members can also establish a direct one-to-one conversation with the production team and crew members.
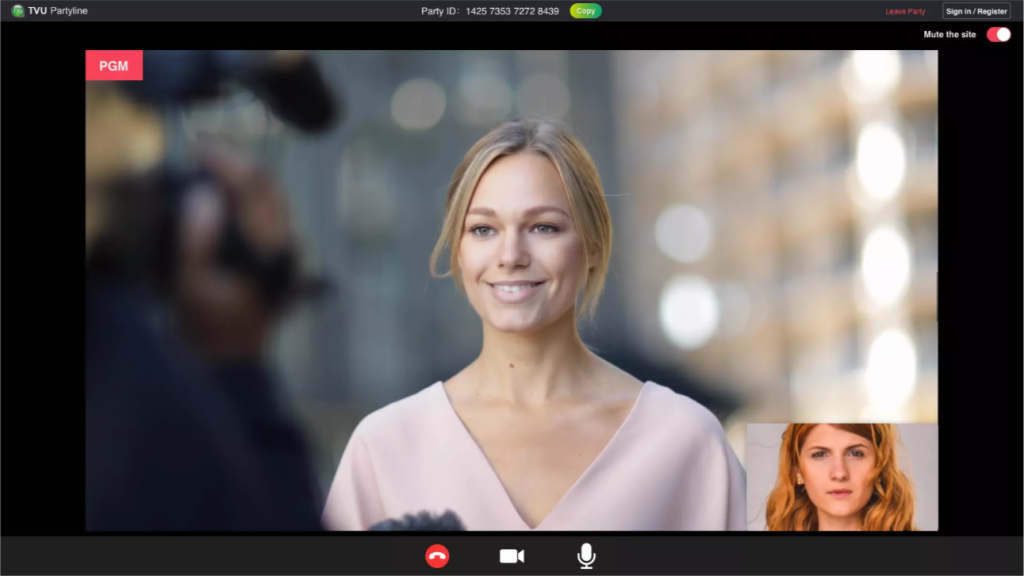
The Program Video (or studio output) feed is pulled into the host’s Partyline feed and seen by all participants. For information about pulling the Program Output feed, refer to “Sending the video feed from a receiver to Partyline.”
Each participant can join the Partyline mode to view and listen to the video feed while talking to other participants to share their feedback about the live program being produced. Each participant, including the host, can share their screen with other participants.
The host can enable private conversations between multiple participants, including the host.
Step 1 – Create your Partyline account
To log into or create a Partyline account, complete the following steps:
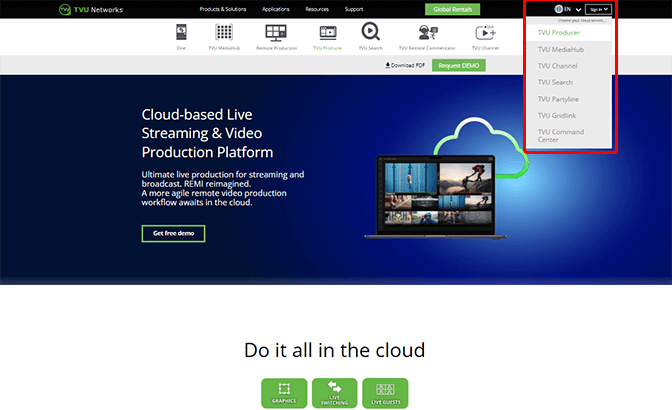
- Go to https://www.tvunetworks.com/products/tvu-partyline/ and click Sign Up/Login in the main navigation.
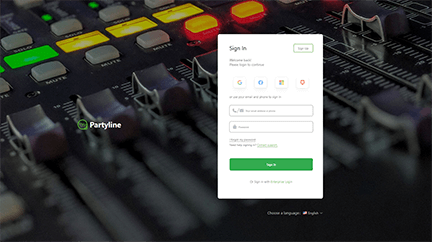
The Partyline Sign-in page displays.
- To create an account, click Sign Up and complete the required information.
Step 2 – Start a party
To initiate a Partyline session, complete the following steps:
- Open a browser tab and enter: https://Partyline.tvunetworks.com
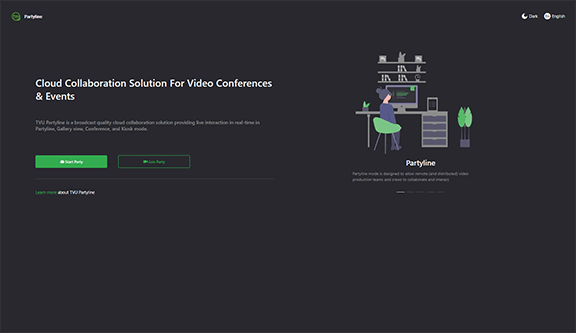
- The Partyline Welcome screen displays. Choose the dark or light mode at the top-right of the Welcome screen. The dark mode is the default.
- Click the green Get Started button.
The Partyline Sign in page displays.
- If you have a TVU account, Sign in to Partyline with your user account credentials. Sign in with your new credentials if you set up a new account.
Note: Using the same credentials allows Partyline to access details about your producer session.
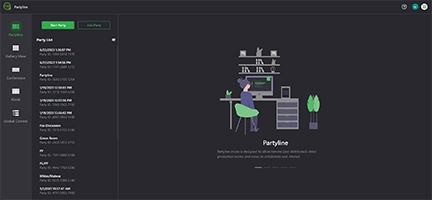
The Partyline Workbench interface opens.
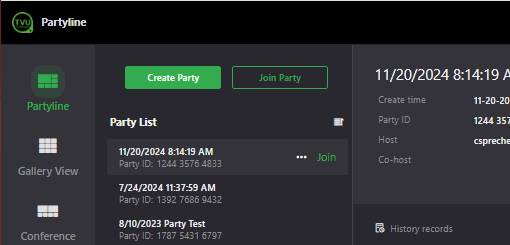
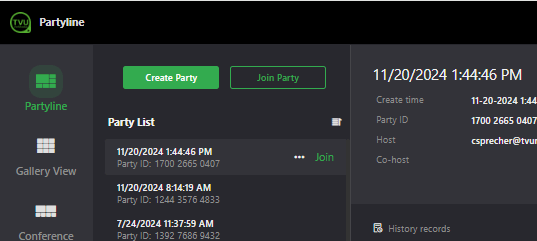
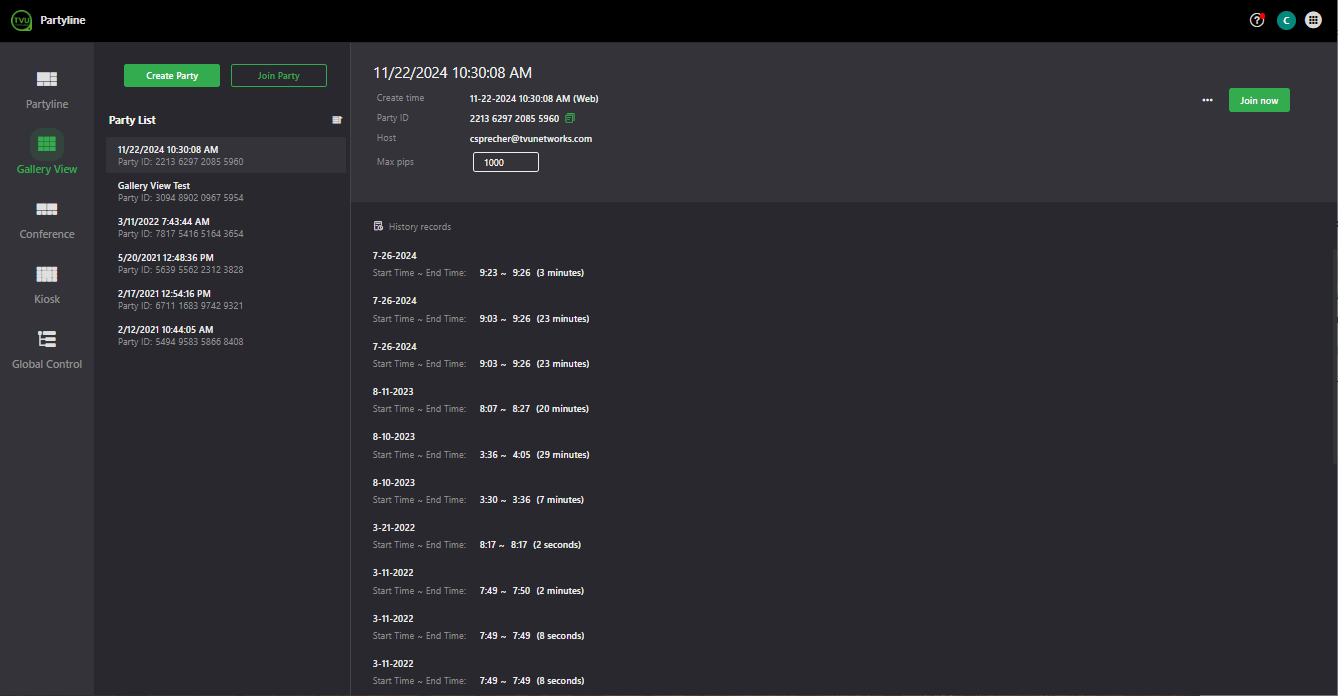
- Click the Create Party button to initiate a new Partyline session.
- The new Partyline session will be displayed at the top of the Party List.
- Select the Party in the Party List to display its usage details.
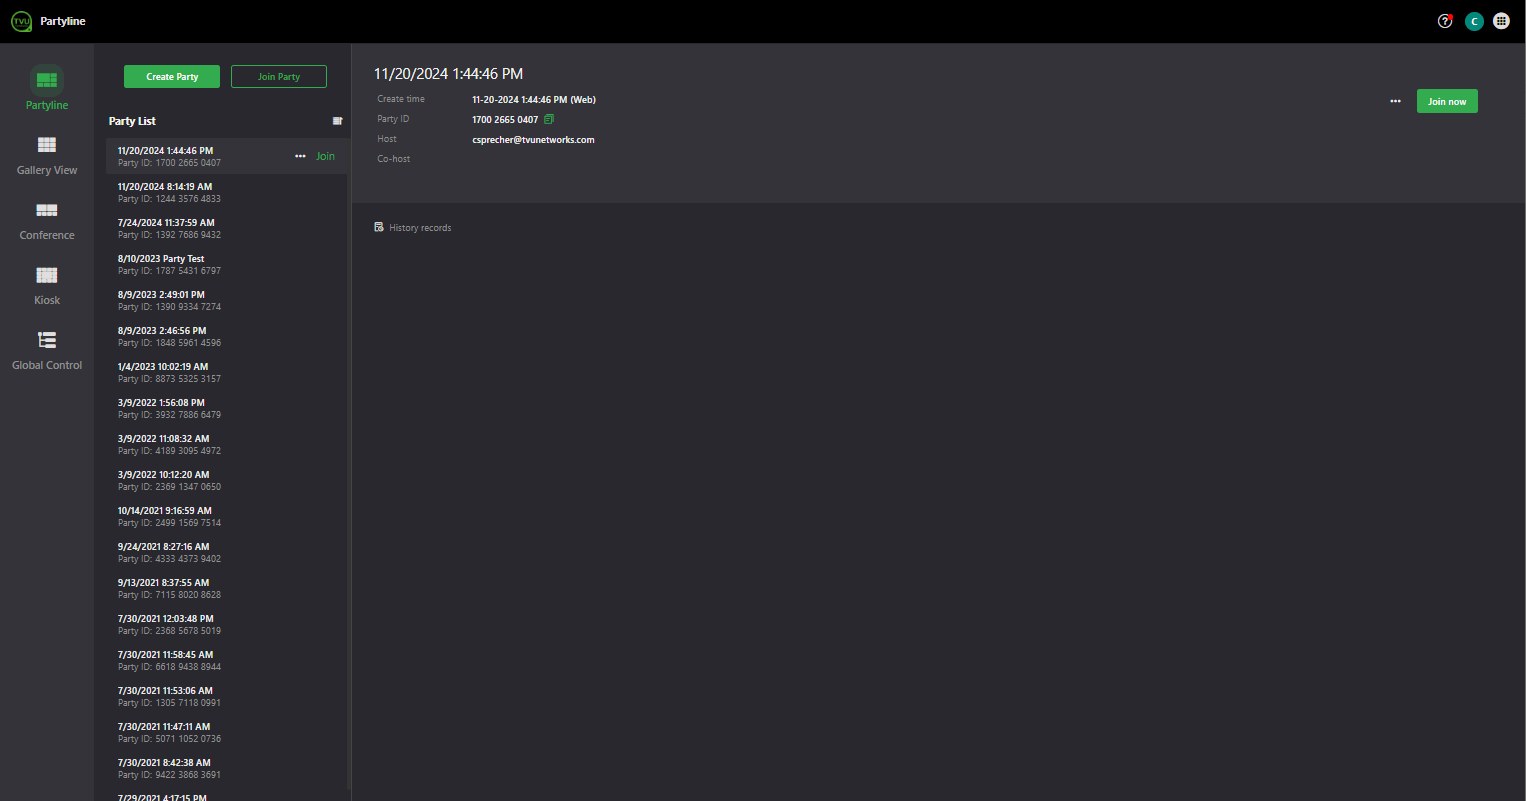
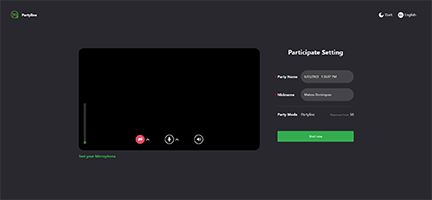
- Hover over the Partyline session in the Party List and click Join to open the Participate Setting page.
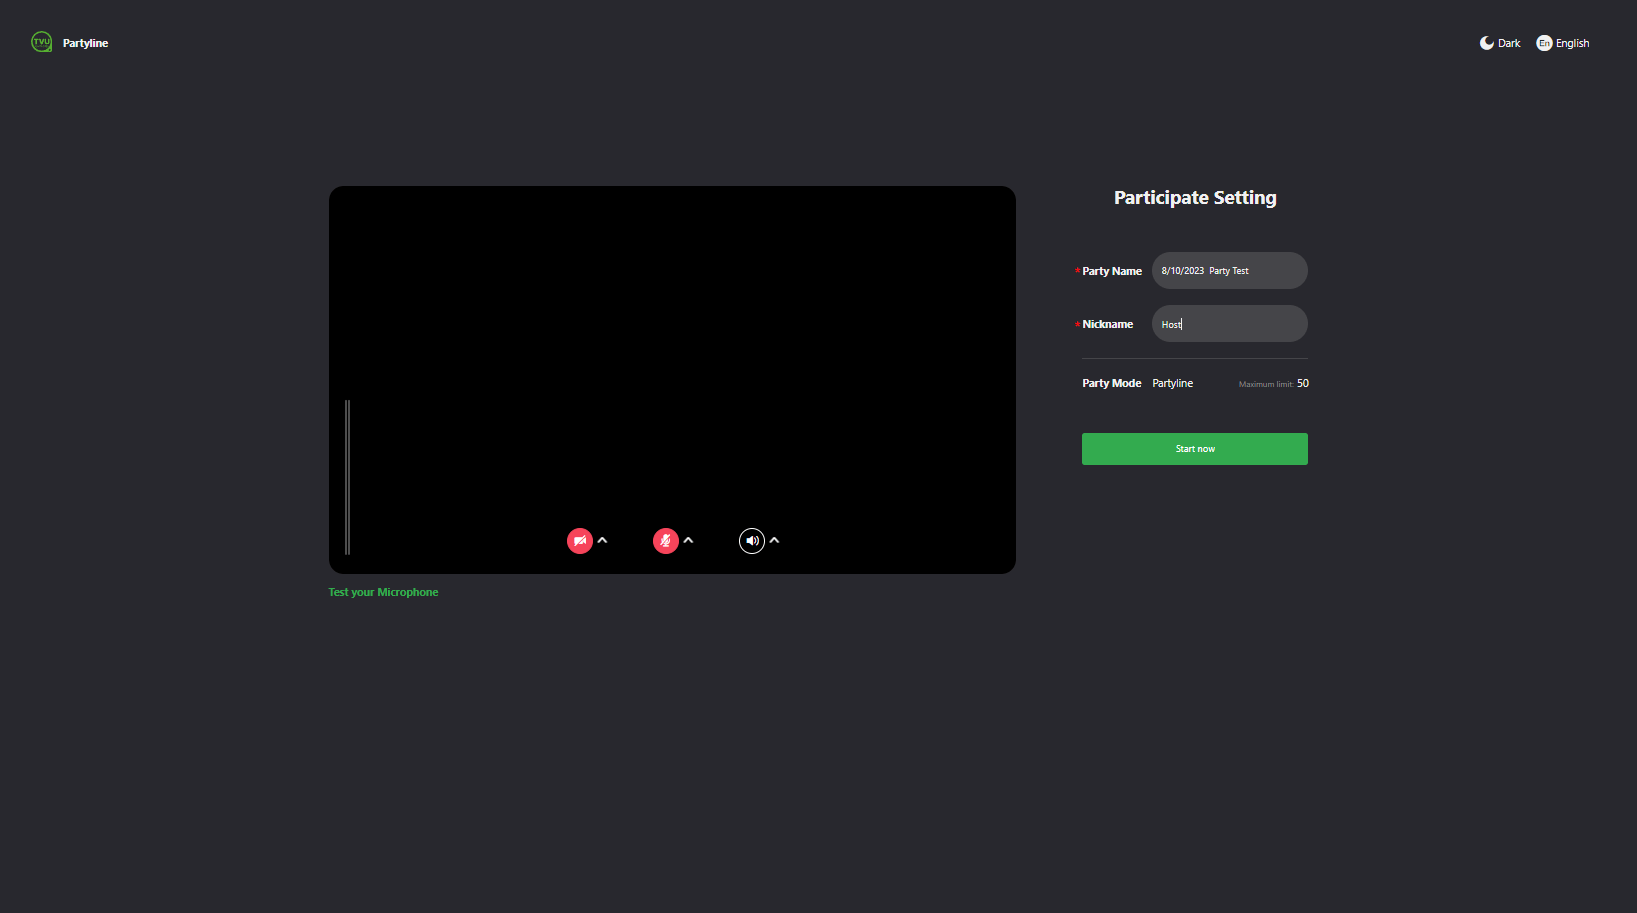
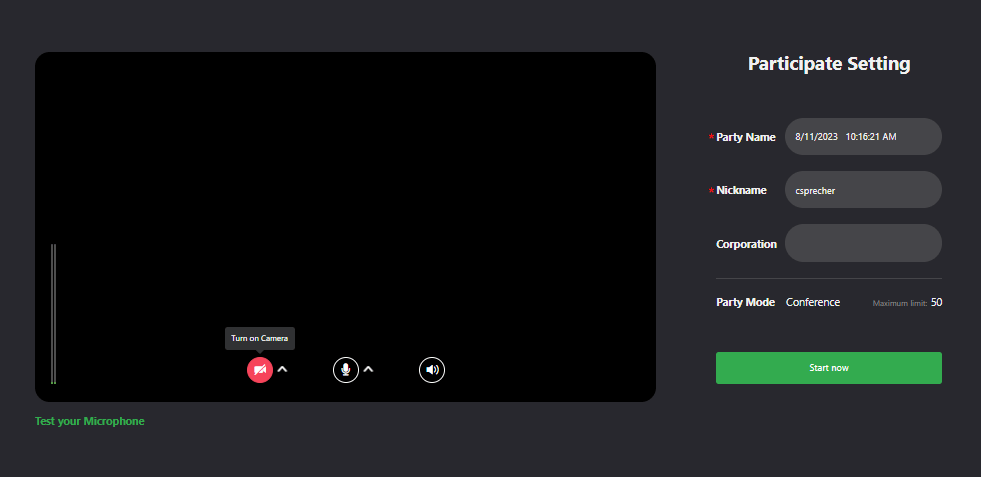
- The Participate Setting page allows users to test and configure their mic and camera devices before starting a Partyline session.
- The Party Name and Nickname fields can be edited as desired.
- Click the Start Now button.
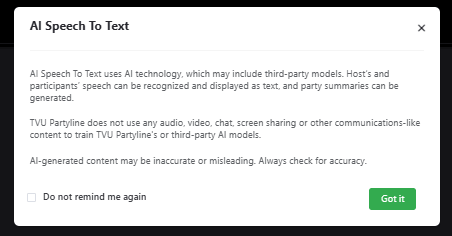
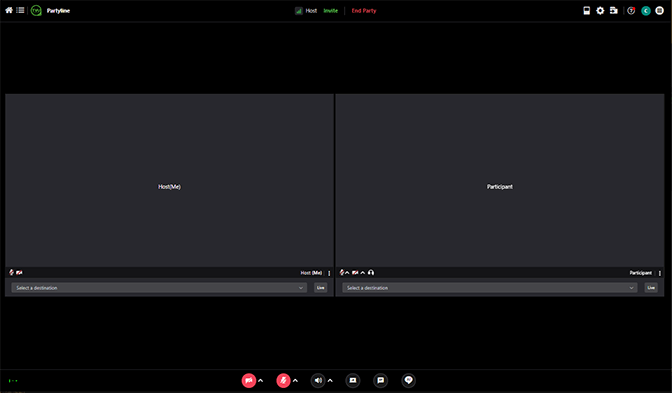
- The Party Control page opens with an “AI Speech To Text” message. Click the Got it button or the “Do not remind me again” checkbox to continue.

- Clicking the Home icon will remove you from the active Partyline Control page and return you to the Partyline Workbench.
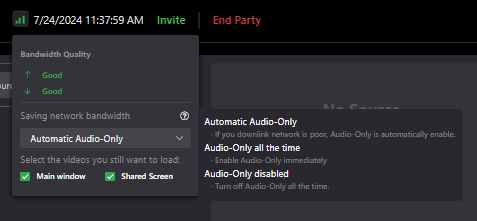
- Your Party ID, Network measurement icon, Invite link, and End Party link are displayed at the top of the Control page.
- Click the Network measurement icon to open the pop-up window. Make your selections from the drop-down menu to set up the “Audio Only” mode and select the checkboxes to prioritize the videos you want to load.
- Click the Invite link to invite participants.

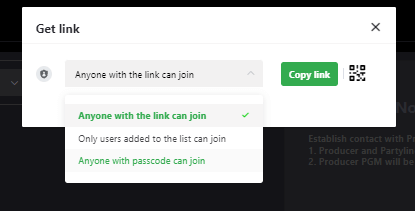
The Get link window opens.
- Make a selection from the drop-down menu and click the Copy link button. If a participant uses the TVU Anywhere app, you can click Copy Link or send the QR code to join the Party.

- Paste the session URL or QR code into an e-mail and send it to your remote participants.
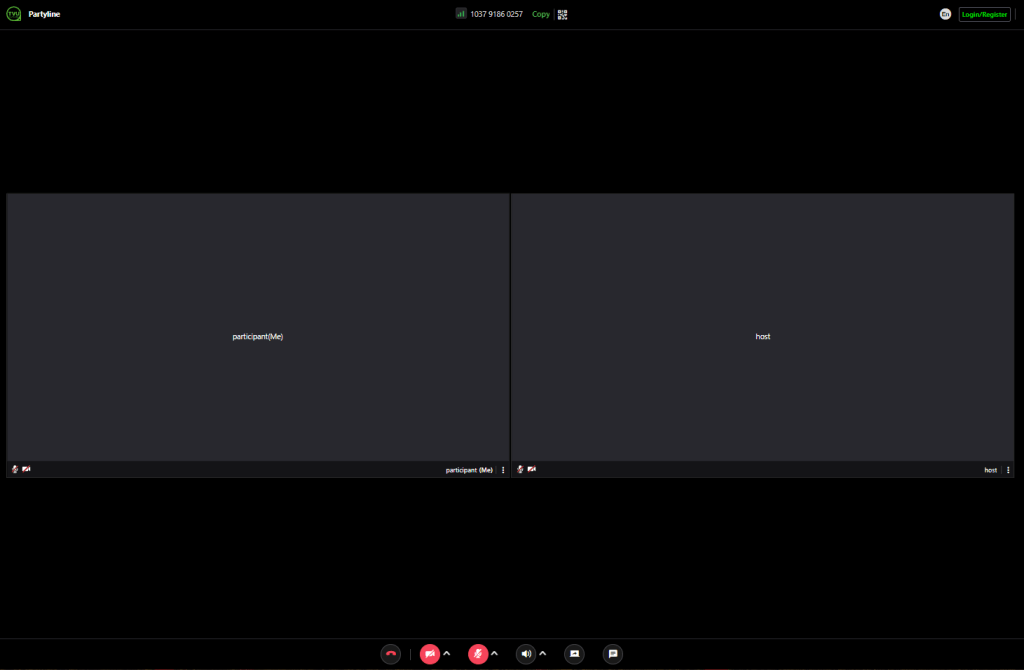
Step 3 – Participate in the party
Participants copy and paste the URL sent via e-mail into their browser address field. The Participant Setting page opens.
Participants can create a Nickname for their session and open and install the TVU Anywhere app if they prefer using a smartphone.
To participate in the party, click the green Start now button.

Participate using a browser
Remote participants can join the party using a browser (Chrome is recommended).
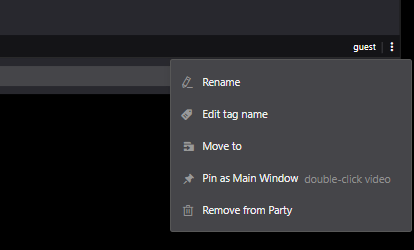
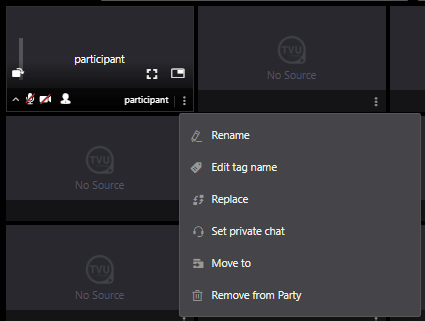
Removing a participant
If someone enters the party by mistake, the host can remove them by clicking on the participant’s Settings three-dot icon “…” and selecting Remove from party in the drop-down menu.
Step 4 – Screen sharing
Anyone in the party can share a screen and audio or multiple screens with others, up to fifteen participants.
Anyone in the party can share a screen and audio or multiple screens with others. Screen sharing supports up to fifteen participants.
While in a TVU Partyline session, any participant, including the Host (owner of Partyline), can share multiple screens: their entire desktop, a specific application, a device video, and a TVU Anywhere screen. The desktop share gets added as a separate participant for easy viewing. Any of those sources can be used for a high-quality live production.
Note: The shared screen can be used as a video source sent to the TVU Producer slots 1 to 4 or a receiver.
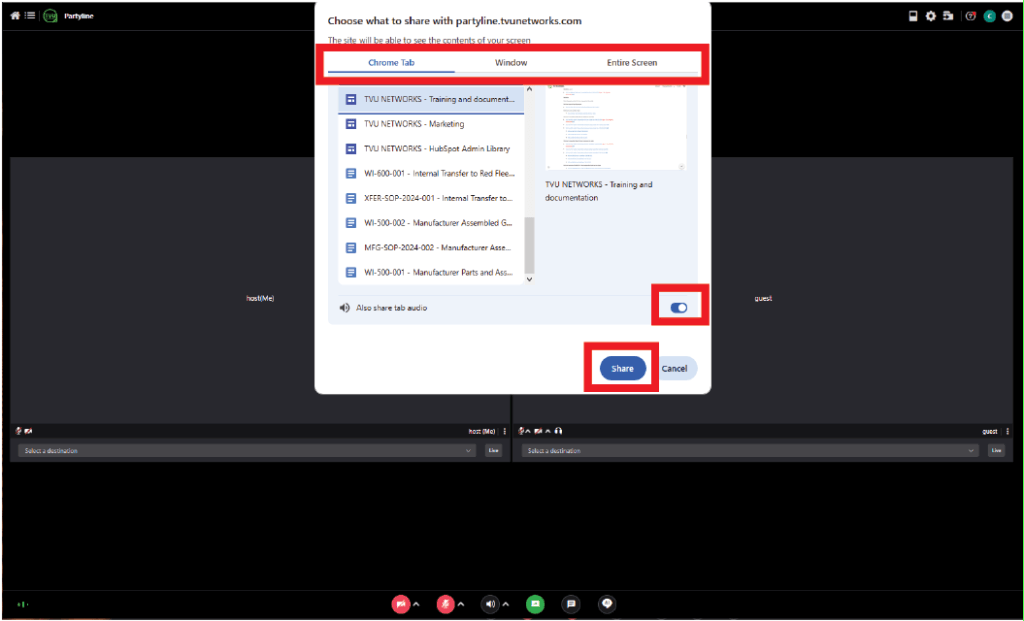
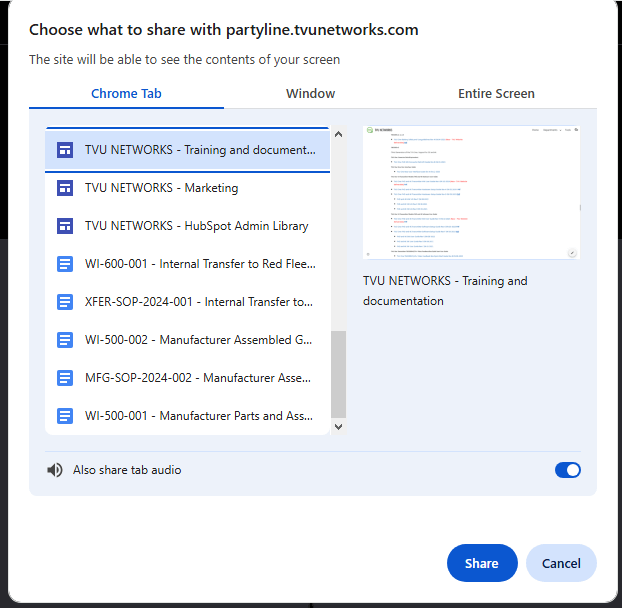
Using the screen sharing feature, any participant including the Host (owner of Partyline) can share content by selecting one of the following tabs and enabling the Share tab audio slider:
- Entire Desktop Screen
- Entire Application Window
- Chrome browser window
To start the screen-sharing feature during a Partyline session, complete the following steps:
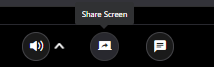
- The share screen functionality is activated by clicking the Share Screen icon at the bottom of the Partyline Web interface.
- To share your system audio, enable the Also share tab audio slider in the share screen pop-up window.
- Select the tab and content you want to share and click the Share button.
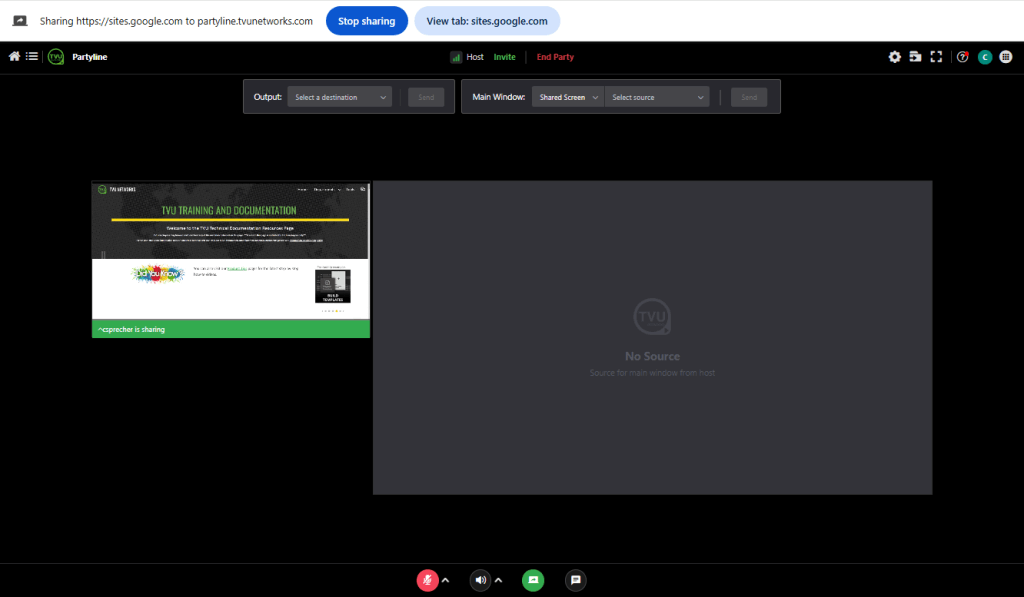
- The shared content opens in a new tab and is displayed in full-screen mode. To exit full-screen mode, click the View tab: partyline.tvunetworks.com button at the top of the screen.

Note: Only one participant at a time can share a screen.
The shared content is displayed in gallery view mode.
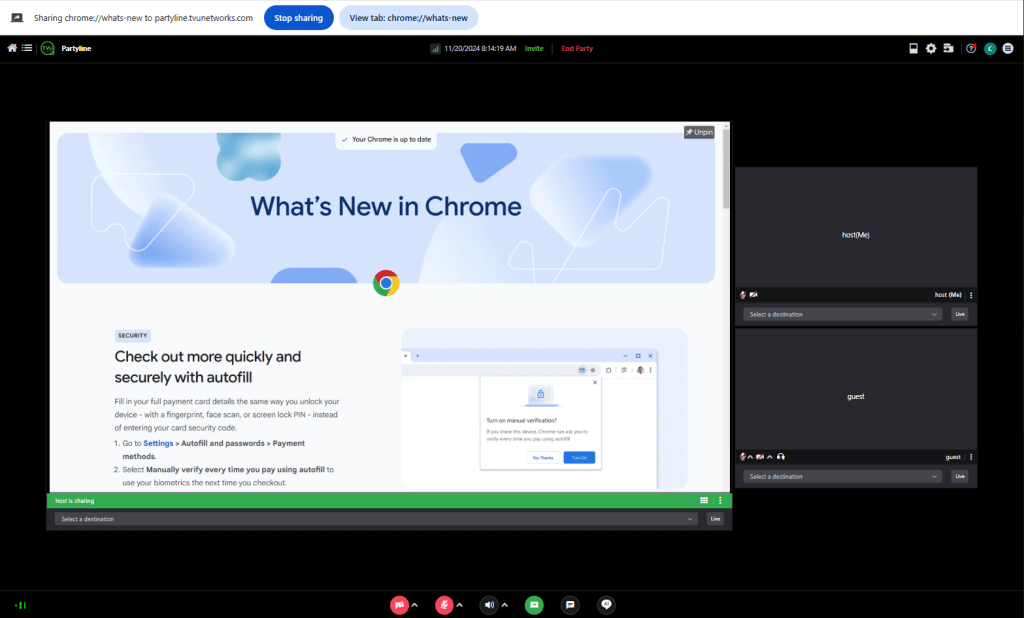
- Move the speaker slider to adjust the audio. To change the screen share preview window, hover over the preview and select one of the view mode icons.

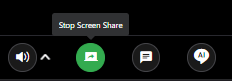
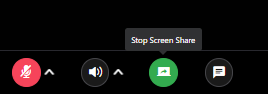
- To stop screen sharing, click the blue Stop Sharing button. Otherwise, click the green Stop screen Share icon at the bottom of the window.

Step 5 – Picture-in-Picture feature
Any video previews in a participant’s Partyline session can be displayed in a separate, resizable, and moveable window.
To use this feature, complete the following steps:
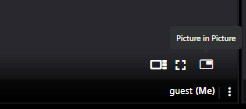
- Hover your mouse over the bottom right section of the preview window. Click the Picture-in-Picture icon.
- A separate moveable, resizable window displays. Move your mouse to the top-left corner until the sizing tool displays to resize the window. Resize or move the window as desired.
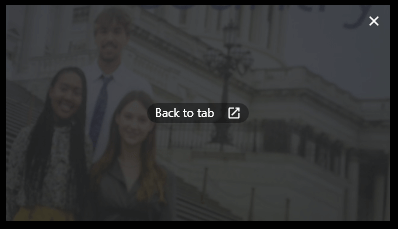
- To close the window and return to the participant’s preview, click the X in the window’s top-right corner.
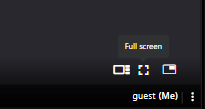
- Hover your mouse over the preview window to view the preview in full-screen mode. Then, select the Full-screen icon. Double-click the full screen to return to the basic preview.
Step 6 – Intercom – Private conversation feature
As the host, you can control the public and private conversation features by enabling or disabling the appropriate slider in the party Settings and chat Setting windows.
To enable participants to create private conversations:
- Hover over a party in the Party list, and click the three dots “…” and select Party Setting from the menu.
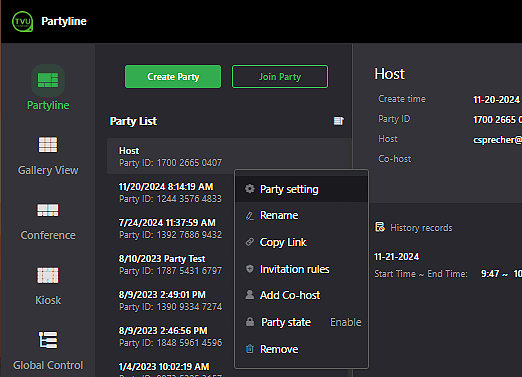
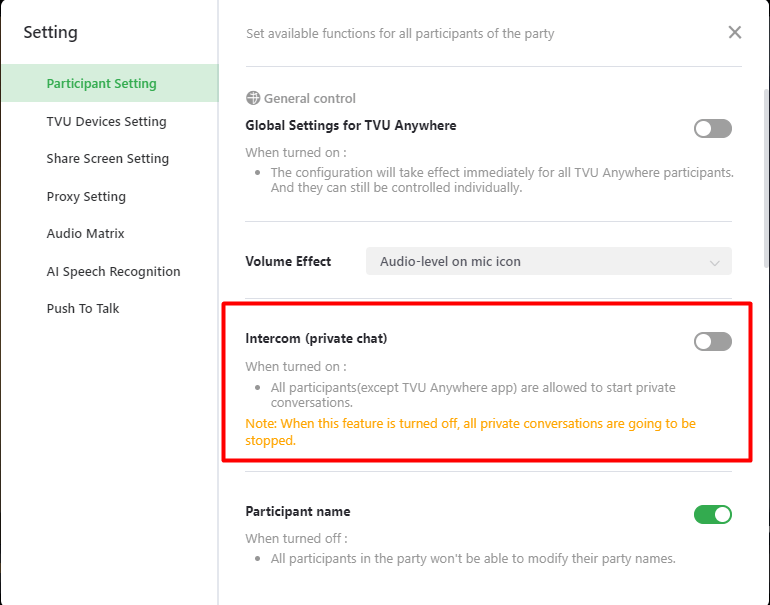
- The Setting window opens. Enable the Intercom (private chat) slider.
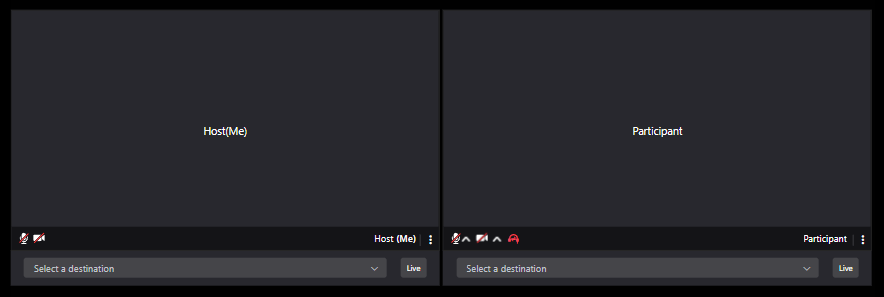
- Click the headset icon below the preview window to start a two-way private chat. Others will not hear the initiator outside of the chat, and the initiator will hear the recipients.
- The participant’s Headset icon below the preview will be displayed in red when a private conversation is active.
Along with their private conversation, they can hear audio from the participants. The host and participants can create a private conversation with the host and other participants simultaneously.
- To end the private conversation, click the Headset and Chat icons again.
Step 7 – Creating a group or private written chat
All modes now include the chat feature for written communication between the host and participants. This feature includes options for starting a private chat, group chat, and message notification.
Note: This functionality allows you to create a private conversation with more than one person at a time.
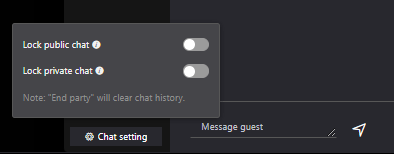
The host has control of the chat setting and can lock public or private chat sessions by clicking the Chat icon and Chat Setting button at the bottom of the chat panel.
- Click the Chat icon to create a private written chat with a participant or group chat.
- The Chat panel displays your chat options.
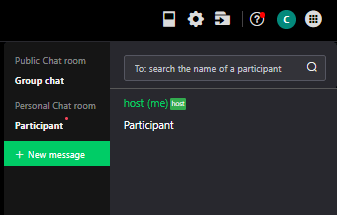
- Select Group chat to chat with all Partyline participants.
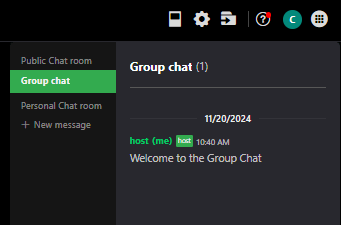
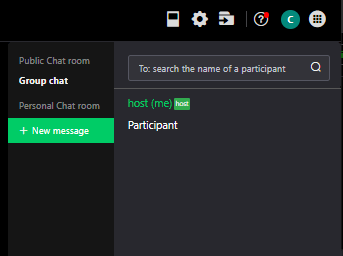
- Select +New message to start a Private or Personal chat.
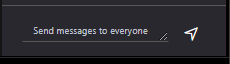
- Select Group chat or the name of the participant with whom you would like to chat privately. Enter your message in the Message field at the bottom of the chat panel and click the send icon.
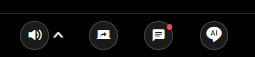
- The participant or group will see a red dot at the top of the chat icon. This red dot indicates that a chat has been started. Click the Chat icon to open the chat panel.
- To start a private chat with one of the Partyline participants or host, Select Personal chat room and + New message. Then, select the participant with whom you would like to chat within the chat panel.

- Enter your message in the Message field at the bottom of the chat panel. The participant’s chat icon displays a red dot indicating that a new message is available.
- All new chat responses are indicated with a red dot at the top of the participant’s name in the chat panel. Click the red dot to display the new message.
- To close the chat panel, click the Chat icon.
Adding a Co-host
Use the TVU Partyline Co-host feature to add a co-host to your party. The Partyline host invites a Partyline co-host via email. Once the Co-host accepts the invitation, the Co-host inherits the same controls as the host except for the “Delete party” and “Add Co-host” functions. A Co-host can accept or decline an invitation and can remove themselves as co-host without the host’s intervention.
To add a co-host:
- Navigate to the Partyline Workbench interface and Create or select an existing party from the Party list. Hover over the Party and click Join.
- Enter a Party Name and Nickname on the Participate Setting page, then click Start now.
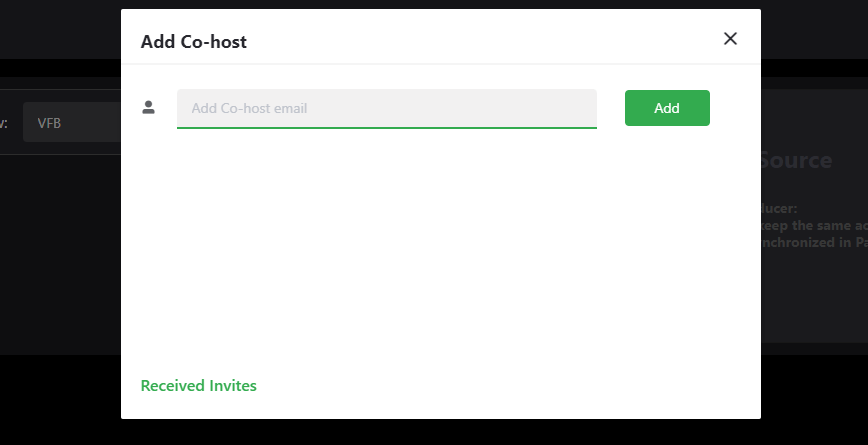
- A new Workbench tab opens. In the Partyline Workbench tab, select a party from the Party list, click the three dots “…”, and select Add Co-host.
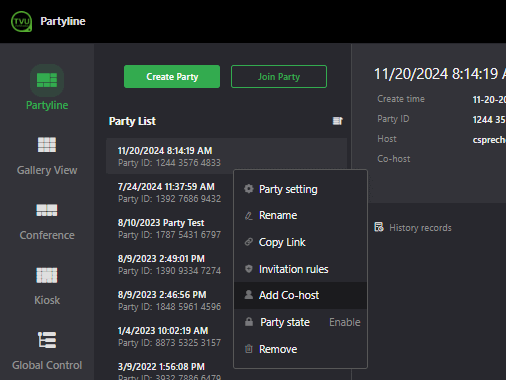
- To send an invitation to Co-host, enter the Co-host’s email and click Add.
- The co-host receives a “TVU Partyline Service Host Authorization” invitation via email. The Co-host has the option to Accept or Decline the invitation.
Note: The co-host displays in the Workbench party list with a gray double silhouette icon until accepted.
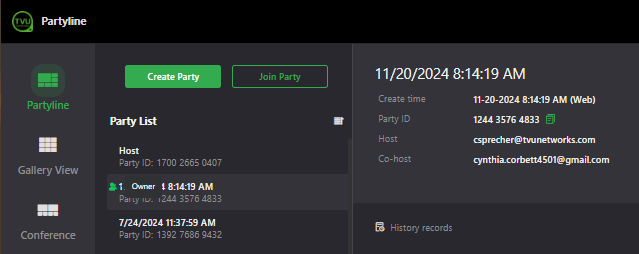
- After accepting the invitation, the co-host can go to https://partyline.tvunetworks.com, click the Join Party button, enter the Partyline ID, and click Join to enter the Workbench.
- The partyline session is displayed in the Party list with a double silhouette in green to indicate co-ownership is accepted. The co-host will have equal management rights with the host (party owner.)
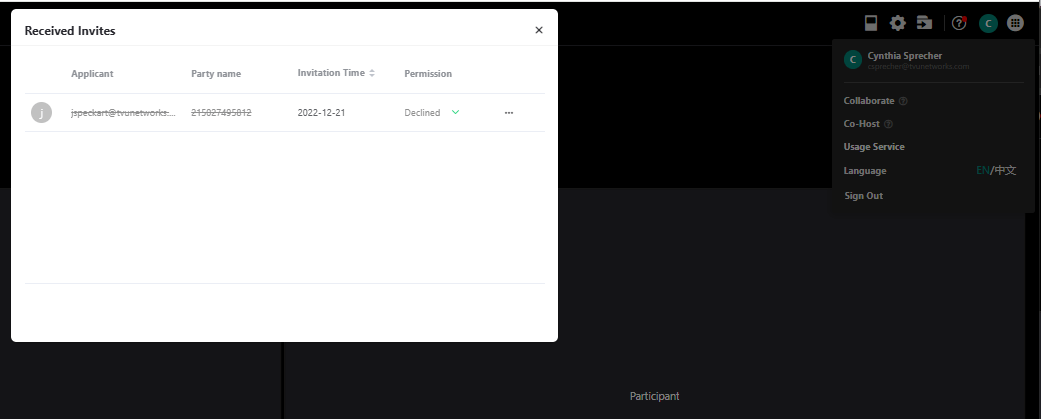
- Click the User Management icon and click Co-Host to confirm the Co-host invitation status. The Received Invites window is displayed. The host or co-host can choose to decline co-ownership by clicking the permission menu and selecting Decline.
Collaborate option
When Collaborate is selected from the User Management drop-down menu, the host can invite and enable collaborators via email to pull a production into their Partyline or send sources from the host’s Partyline to a TVU Producer account. This feature is a global configuration that applies to all parties.
Note: An invited collaborator must have a registered TVU Producer account.
When accepted, the collaborator will be able to go live with your Producer production and move his participants to your Partyline:
- The collaborator can live their participants with your Producer programs.
- The collaborator can move their participants to your Partyline.
- The collaborator can pull your Producer program as a video return.
To add a collaborator:
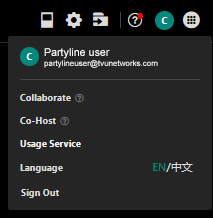
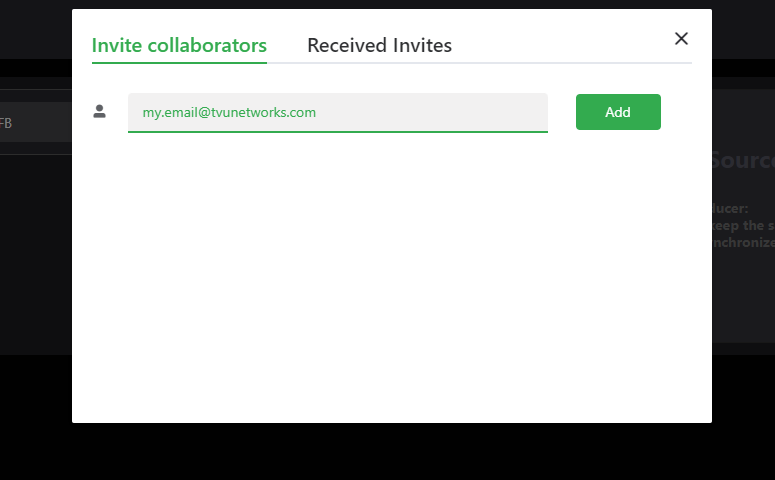
- Click the User Management icon in the top navigation bar.
- Select Collaborate in the drop-down menu.
- In the Invite Collaborators pop-up window, enter the collaborator’s email address and click Add.
- The invited collaborator receives the TVU Partyline Service Authorization via email. The invited collaborator can Accept or Decline the request.
- Accepted invitations to collaborate emails are added to the Received Invites list. The collaborator can start live with an added account.
- The collaborator can move the pip to the added account.
- The collaborator can pull the Producer program from the added account and put it into your Main window.
- To remove a collaborator, the host must open the Invite Collaborators window, click the Received Invites tab, mouse over the collaborator’s name, click the three dots, and select Remove.
Adding a TVU device to Partyline
The host can easily add TVU devices to their Partyline session.
To add a TVU Device to Partyline:
- Click the Add TVU Device button.
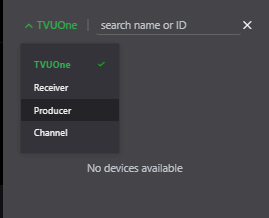
- In the top-right panel, click the search icon.
- Select an input source or ID to build your list.
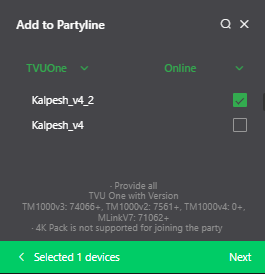
- Click the checkbox for the desired input source(s) and click Next.
- Select the Video and Audio Inputs.
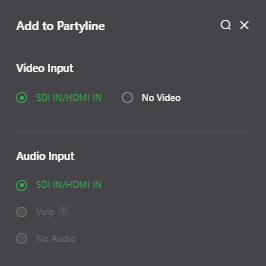
- Click Add at the bottom of the panel.
- A new preview window opens for the device. Enter the input source name or ID. These entries become selectable once entered.
Note: All of the latest supported devices are listed in the What’s new panel. Refer to View What’s New in Partyline” for more information.
Microphone and camera selections in all modes
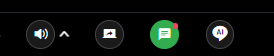
The Partyline UI allows the host and participant to directly access a drop-down menu for microphone and camera selections in all modes. The host and participant can access these devices at the bottom of the screen. A participant can click the red phone icon to leave the party.
Host view:

Participant view:

View What’s New in Partyline
Click the “?” icon in the top-right main navigation panel to follow and view the latest Partyline updates and features. The What’s New panel opens from within Partyline. Click What’s New also to view the latest supported devices.
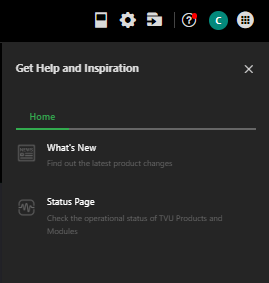
The What’s New panel includes the following information:
- Partyline versions/build information and environment updates
- Partyline build information is also available when you mouse over the TVU Partyline logo in the top left main navigation pane.

- Supported TVU receivers and packs
- Supported TVU Anywhere Apps and smart device types and software requirements
- Browser requirements
- Feature releases
Chapter 3 – Mosaic mode (Gallery view)
Overview
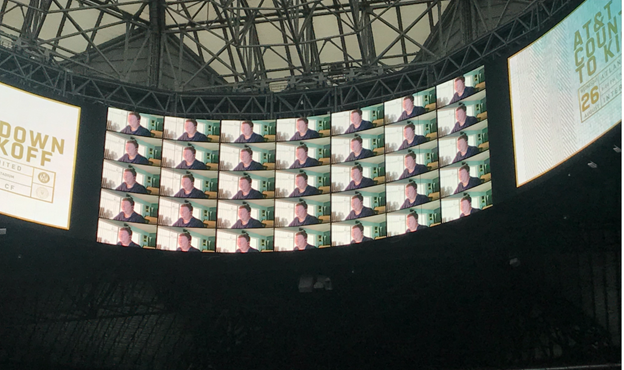
Fans can join this Partyline mode online and cheer for their favorite players or teams. The Partyline mode allows the host to place all the fans in a specific grid layout and project the format to big displays such as Halo or Jumbotron in a venue.
The Mosaic mode in TVU Partyline allows unlimited virtual participants, such as sports fans, to appear and exchange their cheers, comments, or feedback.
Step 1 – Opening the Mosaic (Gallery view)
Gallery view allows the participant to copy and send URLs directly to remote participants using the TVU Anywhere App or browser.
Complete the following steps to start a Partyline session:
- Open a browser tab and enter: https://Partyline.tvunetworks.com/
- The Partyline Welcome screen displays. Choose the dark or light mode at the top-right corner of the Welcome screen. The dark mode is the default.
- Click the green Get Started button.
The Partyline sign-in page displays.
- If you have a TVU account, Sign in to Partyline with your user account credentials. Sign in with your new credentials if you set up a new account.
Note: Using the same credentials allows Partyline to access details about your producer session.
- The Partyline Workbench interface opens.
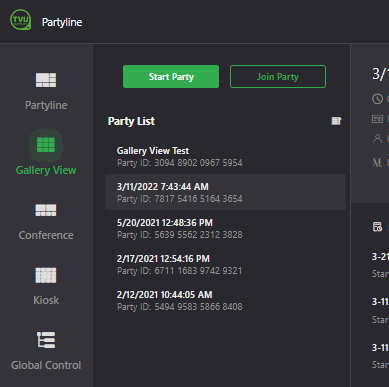
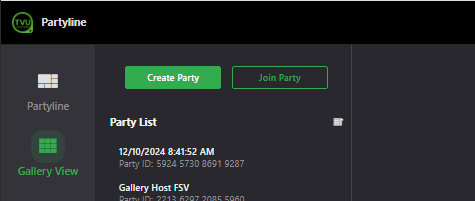
- Click the Gallery View tab.
- Click the green Create Party button to initiate a new Partyline Gallery View session. The new session is displayed in the Party List.
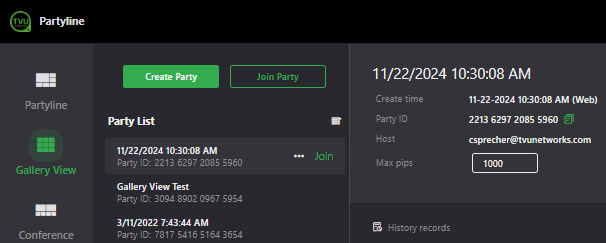
- Select the new Party in the Party List to display its usage details.
- Hover the mouse over the new Party and click Join.

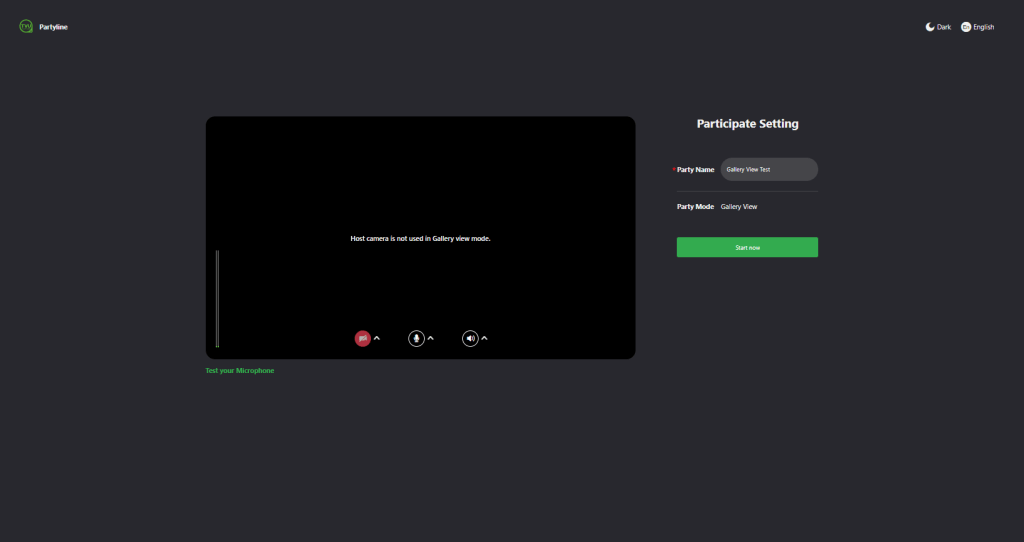
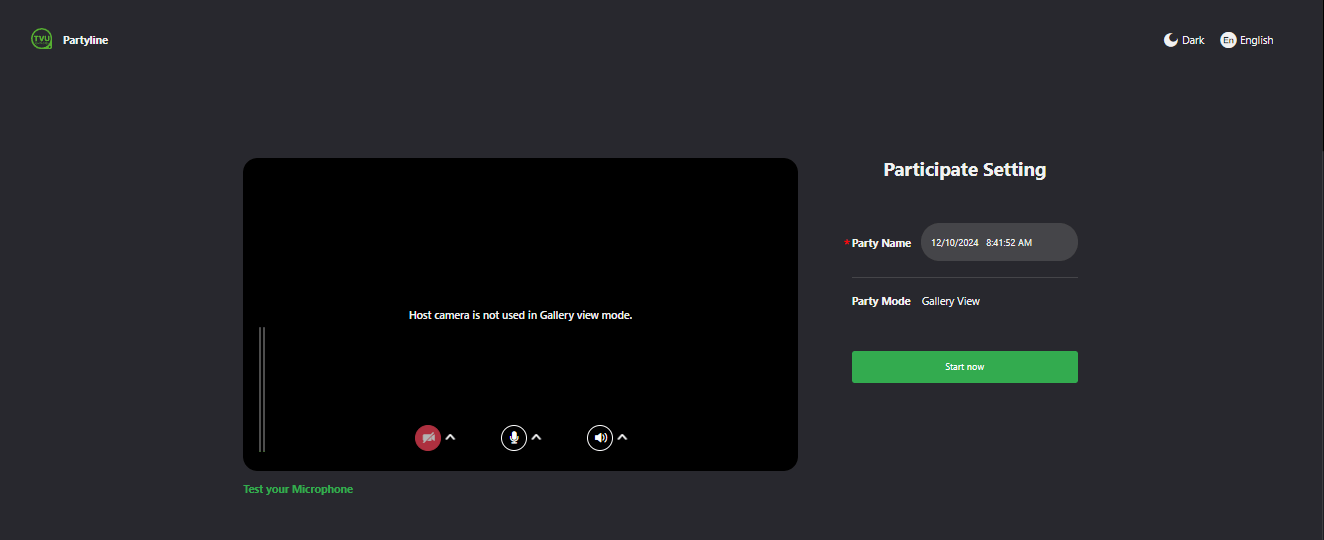
- In the Participate Setting page, enter a Party Name and click Start now.
Note: The host’s camera is not used in Gallery view mode and is disabled by default.
- Click the Invite link in the top main navigation panel and click the Copy link.

- Paste the copied link into an email and send it to all your remote participants using the TVU Anywhere App or the browser.
Step 2 – Participate in the Mosaic (Gallery view)
Remote participants can join the Mosaic (Gallery view) using an iPhone, iPad, Android phone, or computer by clicking on the URL sent via e-mail.
Remote TVU Anywhere participants
Remote participants can join the Mosaic (Gallery view) using the TVU Anywhere App.
- Click on the URL sent via e-mail.
The TVU Anywhere App is launched with the gallery view feature. The remote participant can now see this user interface on his TVU Anywhere App or the browser.
- Click the switch button to switch the front and rear cameras of the phone.
- Click the camera icon to turn the camera On or Off.
- Click the microphone to control the microphone.
Remote browser participants
Remote participants can join the Gallery view using the Partyline window.
Note: A Chrome browser is recommended.
Removing the participant from the Mosaic (Gallery view)
If someone enters the party by mistake, the host can remove them from the party by simply mousing over the participant’s window, clicking the three dots “…” and then clicking Remove from party.
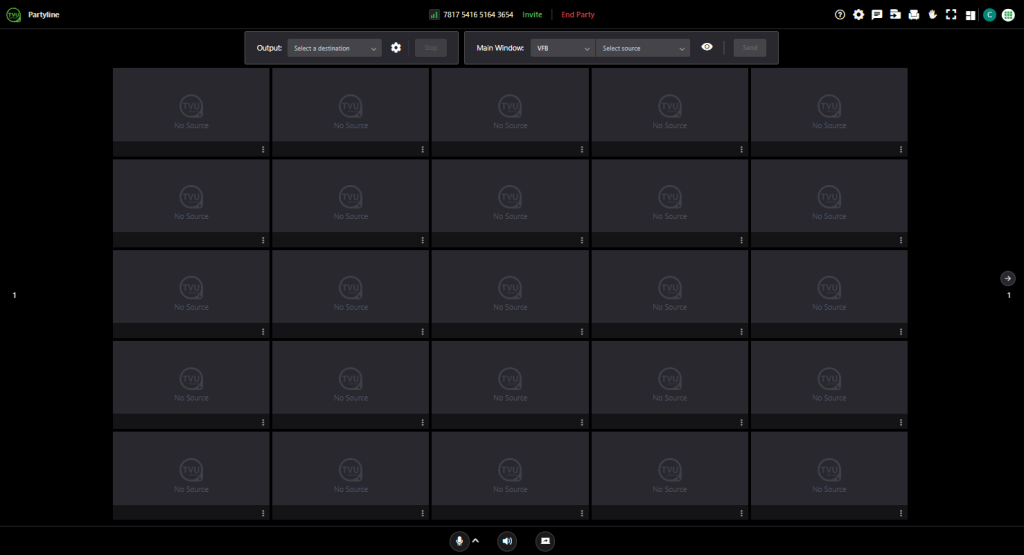
Step 3- Mosaic mode output
The dispatcher uses the Mosaic mode feature to control the layout of participant windows. A participant can be replaced or removed from a source window in the Mosaic mode.
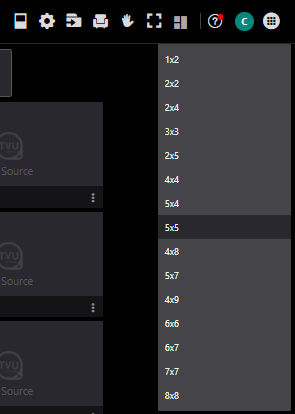
Other features include several participant window layout options. The default layout option is 7×7. Participants can be output to the receiver from the Mosaic mode Output function.
- To change the layout, click the view icon to the left of your account icon in the top right navigation panel.
- Choose a layout from the menu.
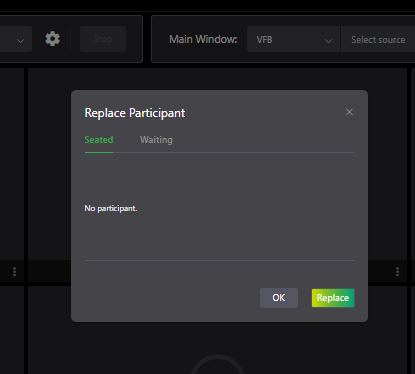
- To replace a participant, mouse over the participant’s window and click the three dots “…” in the bottom right corner of the window, and click Replace.

The Replace participant menu displays.
- Select a replacement from the menu and click the Replace button.
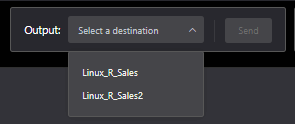
- To send all participant source windows to the receiver, click the Output drop-down menu and select a receiver. Then, click the Send button.
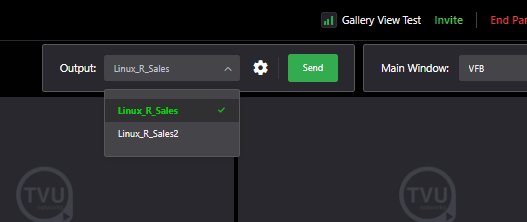
After the participants or fans join the Partyline, they are ready to view the live event or game as spectators who can actively cheer in the event or live game.
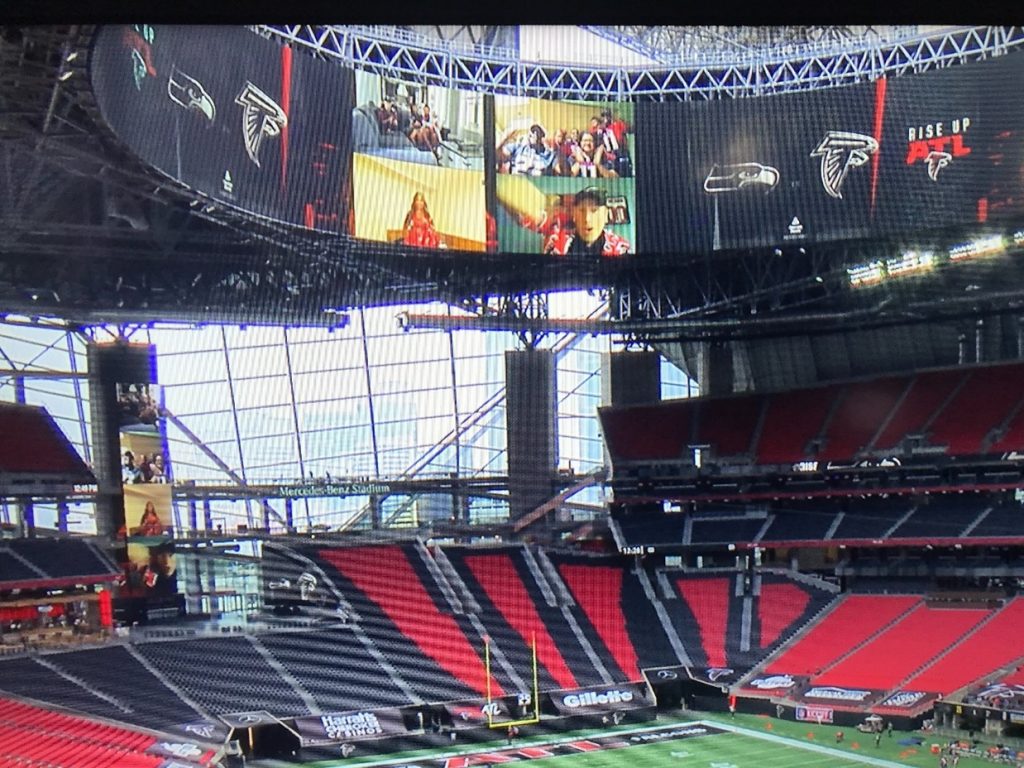
- If desired, choose to send selected layouts to different receivers. Layouts can be combined as projects and projected onto the stadium screen.
Step 4 – Move participants from Party to Party – Mode to Mode
This feature allows the host to move any participant from party to party and mode to mode by creating individual links for each participant. The participant must currently be in the Mosaic
mode to enable this feature.
From the Mosaic mode, the host can move an individual or batch of participants into another mode or party by completing the following steps:
Individual participants
- Click the three dots “…” at the bottom-right corner of the participant’s preview window and select Move to from the drop-down menu.
- Select the Party and Mode you want the participant to move to and click Save.
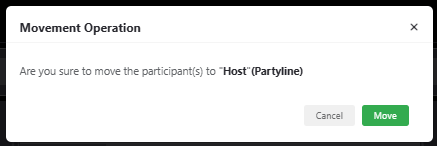
- Click Move from the Movement Operation window.
Batch moving participants
- Click the three dots “…” at the bottom-right corner of the participants’ preview window and select Move to from the drop-down menu.
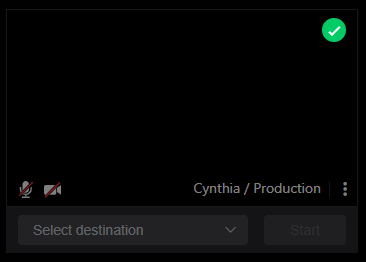
- You have two selection options; click the top-right icon in the participant preview window. The icon turns green when selected.
- You may also choose to click Select all from the bottom-right pop-up window to select all participants and click Done.

Note: For modes that cannot be moved with the select All function, continue with step 4.
- Click the three dots “…” at the bottom-right corner of the participants’ preview window and select Move to from the drop-down menu.
- Select the Party or Mode you want the participant to move to and click Move to confirm your selection.
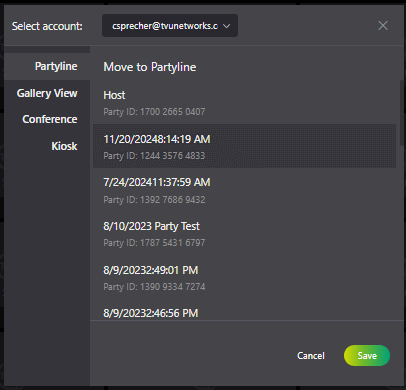
- To view your changes, press F5 to refresh the screen.
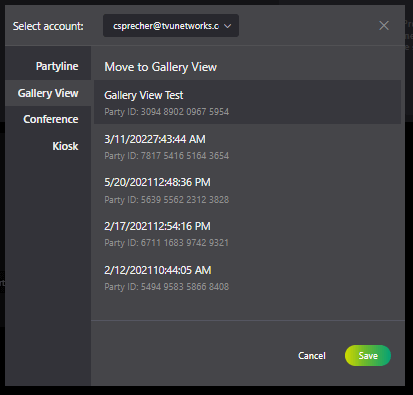
- The Select Account panel opens. Select the appropriate tab, then select your Party ID and click Save.
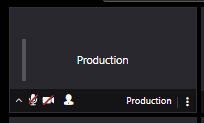
Step 5 – Lock, rename, and tag a participant’s name
The host can lock, rename, and add an identifying tag to each participant’s name in their preview name field. This feature is only seen by the host and allows the host to easily identify a participant’s role in Partyline.
Renaming a participant
To use the Rename feature, complete the following steps:
- Click the three dots “…” at the bottom-right corner of the participants’ preview window and select Rename from the drop-down menu.
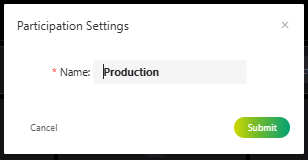
The Participation Settings window opens.
- Enter a new name in the Name field. Then, click Submit.
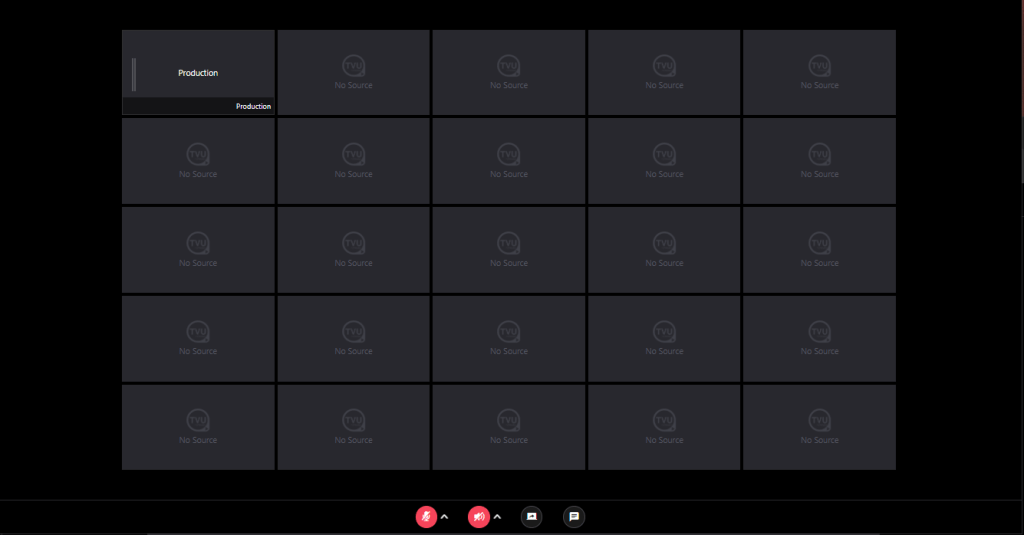
Adding a tag
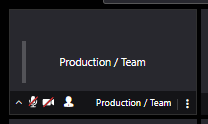
In the following example, the Participant can now be identified as “Participant/Production” below the preview window by the host. The host only sees this feature.
To add a tag to the participant’s name, complete the following steps:
- Click the three dots “…” at the bottom-right corner of the participant’s preview window, then select Edit tag name from the drop-down menu.
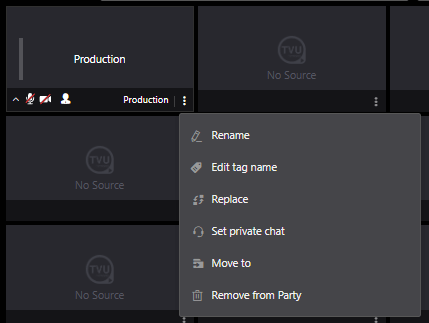
The Tag name setting window opens.
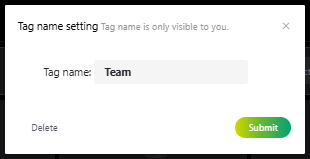
- Enter a tag name in the Tag name field. Then, click Submit. The tag displays after the participant’s name, separated by a “/”.
Lock and Unlock participant names
The host can Lock or Unlock participant names. This gives the participant the ability to change their preview name.
To use the Lock/unlock feature, complete the following steps:
- Click the Setting Gear icon in the top-right navigation pane.
The Setting window opens.
- Click the Participant tab and move the Participant name slider to the right or left to lock or unlock the Participant name.

Full-screen Gallery view
The host can change to a clean, full-screen view of the mosaic in a new browser window. To open a full-screen Gallery view, Click the Workbench tab and select the Gallery View tab.
Change the Party Name in the Participate Setting page and click Start now if desired.

The full-screen Gallery view page opens.
- Click the Full-screen icon.
- To exit from full-screen mode, hover your mouse over the top left side of the screen and click Exit full screen.
Controls and functions
The Host view Gallery view controls and functions are described below.
From left to right:
- Add TVU Device
- Settings
- Move PiPs
- Fill-in rule – Rules for filling empty seats during video output
- Raise hand queue
- Full-screen mode
- Preview arrangements – up to 8×8
- What’s new
- User Management
Hide/show me feature (Participant view)
Participants can hide their preview window from other participants by using the Hide me feature. This feature does not hide their preview from the host.
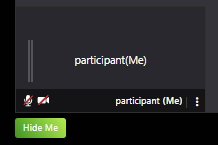
To hide your preview, click the Hide Me button.

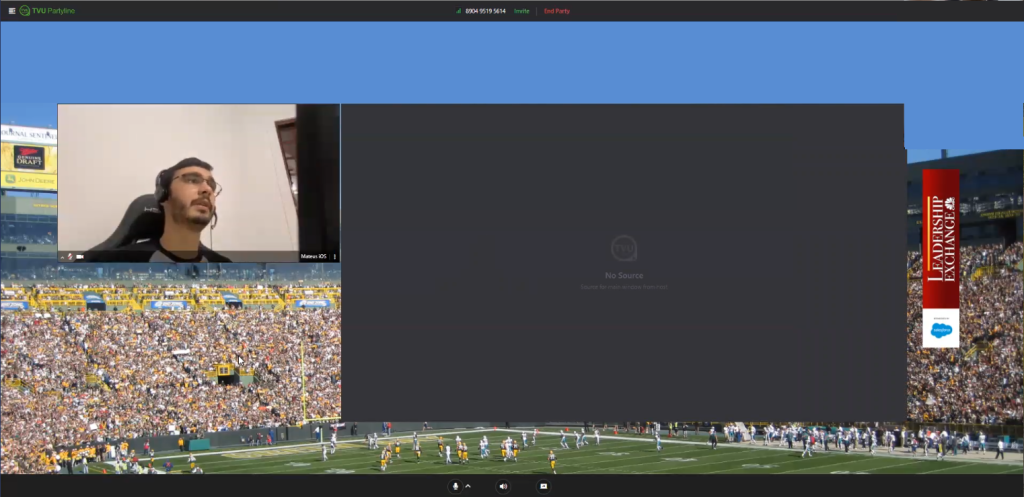
Chapter 4 – Kiosk mode
Overview
The Partyline Kiosk mode is designed to fit up to 30 participants and a main video feed into a dynamically arranged window to fit on a single display without the need to scroll or add secondary screens. Kiosk mode always emphasizes the main video feed, and moves and resizes participant windows around the main video feed as participants are added and removed. It also allows you to use a custom background image and logos to display alongside the video feeds.
Note: The host camera is not used in Kiosk mode.
Starting Kiosk mode
To use the kiosk mode, start a Partyline session and complete the following steps:
- On the Workbench page, select the Kiosk tab and click the Start Party button.
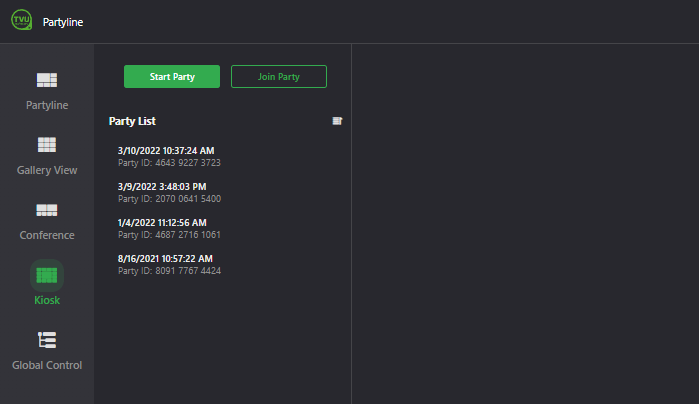
- Select the new entry in the Party List. Hover your mouse over the entry and click Join.
- If desired, change the Party Name in the Participate Setting page and click Start now.
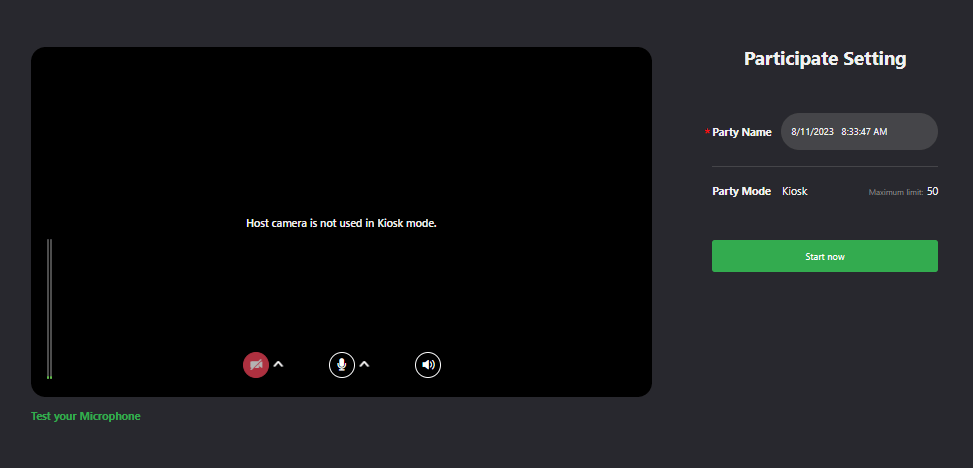
A new Kiosk mode tab opens.

- Make a selection from the Main Window drop-down menu. For selection descriptions, scroll down to the “Main Window menu.”
The host can set the main window to be from a receiver, TVU Producer, a shared screen, or the webcam/video feed from a participant (not available in other Partyline modes), or two participant webcam/video feeds in side-by-side mode (also not available in other Partyline modes).

- Make a selection from the Output drop-down menu. For more information, scroll down to “Output destination selections.”
The output will include the background image, logos, and all main window and participant video feeds and will look just like the Partyline session.
Otherwise, the functionality is all the same so that those elements can be repeated.
Inviting participants
To invite participants, complete the following steps:
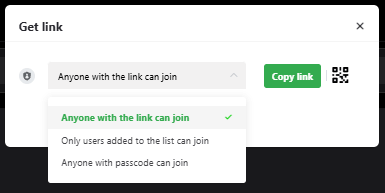
- Click Invite at the top of the window.

The Get link window opens.
- Make a selection from the drop-down menu and click Copy link.
- Paste the session URL into an e-mail and send it to your remote participants. Up to 30 participants can join a session.
Participate using a browser
Participants copy and paste the URL sent by the host via e-mail into their browser address field (Chrome is recommended).
Each participant that joins will display to the right of the main window.
Host functions
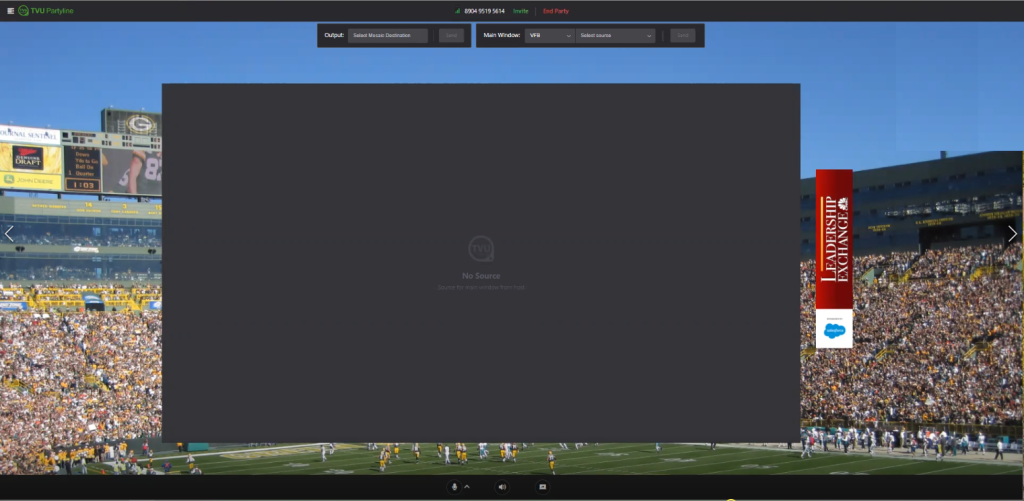
The host view displays the Output and Main Window control functions.
Participant and Main Window Settings
To set available functions for all participants of the party, complete the following steps:
- Click the Setting (Gear) icon in the top-right navigation pane.
The Setting window opens.
- Click the Participant Setting tab and use the slider to enable or disable participant functions.
- Click the Main Window Setting tab and use the slider to enable or disable functions.
Main Window menu
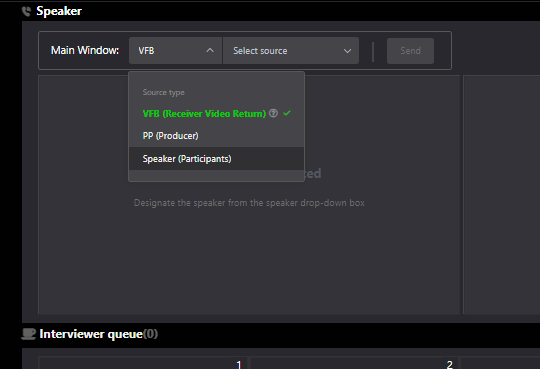
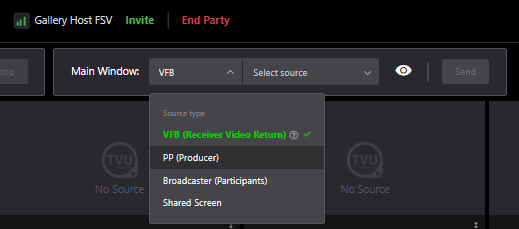
The host sets up the type of video return to display in the main window by selecting from the VFB drop-down menu.
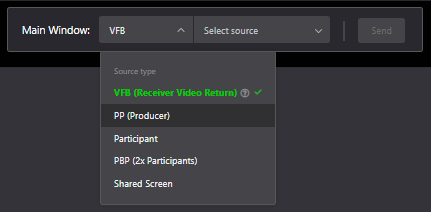
VFB menu selections:
- VFB (Receiver Video Return): Sets the main window to display a video return from a receiver.
- pip (Producer): Sets the main window to display a video return from the TVU Producer source.
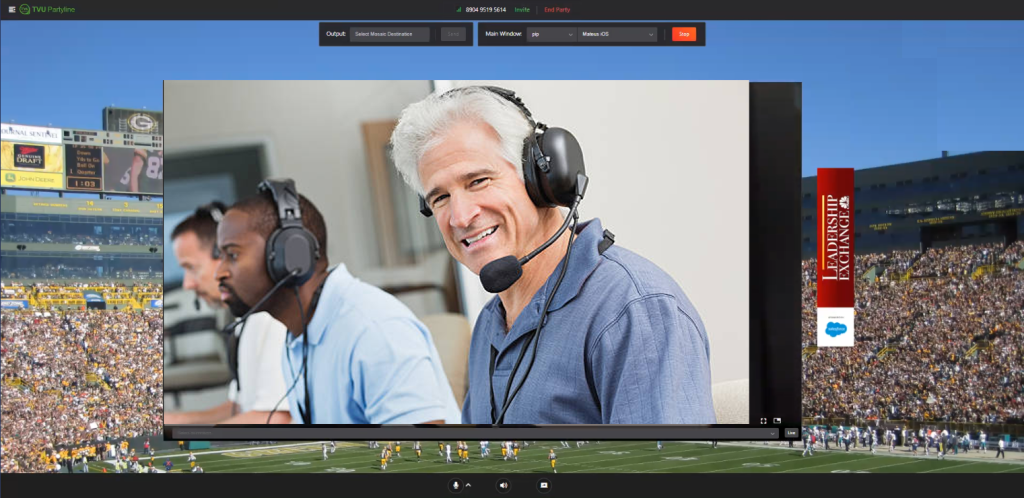
- pip (participant): Allows a participant to display in the main window.
- PBP (2x participants): Two participants will display side-by-side in the main window.
- Shared Screen: Allows a shared screen to display in the main window.
Output destination selections
The host selects an output destination from the Output dropdown menu. The output will include the background image, logos, main window, and participant video feeds.
The host can start transmission to a transceiver as a single signal with all 30 participants, and the main window feeds as seen by the participants.
Use the Output menu to select a Mosaic destination and click Send.
Screen sharing feature
To use the screen-sharing feature, complete the following steps:
- To share your screen as the main window or as a picture-in-picture, click the share screen icon at the bottom of the screen.
- Choose the As a pip or As a Main window display location.
- Select the tab and content you want to share and click the Share button.
- The shared content opens in a new tab and is displayed in full-screen mode. To exit full-screen mode, click the View tab: partyline.tvunetworks.com button at the top of the screen.

The shared content is displayed in Kiosk view mode.
- Move the speaker slider to adjust the audio. To change the screen share preview window, hover over the shared preview and select one of the view mode icons.

- To stop screen sharing, click the blue Stop Sharing button. Otherwise, click the green Stop screen Share icon at the bottom of the window.
Adding backgrounds and logos
The host can add backgrounds and logos by completing the following steps:
- Click the top-right full-screen icon.

- Click the +Add Background/Logo button in the top-left of the window.
- In the left panel, select the Background or Logo tab.
- To add a logo or background to the image list, click the +Add button, select, and upload your new image.
- To apply an image, click the Logo or Background tab image.
- If you select a background image, it will display as a full background behind the main window.
- If you select a logo, it will display in a predefined right column. Click the logo to resize it as desired.
- Click Apply at the bottom of the panel to save your changes.
- To return to the main screen, click the arrow on the top-left panel and the Exit full-screen button.
Add to Global Control feature
The Add to global Control feature uses the Kiosk party mode. This feature allows one way to manage multiple Kiosk parties from a single place. You can “bundle” multiple Kiosk parties and control VFB for all of them simultaneously. It also includes Mute/Unmute control, Move feature, and Full-Screen control.
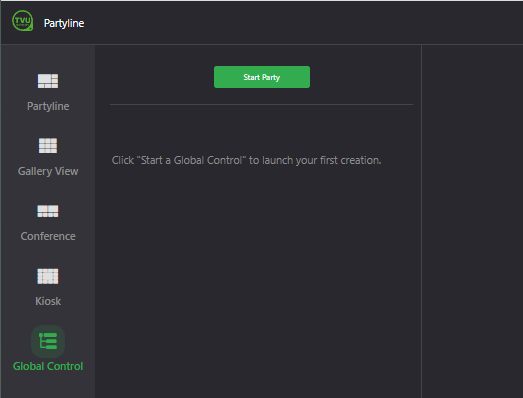
- Click the Workbench page tab, and select the Global Control tab.
- Click the green Start Party button.
- In the Add to Global Control pop-up window, enter a Global control Name.
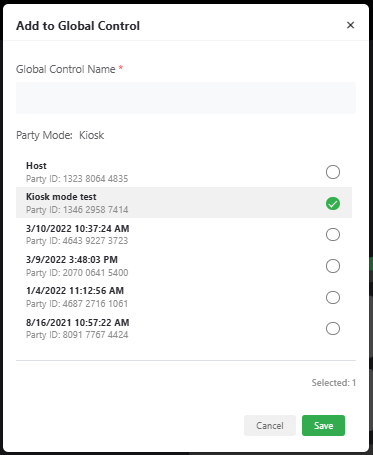
- Select the radio button of the Partyline session you want to control and click Save.
Chapter 5 – Pressline (Conference mode)
Overview
TVU Partyline operates in Pressline mode (Conference mode). TVU Partyline Pressline mode is used with TVU Producer for live broadcast and recording. Partyline can be configured to host virtual interviews, press conferences, town halls, or other educational events. Participants, such as reporters or the general audience, can be pre-screened by a coordinator before being placed into a queue. The conference coordinator can view and interact one-to-one with all of the participants. All participants can view and hear the guest and interviewer without hearing the rest of the participants.
Partyline Pressline (conference mode)
Using the Pressline mode in a virtual event requires a primary technical host or coordinator to run the conference. The virtual event includes a speaker or a presenter who will address the audience and a set of reporters or interviewers who will ask the speaker questions. All other participants watch the event online
through the cloud-based Partyline product.
The coordinator will be able to interact one-on-one with all participants. All participants can view and hear the guest and interviewer without interference from the rest of the participants. Once a reporter is finished asking questions, the speaker can switch to the next reporter for the next question. The host will
broadcast the entire virtual conference to the audience.
Partyline has an enhanced conference mode, where the coordinator can designate a Speaker, Interviewer, create a queue for questions, use the Chat feature, and have the Raise Hand capability. All integrated for the broadcast world (SDI Output on TVU Receivers) in high quality/low latency.
Starting a new conference
Partyline Pressline mode is used with TVU Producer for the Live broadcast and recording.
As a host, Complete the following steps to run a new conference or use Pressline mode from the Partyline user interface:
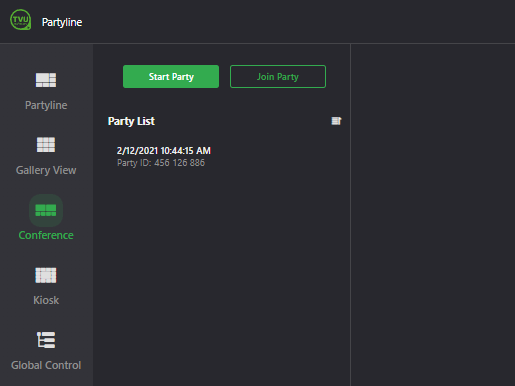
- Click the Workbench page tab, select the Conference tab, and choose a Party list menu item. Then, click the Start Party button.
- Hover your mouse over the new conference entry in the P{arty List and click Join. The Participate Setting page opens.
- Enter a new Party Name, Nickname, and Corporation to customize your conference setting.
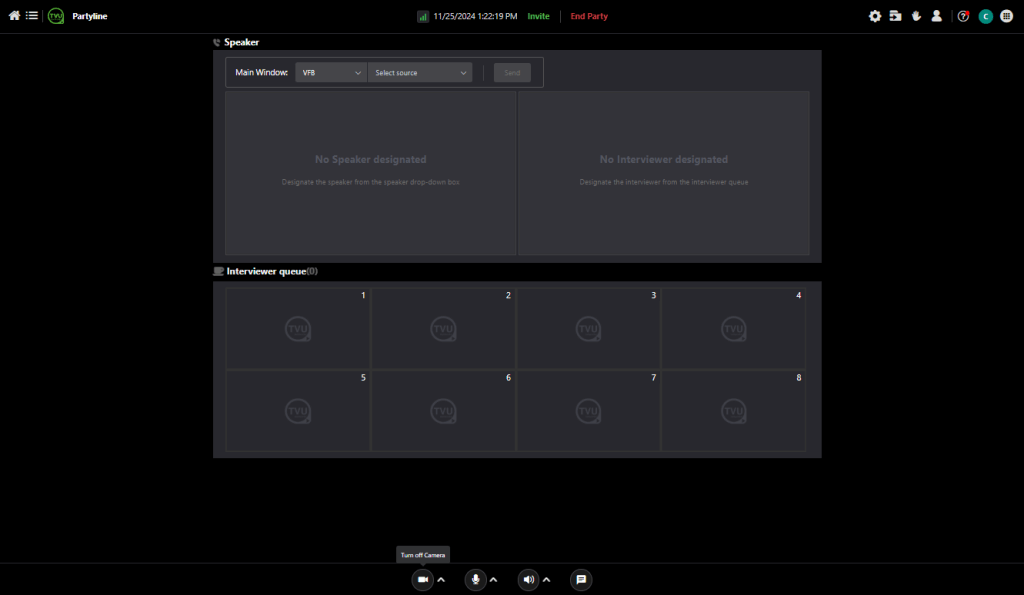
- Click the Start now button. The Conference mode page opens.
- Click Invite at the top of the user interface to copy the Partyline ID. In the Get Link pop-up window, click Copy Link.
- Send the copied link and conference details to the speaker and all participants.
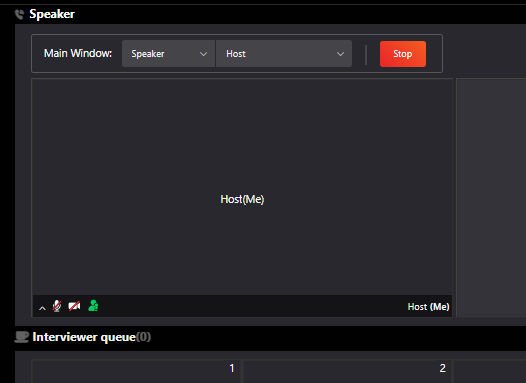
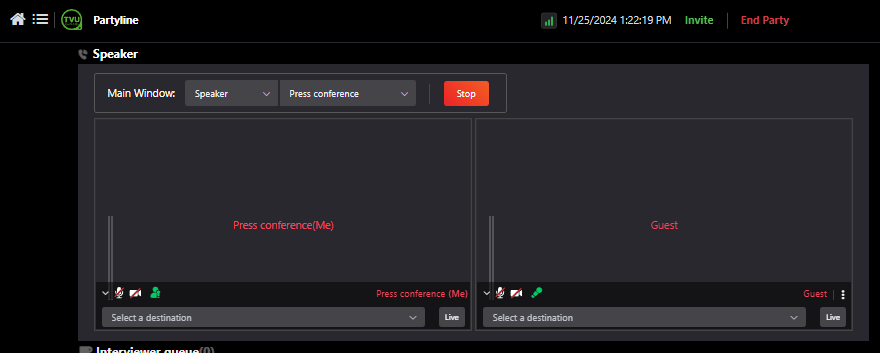
- After all participants join, select a Speaker from the Main Window drop-down menu.
- Select a source and click the Send button. The Speaker is now live. Click the Stop button to stop the transmission.
- The Speaker is now live and ready to communicate with participants.
- Inform the reporters in the conference to click the Raise Hand icon when they want to ask a question.
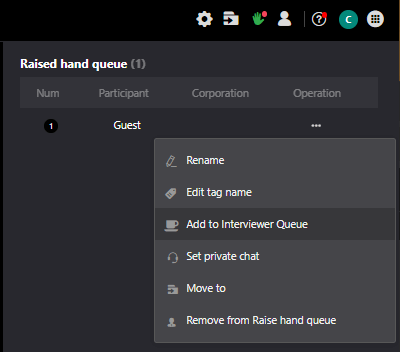
When a reporter clicks the Raise Hand icon, their name and details are entered into the raised hand queue. The host can choose to review all the reporters’ details in the queue and select Set private chat to interview them in advance before you queue them to ask a question.
- If desired, the host can add the reporter to the questioner queue by clicking the three dots “…” and selecting Add to interviewer queue or Remove to remove the reporter from the raised hand queue..
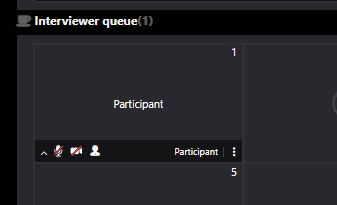
Reporters in the Interviewer queue will wait their turn to go live and ask the speaker questions.
- When the speaker is ready to take questions from the reporter, the host clicks on a reporter from the questioner queue and selects Set as interviewer from the pop-up menu.
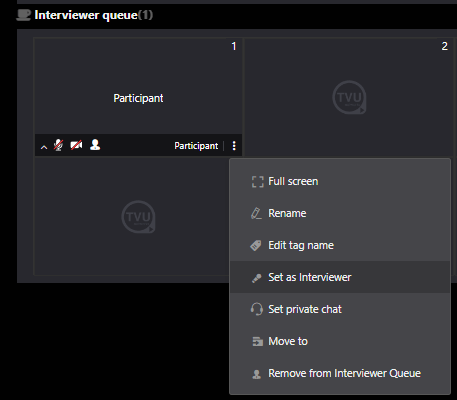
After the reporter is Set as Interviewer, the reporter (questioner) displays on the right side of the Speaker panel. The speaker displays on the left side of the Speaker panel.
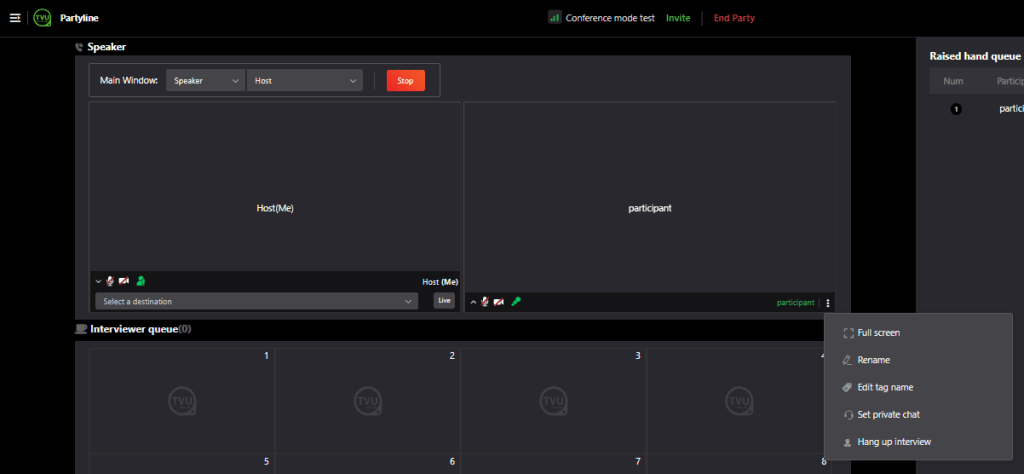
The reporter and speaker can now have a dialog with one another. All of the participants now view both speaker and reporter.
To select another participant option, click the three dots “…” and make a selection from the drop-down menu.
Note: Both the speaker and reporter video can be routed to TVU transceivers for further broadcast.
Automatic audio control for private conversations
When the host starts a private conversation with a participant, all audio (Video Feedback and other participants) are automatically decreased to 50%, creating a better conversation experience for
users.
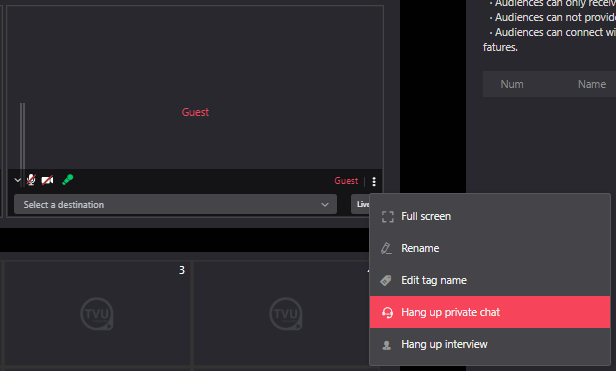
To set up a private chat with the host, click the three dots “…” and select Set Private Chat from the drop-down menu.
To end a private chat with the host, click the three dots “…” and select hang up Private chat from the drop-down menu.
Lazy Audio Control feature
This feature is enabled in the Settings menu. When a participant can’t hear you, expant the caret and select a destination. Tap the Live button to start live and send the Left audio channel to the receiver or tap the Live button Ctrl-L to send the Right audio channel to the receiver.
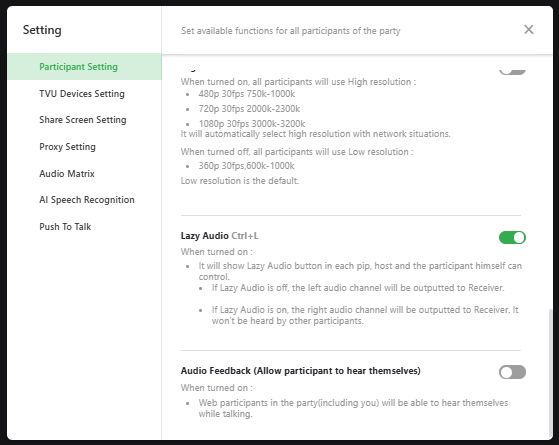
The Lazy Audio button displays in each pip. The host and the participant can control the audio. If Lazy Audio is disabled, the left audio channel is output to the Receiver. When Lazy Audio is enabled, the right audio channel is output to the Receiver, and other participants won’t hear it.
Conference mode controls and functions (Host view)
The top-right navigation in the host view has the following controls and functions.

Controls and functions from left to right:
- Settings
- Move pips – Select and move pips to another partyline
- Raised hand
- Audience – Audience can only receive all video and audio from the party and cannot provide their own video. Audiences can connect with the host by clicking their raised hand icon and private chat feature.
- What’s new in Partyline
- User preferences
Appendix A – Using Partyline with TVU Producer
Using Partyline with TVU Producer includes the following topics:
- TVU Producer account
- Start your Producer session
- Log into Partyline
- Route all participants to TVU Producer
- Move the TVU Producer feed into the Partyline Main window
Step 1 – Sign up or register for a TVU Producer account
To sign up or register for TVU Producer, complete the following steps:
Note: To purchase TVU Producer, go to “Purchasing TVU Producer” for more information.
- Open a web browser window and enter:
https://www.tvunetworks.com/products/tvu-producer-cloud-production/
- Click the Sign up/Login icon at the page’s top right corner and select TVU Producer.
- The Producer Sign-in pop-up window displays. Click Sign Up, the “Get started for free today” window will appear.

- Enter your Name, email, and Password, then click Get Started now.
- Check your email and enter the six-digit code, then click Verify.
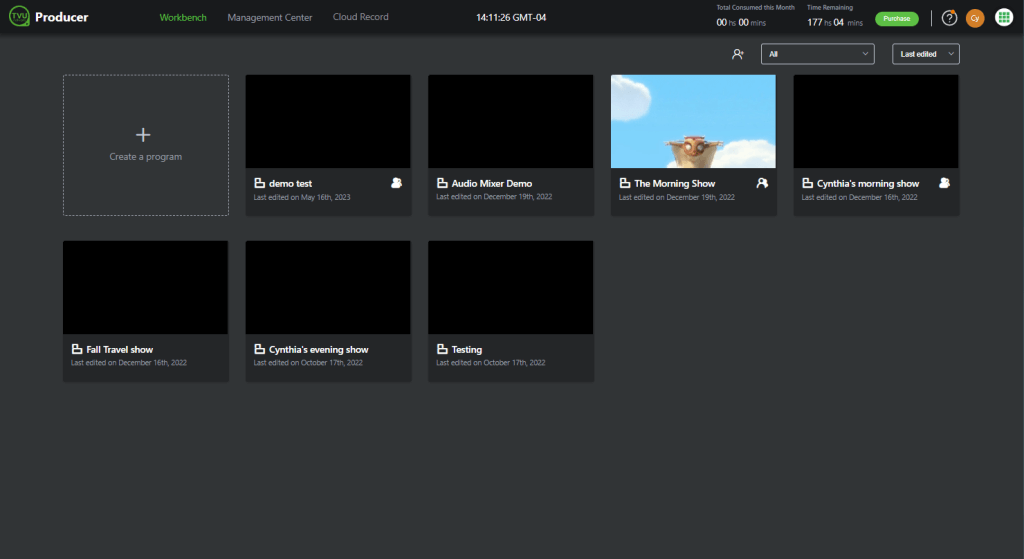
- The TVU Producer Workbench opens. Continue to “Creating a program” in Step 2.
Step 2 – Signing in to your Producer account
To Sign in to your TVU Producer account, complete the following steps:
Note: TVU Partyline does not require a Producer account. If you do not have a TVU Producer account, continue to “Step 3 – Log in to the Partyline web page.”
- Open a web browser window and enter:
https://www.tvunetworks.com/products/tvu-producer-cloud-production/ - Click the green Sign up/Login button in the top-right corner of the page.

The Producer Sign-in pop-up window displays.
- To Sign in to the TVU Producer Web user interface, Enter the following information:
User ID: e-mail address
Password: Enter your Password
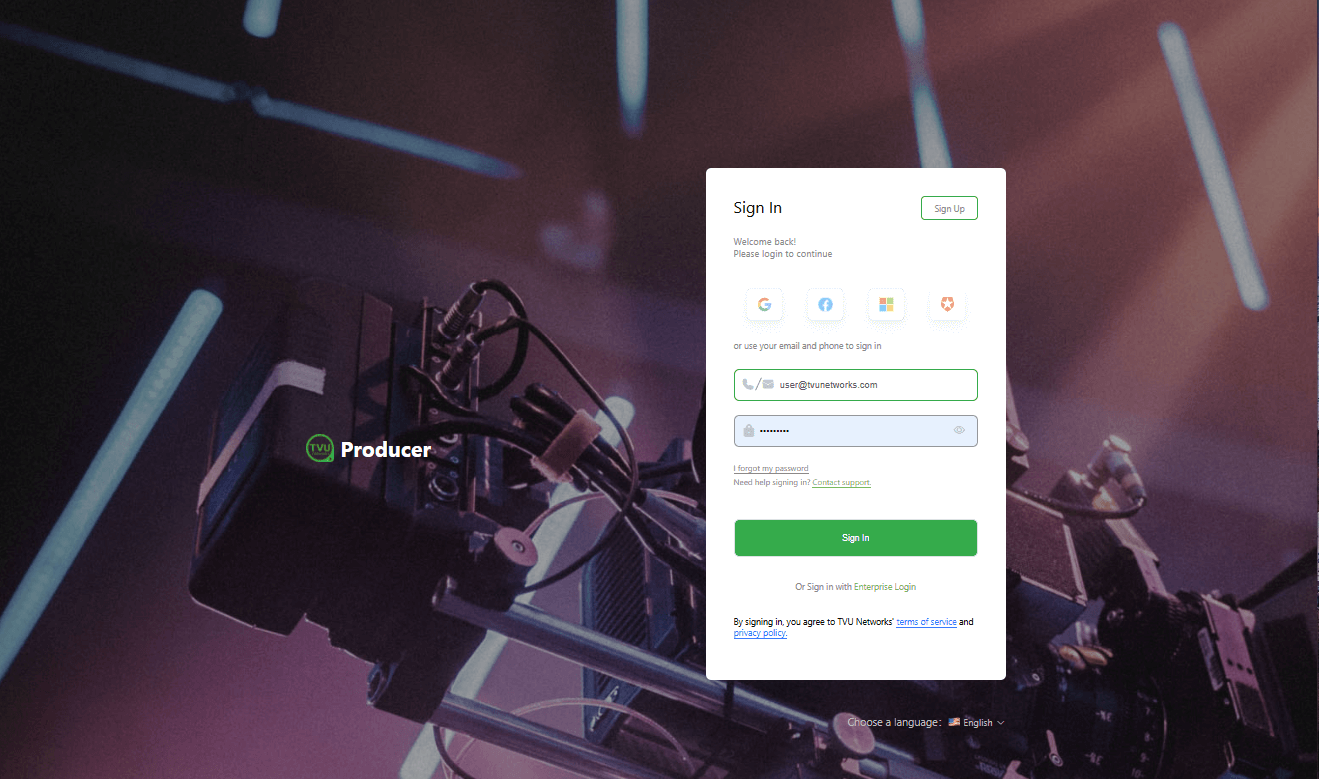
- Click Sign In. The Producer Workbench user interface will display. Continue with “Creating a program.”
Creating a program
To create a program, complete the following steps:
- Click the Workbench tab. Then, click + Create a Program.
- In the Create a program pop-up window, Enter a Program name for your production and click Next. The Settings window opens.
- Enable the Party-line feature checkbox and other desired features for your live production, select a Region, and click Save.

- Inform your remote participants to get ready with their iPhones or Androids with the Partyline-supported TVU Anywhere App.
Step 3 – Log into the Partyline Web page
TVU Partyline and TVU Producer allow all participants to video conference with each other using TVU Anywhere App while transmitting their feed to the Producer using the TVU Anywhere App.
To initiate a Partyline session, complete the following steps:
- Open a browser tab and enter:
https://Partyline.tvunetworks.com - The Partyline Welcome screen displays. Choose the dark or light mode on the top-right of the Welcome screen. The dark mode is the default.
- Click the green Get Started button.
The Partyline sign-in page displays.
- If you have a TVU account, Sign in to Partyline with your user account credentials. Sign in with your new credentials if you set up a new account.
Note: Using the same credentials allows Partyline to access details about your producer session.
- The Partyline Workbench interface opens.
- Click the Create Party button to initiate a new Partyline session. The new session displays in the Party List.
- Select the Party in the Party List to display its usage details.

- Hover over the Partyline in the Party List and click Join to open the Participate Setting page.
- The Participate setting page allows users to test and configure their mic and camera devices before starting a Partyline session.
- The Party Name and Nickname fields can be edited as desired.
- Click the Start Now button. The Party Control page opens.
- Click Invite at the top of the control page to allow participants to join the party.
Step 4 – Route all participants to TVU Producer
We prefer you start the TVU Producer first, so it is easy for you to route the selected participants from the Partyline Web page to the TVU Producer. Open the Select a destination menu and select Producer.
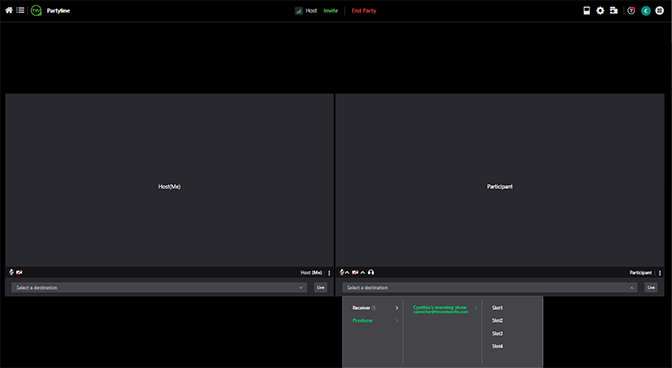
Any participant source can be routed to the Producer session using slots 1 to 4, then click the Live button.

The participant window in Partyline displays Live.
Step 5 – Move the Producer return feed into the Partyline Main window
The Producer Output, which is being built, can be chosen as the main window, enabling Partyline participants to view it.
Using the TVU Anywhere App, all participants (or talent personnel) can video conference.
The Participants can see a return feed on the main screen indicating what is being broadcast.
The Technical Producer is not participating in the video conference but is focused on producing the live show and switching between different sources.
This enables all participants and the producer to collaborate efficiently to produce the live program.
Appendix B – Using Partyline with a receiver
Using Partyline with a receiver includes the following topics:
- Log into Partyline
- Sending the video feed from a receiver to Partyline
- Sending a participant to the receiver feed
- Using single or multiple receivers
- Using the Picture-in-Picture feature in VFB preview mode
Step 1 – Log into the Partyline Web page
TVU Partyline and TVU Producer allow all participants to video conference with each other using TVU Anywhere App while transmitting their feed to the Producer using the TVU Anywhere App.
To initiate a Partyline session, complete the following steps:
- Open a Chrome or Safari browser tab and enter:
https://Partyline.tvunetworks.com
The Partyline Welcome screen displays. Choose the dark or light mode on the top-right of the Welcome screen. The dark mode is the default. - Click the green Get Started button.
The Partyline sign-in page displays.
- If you have a TVU account, Sign in to Partyline with your user account credentials. Sign in with your new credentials if you set up a new account.
Note: Using the same credentials allows Partyline to access details about your producer session.
- The Partyline Workbench interface opens.
- Click the Gallery view tab.
- Click the Create Party button to initiate a new Partyline session. The new session displays in the Party List.
- Select the Party in the Party List to display its usage details.
- Hover over the Party in the Party List and click Join to open the Participate Setting page.
- The Participate setting page allows users to test and configure their mic before starting a Partyline session. The camera is disabled by default in Gallery View.
- Enter a Party Name.
- Click the Start Now button. The Gallery View Control page opens.

Partyline integration with TVU receivers
The return video feed of your receivers can be chosen as a main window so that everyone in the Partyline can view it. The Picture-in-Picture feature allows the return video feed preview window to be resized and moved if desired.
Any participant source can be routed to a receiver.
Step 2 – Sending the video feed from a receiver to Partyline
The next step is to get the return feed on the Partyline Web page so that everyone in the Partyline sees what is going live on the return video feed from a receiver.
To view what is going live on the TVU receiver’s live return video feed, complete the following step:
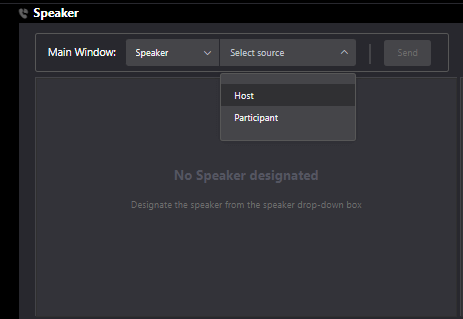
- Go to the Main Window menu and choose the program name or live show you are building with TVU Producer or the live return video feed from a receiver using the Source Type and Select source drop-down menus.
Step 3 – Send a participant to the receiver feed
You are now set to route the TVU Anywhere participants to the appropriate slots on the receiver.
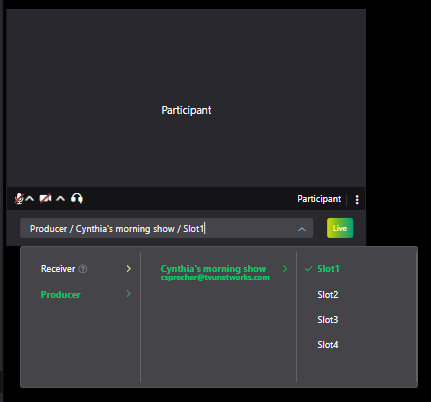
To route TVU Anywhere participants to the appropriate slots, complete the following steps:
- To select a slot, go to the selected participant’s picture and click the menu below the picture frame.
- Choose a slot from the menu where this TVU Anywhere participant will go into the receiver feed.
Note: If you choose 2, then this selected TVU-Anywhere participant or remote talent is now routed to Input Source 2 on the Producer session.
You are now all set to produce your live show using your remote participants.
Using single or multiple receivers
Different receivers can be selected to view their video feed:
LinuxR and CloudR: Add the linuxR or CloudR to your Command Center account. Credentials must be the same as your Partyline account. The dispatcher selects the attendees or shared screen to go live with the receivers. The dispatcher will choose receivers to watch the return video feed in the main window. This enables all attendees to see the video feed on the big screen.
The PGM window in TVU Producer can be selected for viewing the feed:
Your producer account credentials must be the same as your Partyline account. The dispatcher selects the attendees or the shared screen to go live with the TVU Producer slot. You can then use different resources as the PGM. The dispatcher will choose TVU Producer to watch the PGM in the main window.
Picture-in-Picture feature (VBF)
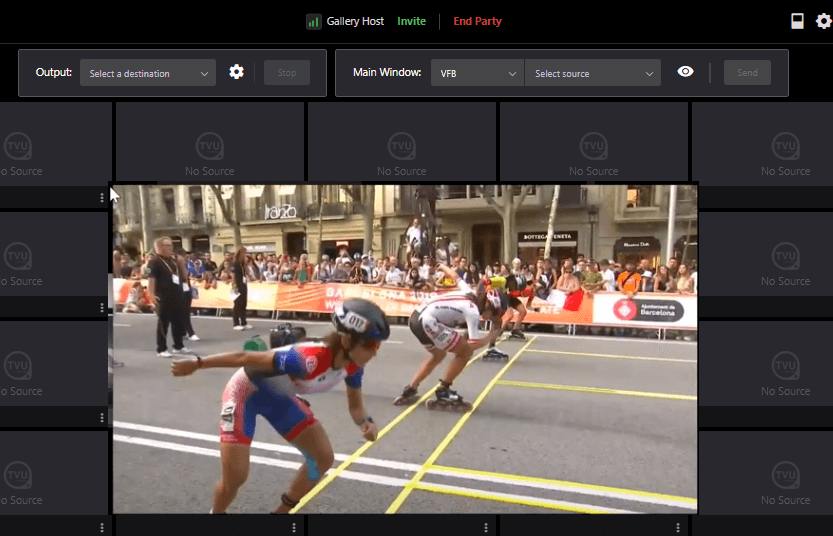
To use the Picture-in-Picture feature for your return video feed preview, complete the following steps:
- Go to the Main Window and choose the live return video feed from a receiver using the drop-down menu. Then, click Send from the pop-up window.
- The return video preview displays. Hover your mouse over the preview. Then, select the Picture-in-Picture icon.
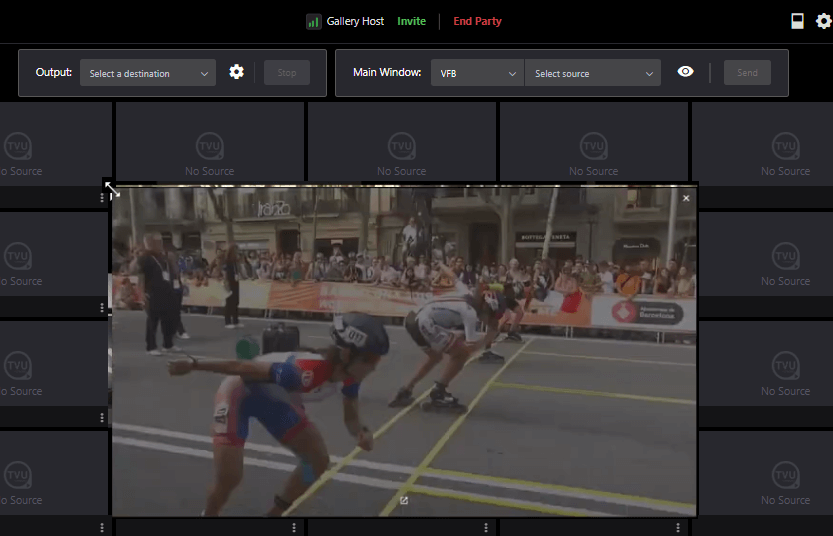
The preview displays in a separate moveable window.
To resize the window, move your mouse to the window’s upper-right corner to display and use the sizing tool. To close the PIP window, click the X in the top-right corner.
Appendix C – Using TVU Anywhere with TVU Partyline
Step 1 – Download and install the TVU Anywhere App to your iOS smart mobile device
The TVU Anywhere App is available free of charge from the App store. To download and register the TVU Anywhere App, complete the following steps:
- Go to the App Store from your mobile device and enter TVU Anywhere Pro in the search field. Download and install the iOS TVU Anywhere Version 9.0.43 and above to your smartphone
or laptop. - Go to your Applications folder and launch the TVU Anywhere App.
- Press the double arrows to open the feature bar.
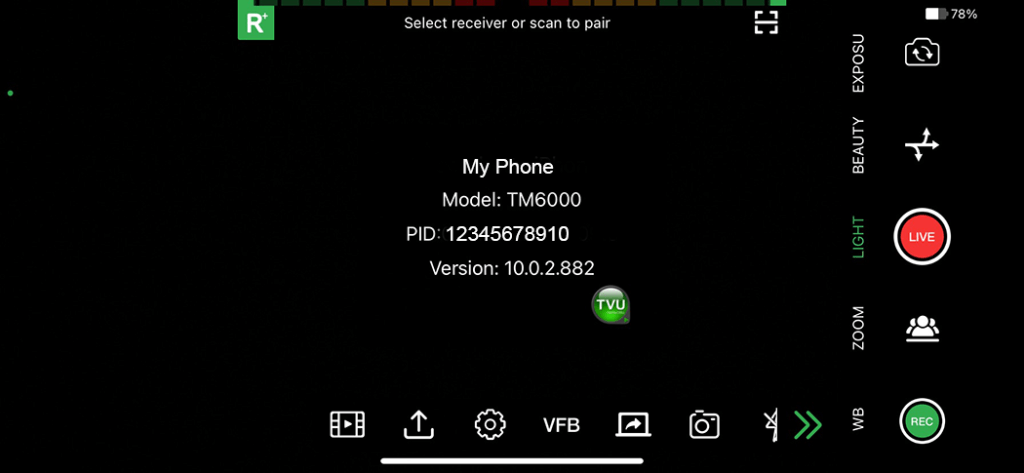
- Press the Advanced icon and select About.
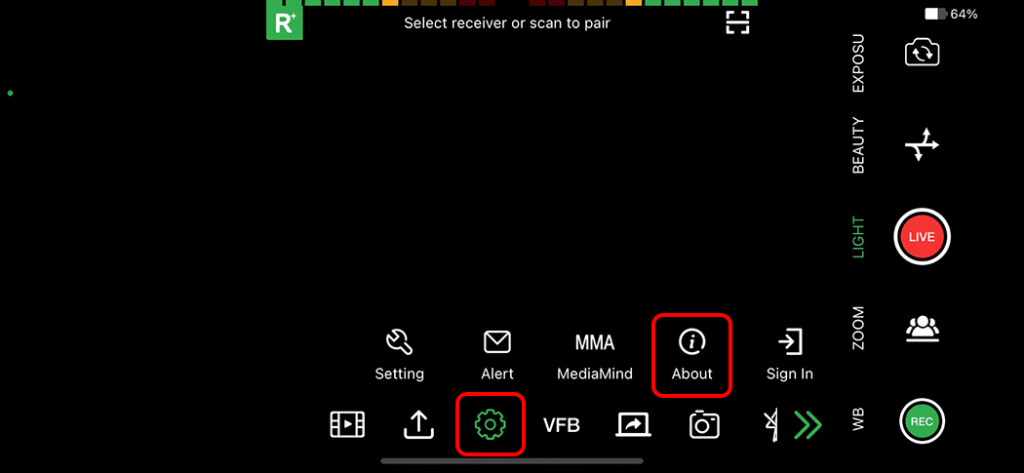
- Locate and write down your device’s PID displayed in the pop-up window.
Contact TVU Support to complete your registration. You will need to provide the following information:
- The device PID
- The receiver(s) name and PID
- After the PID is successfully registered, you can begin streaming.
On Mac OS
Download and Install the TVU Anywhere App version 9.0.0b111 to your Mac OS device.
Download and install the TVU Anywhere App to your Android device
The TVU Anywhere App is available free of charge from the Google Play Store. To download and register the TVU Anywhere App, complete the following steps:
- Click the Google Play icon from your mobile device and enter TVU Anywhere Pro in the search field. Download and install the TVU Anywhere app version 9.0.42 and above to your smartphone.
- Go to your Applications folder and launch the TVU Anywhere App.
- Press the double arrows to open the feature bar.
- Press the Advanced icon and select About.
- Locate and write down your device’s PID displayed in the pop-up window.
- Contact TVU Support to complete your registration. You will need to provide the following information:
- The device PID
- The receiver(s) name and PID
- After the PID is successfully registered, you can begin streaming.
Step 2 – Participate in the party
- The remote participants will join using their iPhone or Android phone by clicking on the URL or QR code the initiator sent.
- Participants click the URL sent via e-mail, and the TVU Anywhere App is launched using the Partyline mode.
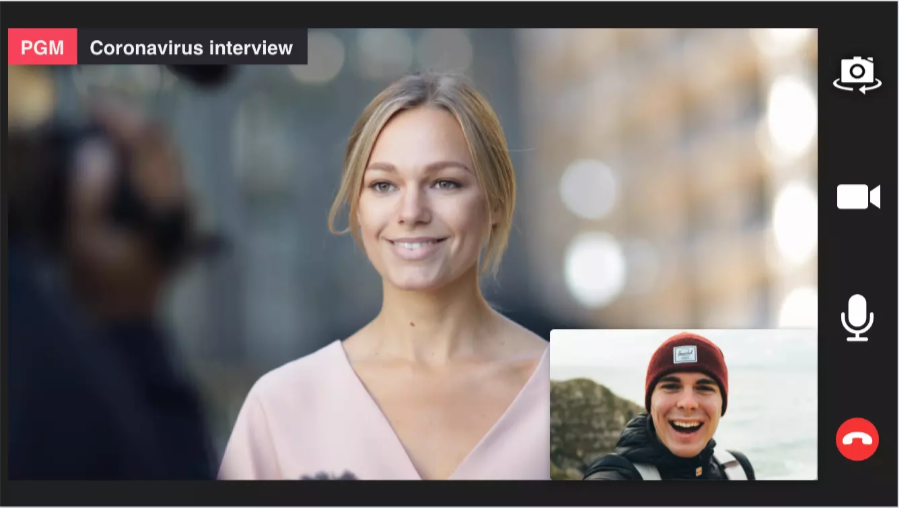
Participate using the TVU Anywhere App
The remote participant can now see this user interface on the TVU Anywhere App and engage in a video conference with all other remote participants on the Partyline.
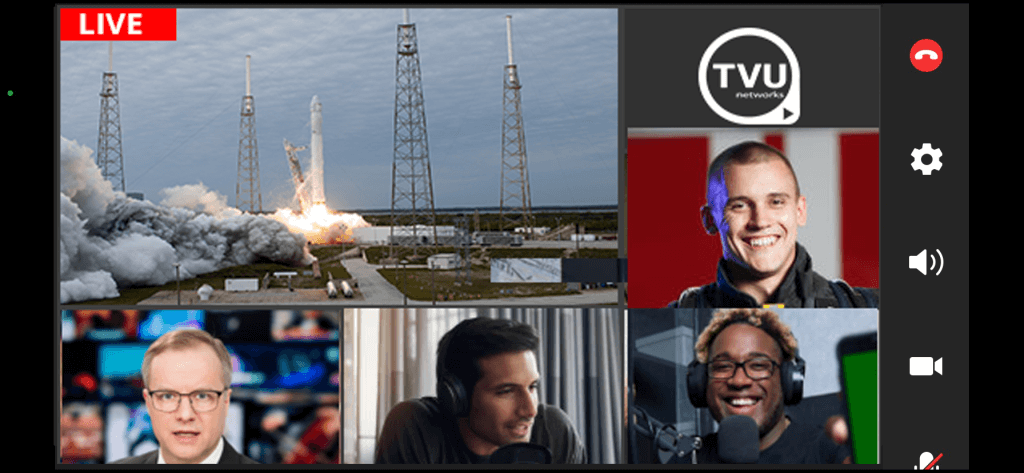
- Click the switch button To reverse the front and rear camera views on your cell phone.
- Click the camera ON to enable participants to see you. Click the camera OFF if you prefer not to be seen.
- Click the Microphone button to control the On and Off function of the microphone. When you click the Microphone button to Off, you are active, and participants cannot hear you.
- Horizontally scroll the screen to view more participants.
- PIP mode – Click PGM or a participant’s source to enlarge their window. The enlarged picture and your picture displays in PIP mode. Click the screen again to exit PIP mode.
© Copyright 2024 TVU Networks Corporation. All rights reserved in all media.
Document Part Number: TVU Partyline QSUG Rev I EN 12-2024