Contents
- Introduction
- Product overview
- Hardware requirements
- Software conversion instructions
- About this guide
- Key features
- Before you begin
- TVU Receiver Web Control login
- Receiver Web interface controls and functions
- TVU Command Center RPS tab functions
- TVU RPS Home interface functions
- Establishing an internet connection
- Command Center Route tab features
- Command Center RPS tab features
- Live streaming
- Return Video feature
- Video feedback resolution and bitrate
- Remote control
- Product specifications – Software specific
- Applications overview
TVU RPSVS3600 Multi-Channel Software User Guide v8.1
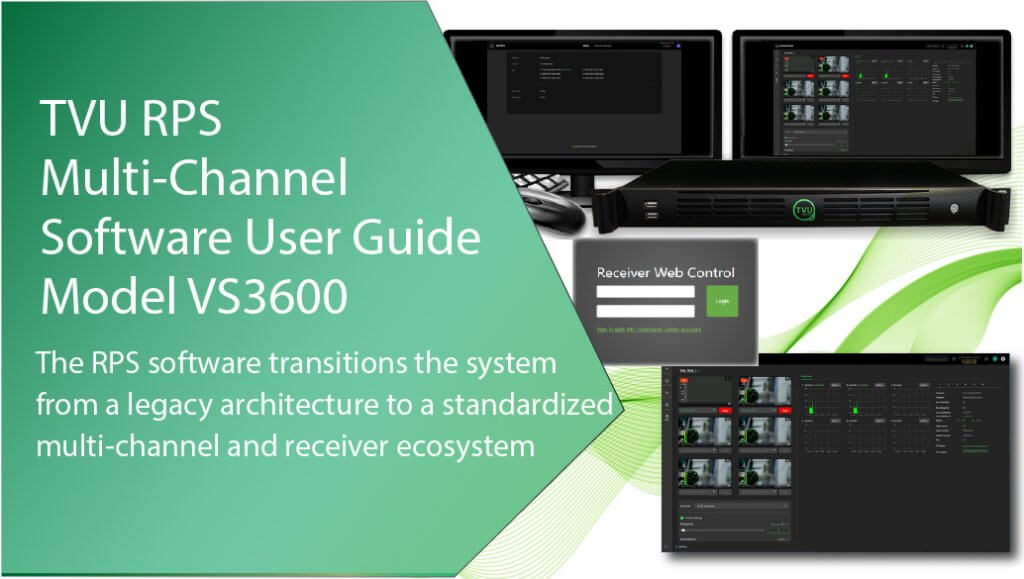
When converting the encoder to the RPS v8.1 software, the remote production system transitions from a legacy architecture to an “RPS multi-channel system,” and the decoder (upgraded to the receiver software) inherits the Multi-Channel and receiver ecosystem features.
Introduction
Existing RPS encoders and decoders must be converted to the new RPS multi-channel ecosystem and paired to the new v8.1 and standard receiver software.
The new RPS software is similar to the RPS One Multi-Channel software. Multiple PIDs will be generated after the software conversion. All new PIDs must be registered and features authorized before they can be used.
The following conversions will generate new PIDs:
- RPS Encoder -> RPS (new Multi-Channel software)
- RPS Decoder -> upgrade to the Standard receiver software
After the conversion, the systems will default to DHCP, which may obtain a different IP from the previous one. Port-forwarding requirements will also change to the ones for the Multi-Channel/receiver ecosystem.
The new RPS software transitions the system from a legacy architecture to a standardized multi-channel and receiver ecosystem. Users can manage this system through the Command Center user interface.
The previous RPS architecture relied on a single pipe for all video/audio data, which limited integration and flexibility. The new software adopts the “Multi-Channel” architecture, where each SDI channel has its own independent transmission (PID), enabling better integration with other services such as Producer and Media Hub.
Product overview
When converting the encoder to the RPS v8.1 software, the remote production system transitions from a legacy architecture to an “RPS multi-channel system” and the decoder (upgraded to the receiver software) inherits the Multi-Channel and receiver ecosystem features.
The v8.1 RPS software is similar to the RPS One Multi-Channel software. Multiple PIDs will be generated after the software upgrade.
All new PIDs must be paired and features enabled before they can be used. After the conversion, the systems will default to DHCP, which may assign a different IP address than before. Port forwarding requirements will also change to the ones for the multi-channel and receiver ecosystem.
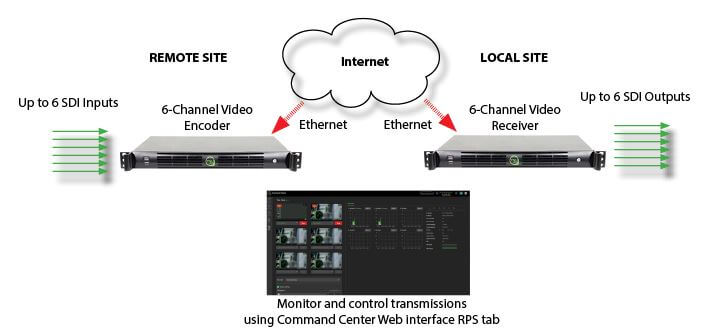
On the encoder side, the new RPS v8.1 software encodes up to six synchronized SDI sources. It transmits high-quality, low-latency IP video from the remote location to a studio-based TVU receiver, which outputs six independent SDI outputs. The TVU receiver can also send up to 2 low-latency return video feeds from the studio back to the field.
You will use the TVU Command Center Route tab to monitor and control all aspects of transmission, including real-time previews of all four channels with the Duo 2 card and all six channels with the Quad 2 card, as well as current bitrate and latency.
Hardware requirements
Preferred hardware: The TVU VS3600 is recommended due to its 32GB of memory, which better handles the resource demands of multiple independent transmissions.
Reversibility: The previous legacy RPS software is still available if preferred; however, re-imaging is required via a USB dongle rather than a simple command-line operation. Contact TVU Support for the instructions.
RPS Encoder and Decoder software conversion instructions
Contact sales or support to convert your RPS encoder and decoder to the multi-channel and receiver ecosystem.
About this guide
After completing the encoder and decoder conversions, this user guide will enable you to:
- Log in to the Receiver Web Control interface.
- Use the TVU Receiver interface controls and features.
- Use the TVU Command Center Web Interface RPS tab features and functions.
- Configure Ethernet parameters and IP address (DHCP/Static).
- Use the Live streaming, return video, and decoder (receiver) features, which are controlled via the RPS tab in the Command Center services interface.
- Go Live with a single or multiple receivers.
Key features
- Command Center service RPS page control: v8.1 supports Live streaming, return video, decoder control, access to the encoder local interface, and remote control via the receiver Web page and Command Center RPS page.
- Supports VoIP calls: Volume monitoring covers the RPS output to the receiver side. The VoIP can be initiated from the Command Center Route page or the receiver interface.
- Supports VBR and CBR.
- Supports transmission health diagnostics: line quality and error detection.
- Supports up to six fully synchronized multi-channel transmissions. Supports the 6-channel Quad 2 and 4-channel Duo 2 cards.
- Dependable, fixed low-latency transmission over standard contended Internet connections. Includes H.264/H.265 encode options.
- Dynamic Return Video: The return feed is now more flexible, allowing users to choose a return video feed from any receiver, not just the one currently live.
- Supports ecosystem integration: By assigning each channel its own PID, RPS can now integrate with TVU SAS services such as Producer, Media Hub, and Channel.
- Multi-receiver support: One RPS encoder can now send different channels to multiple different receivers simultaneously.
- The RPS encoder’s easy-to-use browser interface is accessible via the TVU RPS Web interface or your TVU Command Center account.
Before you begin
After the software conversion, you will generate six PIDs. You must register your PIDs and pair them to your receiver(s).
Logging in to the TVU Receiver Web Control interface
To log in to the TVU Receiver Web Control Web interface, have your receiver’s static IP address available and complete the following steps:
Log in to the Receiver Web Control interface
- Open a Web browser window and enter:
http://IP_Address/R/index.html#/
(Where IP_Address is your Receiver’s static IP address)
- Click Enter. The Receiver Web Control login pop-up displays.
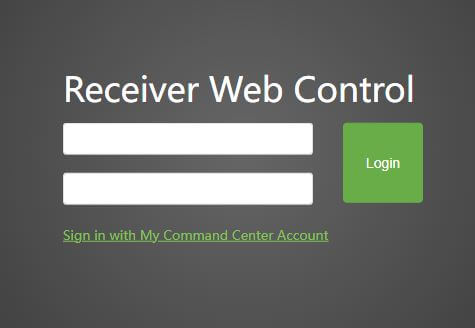
- Enter the following using all lowercase letters:
User ID: tvu
Password: Enter the last 8-digits of the PID using all caps
- Click Login.
- The TVU Receiver Web interface displays.
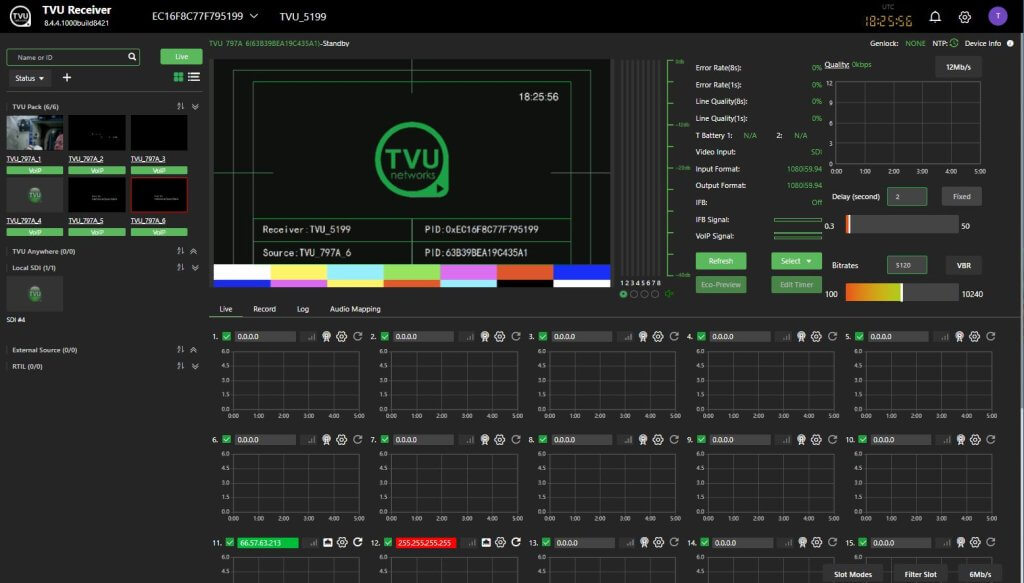
TVU Receiver Web interface controls and functions
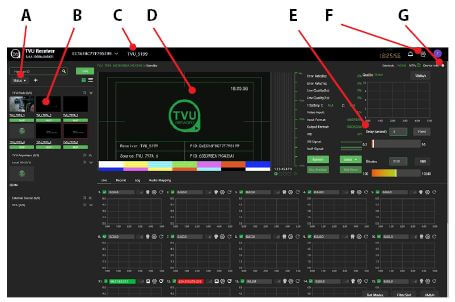
The Receiver Web interface has the following basic controls and features:
(A) Sort thumbnails by Status
(B) Source panel showing six synchronized SDI sources.
(C) Receiver name location.
(D) Source preview screen.
(E) Delay and Bitrate controls.
(F) Settings menu location.
(G) Device info icon – Displays the CPU Usage and temperature, Free Memory, Storage Remaining, and Time Remaining.
TVU Command Center Web interface RPS tab
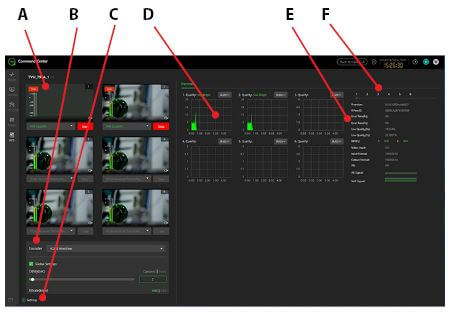
The Command Center Web interface RPS tab has the following features and functions:
(A) Channel previews, status, and control panel.
(B) Encoding, Delay, and bitrate control settings.
(C) Return Video setting.
(D) Overview panel – The Quality histograms display the live transmission status.
(E) Source transmission diagnostics: Displays the version and PID of the receiver and details that represent the health and format of a source and its transmission.
(F) Channel selection to view each source transmission diagnostics.
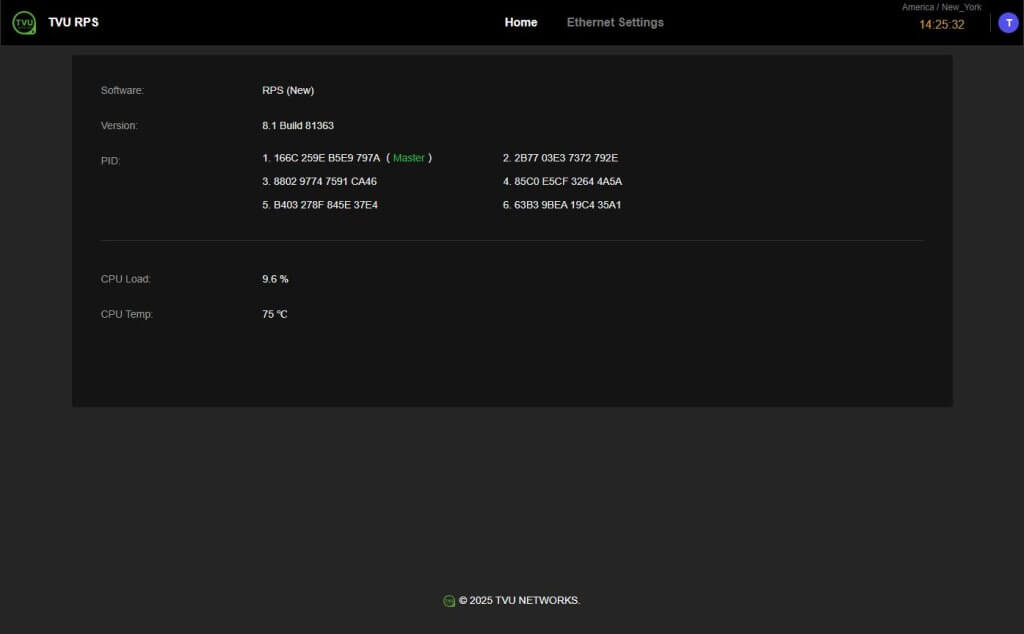
TVU RPS Home interface
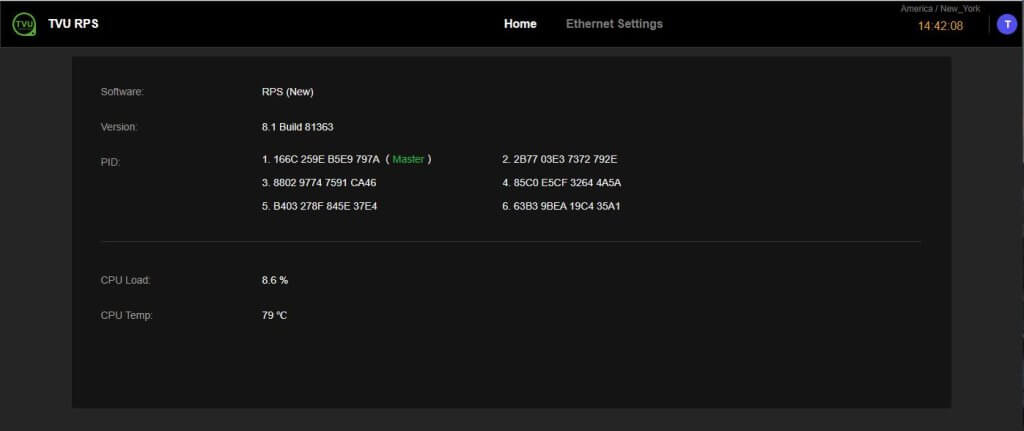
The v8.1 Build 81363 RPS (New) software Home interface enables users to configure Ethernet settings and view the Master and corresponding paired PIDs. Refer to “Establishing an internet connection” for log in instructions.
Establishing an internet connection
The RPS Multi-Channel software requires a local network configuration to establish an Ethernet connection.
To configure your network settings:
- Open a Web browser window and enter:
http://66.57.63.213/localgui/#/home
- Enter the following using all lowercase letters:
User ID: tvu
Password: Enter the last 8-digits of the PID using all caps
- Click Login.
- The TVU RPS Home page opens.
- Click the Ethernet Settings tab.
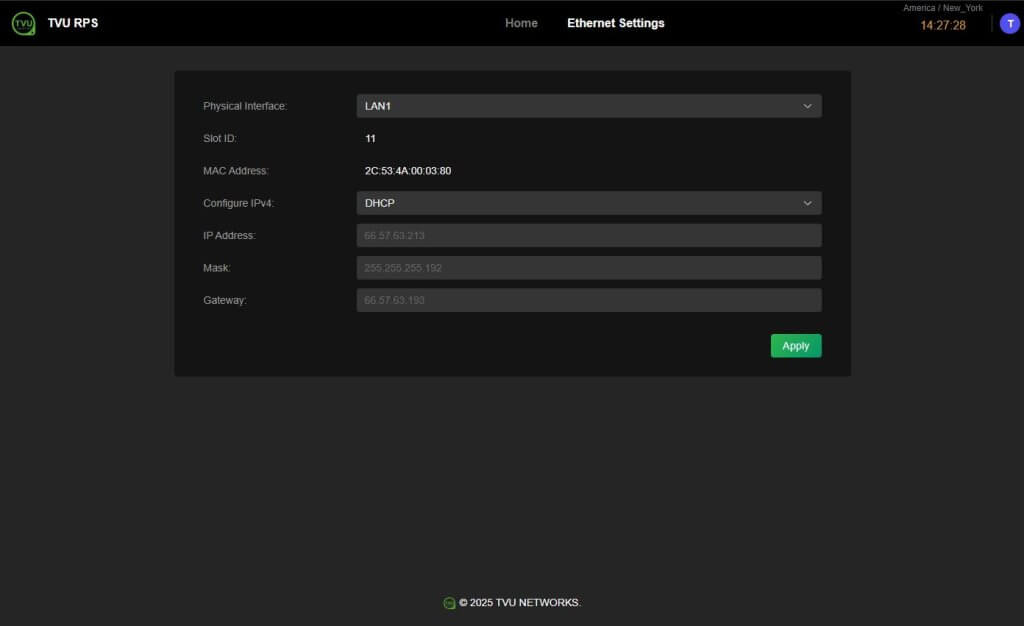
- Choose a Physical Interface setting.
- If you choose DHCP, the IP address, Mask, and Gateway fields should automatically populate.
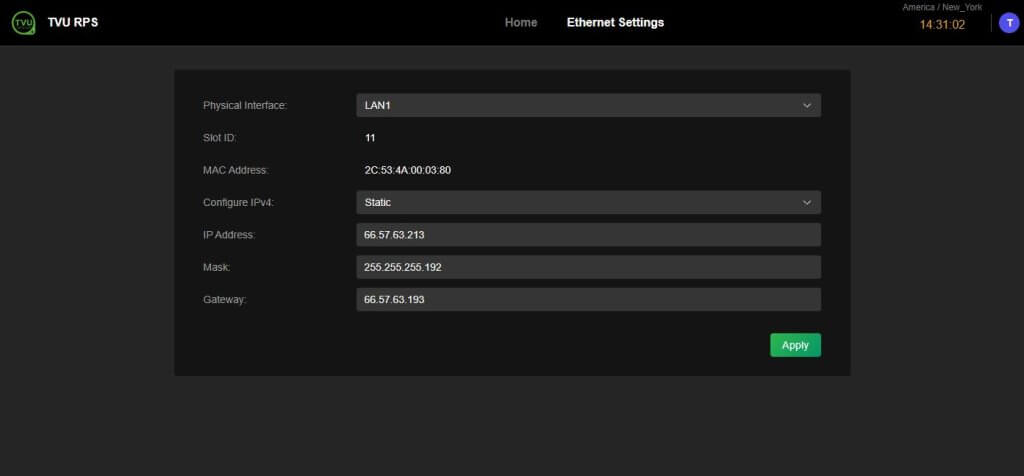
- If you are using a static IP address, click the Configure IPv4 drop-down menu and select Static. Then enter your desired IP address, Mask, and Gateway.
- Click Apply to save your settings.
- Click the Home tab to view the configured PIDs, CPU Load, and Temp.
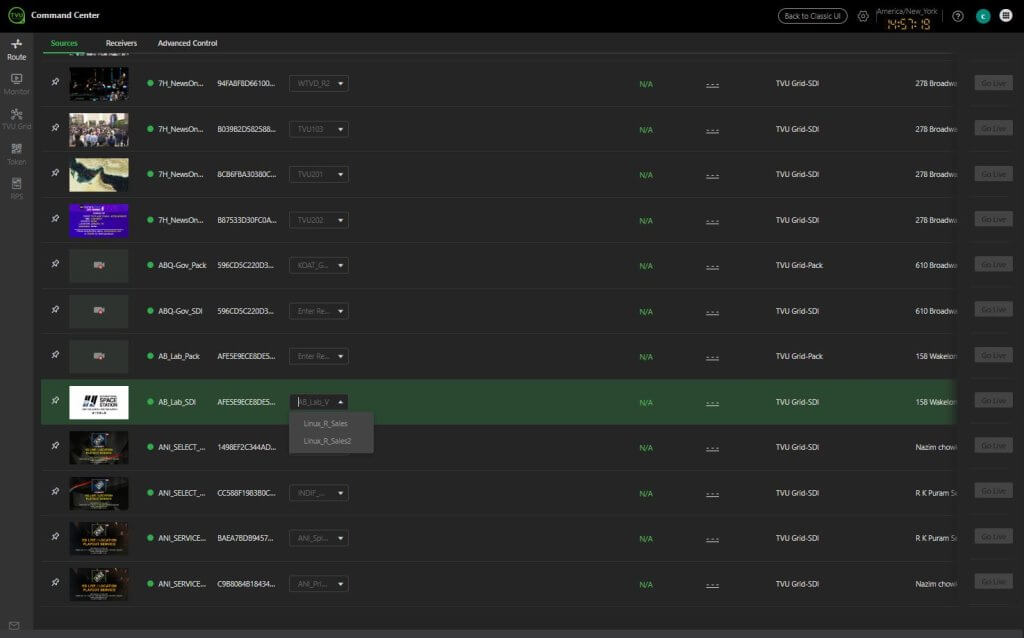
Using the Command Center Route tab features
After selecting multiple receivers, users can also rename their sources (e.g., name_1, name_2, etc.) to easily identify each source, select a receiver, and take them live in the Command Center interface Route tab.
Using the Command Center RPS tab features
The following v8.1 features are controlled in the Command Center RPS tab page:
- Live Streaming
- Return video
- Decoder (standard receiver software) control
- Remote control
Live Streaming
The left panel displays 6 main channels with previews plus two return channels.
Going live with a single or multiple receivers
In the Command Center interface RPS tab, the RPS Multi-Channel software enables each SDI PID to go live with multiple receivers. The six video transmissions can be sent to one or multiple different receivers.
Note: TVU Timelock is recommended when sending six feeds to multiple receivers.
To assign a receiver to an SDI output:
- Click the RPS tab in Command Center.
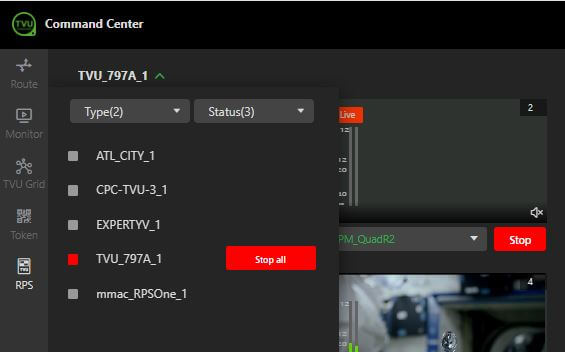
- Click the Receiver name to open the receiver menu.
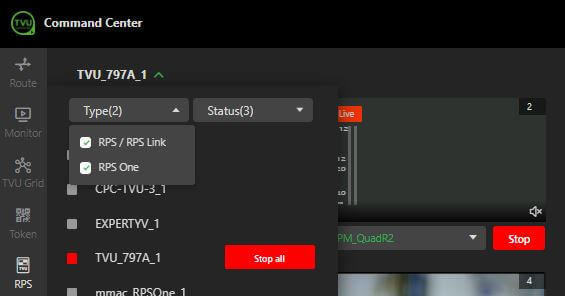
- Click the Type drop-down menu and select RPS/RPS Link.
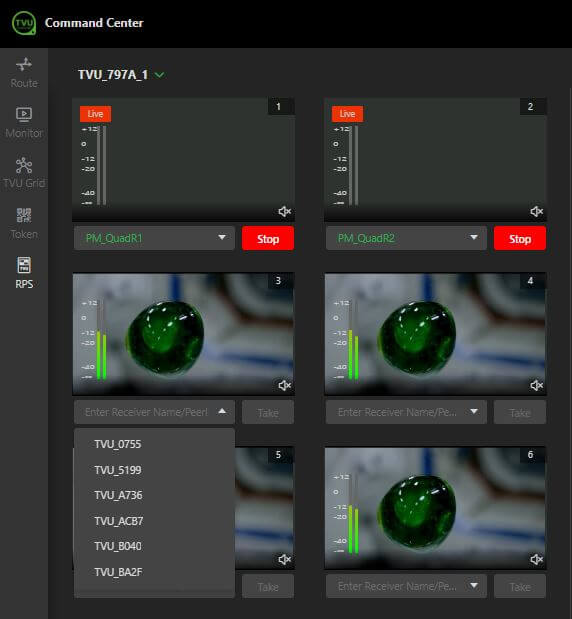
- Click the Enter Receiver Name/Peer ID field to expand the menu and select the desired video input for each channel.
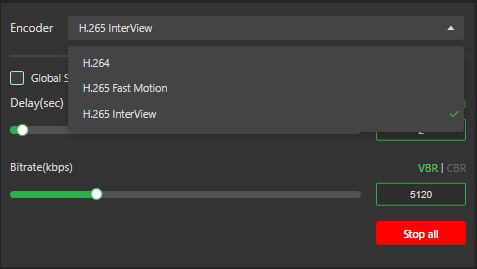
- Click the Encoder drop-down menu and select an encoding option.
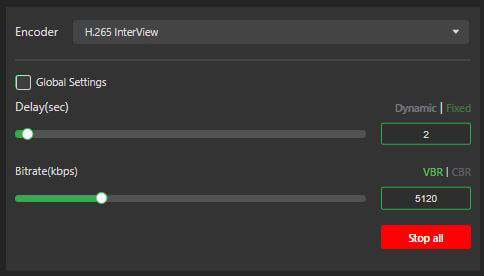
- Configure the Delay and Bitrate.
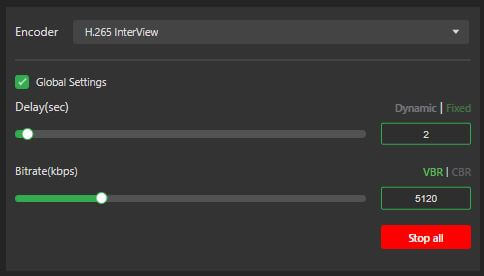
- Click the Global Settings checkbox to configure global and per-channel delay and bitrate settings.
- Click the Take button to go live.
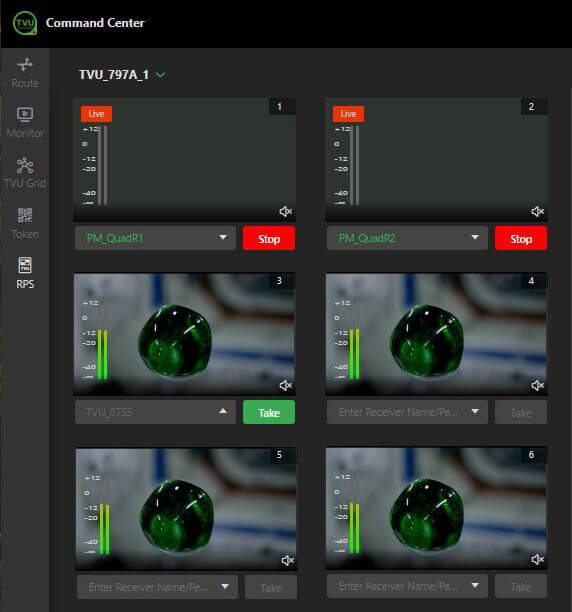
- To stop a live channel, click the Stop button.
- To stop all channels, click Stop all at the bottom of the panel.
- To stop all channels assigned to the same receiver, click the receiver name at the top of the panel, select the receiver, and click the Stop all button.
Transmission status and health diagnostics
The Overview panel Quality histograms show the live transmission status.
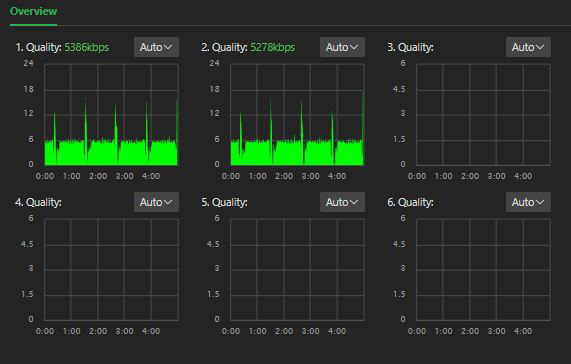
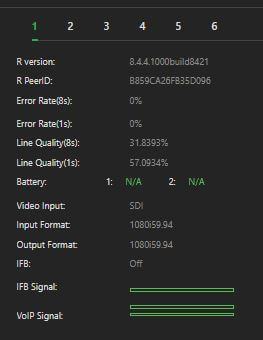
To view the health diagnostics and status for each channel, select the channel number (1-6) in the top right panel.
VoIP
The VoIP signal can be monitored in the channel health and status panel on the Receiver interface or RPS tab in Command Center.
VoIP calls are initiated and stopped via the Receiver interface or from the Command Center Route page.
Return Video feature
There are two return video feeds available. The hardware has eight BNC rear connectors: six input and two output. Refer to the appropriate hardware guide for the BNC connector configuration.
To configure the Return Video settings:
- Click the Setting gear at the bottom of the panel.

- The Return Video pop-up window opens.
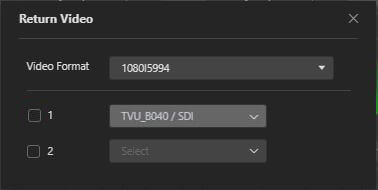
- Choose the Video Format from the drop-down menu.
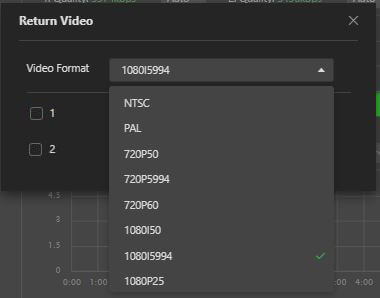
- Choose your first [1] input receiver from the drop-down menu, then select your return video feed selection [2].
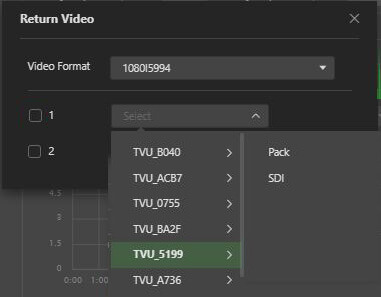
- Click the checkbox to enable your selections.
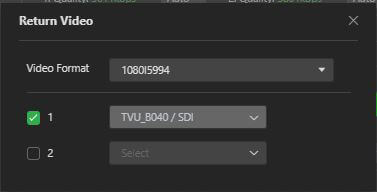
- Click the “X” to close the window.
Adjusting the video feedback resolution and bitrate
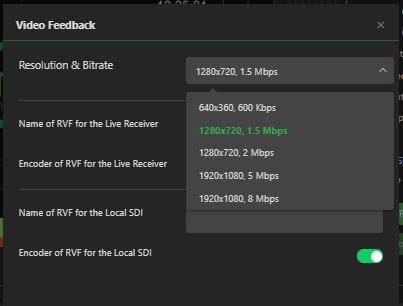
The RVF live, preview, and bitrate on the receiver side are automatically controlled using the Receiver Web interface.
- Click the Settings (gear icon) and select Video Feedback.
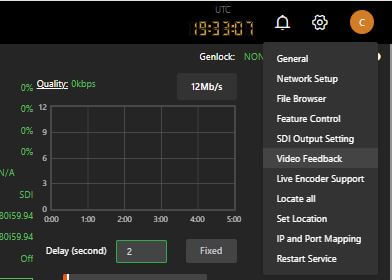
- The Video Feedback pop-up window opens.
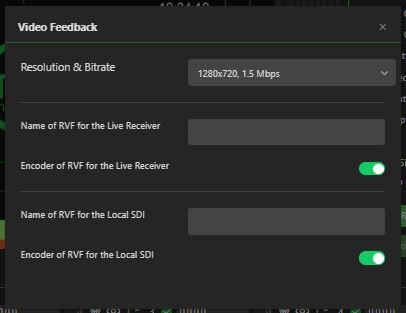
- Open the Resolution & Bitrate menu and make an appropriate selection.
Remote control
The remote control feature is configured via the receiver web interface and the Command Center RPS service.
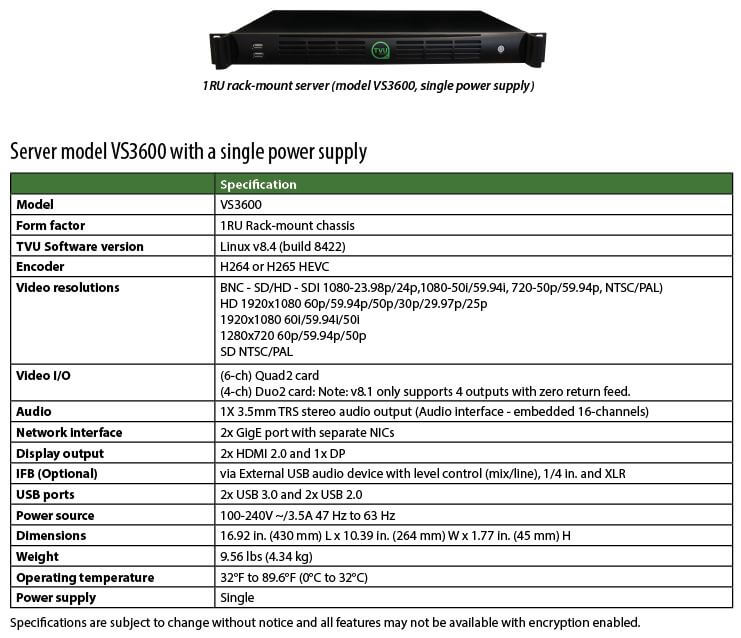
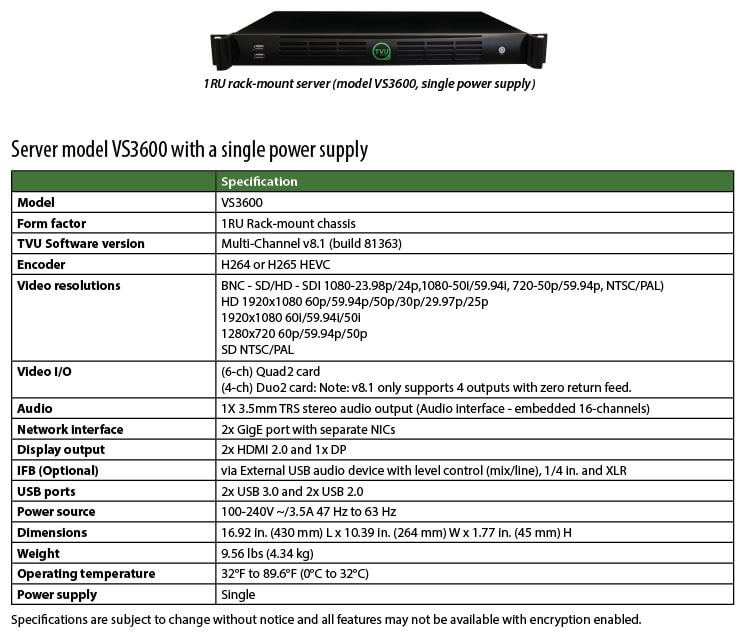
Product specifications
Applications overview
TVU RPS (new software) provides the production solutions and applications
- The new v8.1 TVU RPS software converts the RPS encoder (v6.xx) into an RPS Multi-Channel software solution.
- The v8.1 software converts an RPS decoder (v6.xx) into a standard receiver software interface.
- The system uses TVU’s Inverse Statmux Plus (IS+) transmission algorithm for stable, high-quality, low-latency transmissions. The system’s simple web interface provides 6-channel transmissions and real-time previews of all 6 channels, allowing users to monitor and control all aspects of the transmission, including current bitrate and latency.
- TVU RPS provides multi-receiver remote production for live coverage without the costs of expensive dedicated fiber or satellite links, extensive dedicated transmission equipment, or large on-site production crews.
Application
- 6 main channels with previews + 2 channel return video
TVU Networks® Corporation, © Copyright 2026 All Rights Reserved in all Media.
Document part number TVU RPSVS3600 Software User Guide v8.1 Rev A EN 06-2026
Related tips
