Contents
- Introduction, setup, and base operation
- Product overview
- Core capabilities
- Supported protocols
- MediaHub Open API features
- MediaHub primary software features
- Before you begin
- Sign up for TVU MediaHub
- Sign In to your TVU MediaHub account
- Logging in to the TVU MediaHub user interface
- MediaHub user interface overview
- Getting Started – Adding Sources
- Selecting a Source Type
- Adding a URL source
- TVU Device source types
- Assigning a TVU Device
- Assigning a TVU MediaMesh source
- VoIP sources and Partyline integration
- VOIP feature for the TVU Pack (Beta)
- Adding a TVU Anywhere device source
- Other source type
- Adding SRT Caller/Listener sources
- Customizing Other source parameters
- SDI Input source – Agent installation requirement
- Adding and Operating a VoIP Contributor Source
- Adding an SDI input
- Color correction feature (opt-in)
- MediaHub Output Destinations
- Enabling SDI Output Timecode Overlay
- Adding multiple source destinations
- Tag feature – Destinations
- Editing a MediaHub Project
- Ingesting and routing TVU MediaMesh sources
- Taking your project live
- Deleting a Destination
- Routing Sources into a TVU Partyline Session
- Source sharing feature
- Tag feature – Sources
- Deleting Sources and destination output blocks
- Managing Tokens
- Opt-in features overview
- Configuring Disaster Recovery and Failover
- Appendix – Passthrough Transport and TVU Agent installation
- Ingesting and Demuxing MPTS (Multi-Program Transport Streams) over SRT
- Multi-Receiver SRT with Whitelisting
- Running AI Diagnostics on SRT Feeds
- Exchanging Feeds with Grass Valley AMPP over MXL
TVU MediaHub Quick Start User Guide
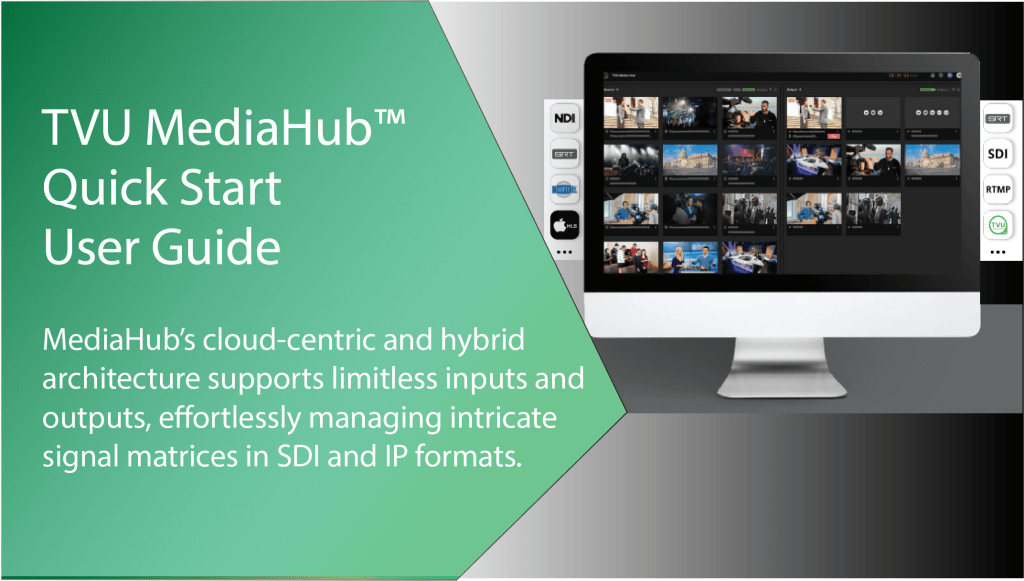
TVU MediaHub’s cloud-centric and hybrid architecture supports limitless inputs and outputs, effortlessly managing intricate signal matrices in SDI and IP formats.
Product overview
TVU MediaHub is a cloud-native, hybrid video router designed to bridge the gap between traditional hardware-dependent SDI routing and modern IP-based digital workflows. It is a SaaS-based solution that allows broadcasters to manage, scale, and route video signals with “boundless” input and output capabilities.
This MediaHub QSUG describes several “opt-in” features. Please contact TVU Support for more information about availability.
Core capabilities
MediaHub functions as a virtual routing switcher. Unlike traditional hardware routers limited by physical ports, MediaHub offers:
- Protocol-Agnostic Routing: Accepts and converts between various formats including SDI (via edge devices), NDI, SRT, TVU Grid, RTMP, HLS, and even YouTube/social media feeds.
- Infinite Scalability: Allows for an unlimited number of inputs and outputs by utilizing cloud resources on demand.
- Automated Signal Processing: Automatically handles encoding, decoding, scaling, and frame-rate conversion the moment a source is added.
- Advanced CBR for SRT Listener and Caller modes (opt-in): The Advanced CBR for SRT Listener and Caller modes allow enhanced receiver compliance.
Supported protocols
MediaHub is designed to be protocol-agnostic, acting as a “universal translator” between traditional broadcast standards and modern IP streaming formats.
Because it is a cloud-native platform, it can handle both compressed and uncompressed formats by utilizing either cloud compute or on-premises edge devices.
Supported input protocols
MediaHub can ingest virtually any live video source. Note that physical SDI/SMPTE connections require a TVU Transceiver or Edge device to bridge into the cloud environment.
- Broadcast & Professional IP: NDI, SRT (Caller/Listener), TVU Grid (proprietary low-latency), UDP (Unicast/Multicast), RTP-FEC, ISSP, MXL.
- Physical & Standardized: SDI (via edge device), SMPTE ST 2110 / ST 2022-6 (via edge device).
- Web & Streaming: RTMP, RTMPS, HLS, RTSP, Zoom Meeting, HTML.
- Cloud & Social: YouTube, Facebook, TikTok, Twitch, X, Kick, and Other (custom URL/stream).
- TVU Ecosystem: TVU One, RPS One, TVU Anywhere, TVU Pack, TVU Grid (Grid-Pack / Grid-SDI / Grid-MediaHub), MediaMesh, Partyline, and TVU Channel — added via the TVU Device source type.
Supported output protocols
MediaHub can simultaneously route a single input to an unlimited number of destinations, each with its own protocol and encoding profile.
- Streaming & CDN: RTMP(S) Push, RTMP(S) Pull, HLS Push, HLS Pull.
- Professional IP: NDI, SRT (Caller/Listener), TVU Grid, UDP, RTP-FEC, ISSP, MXL.
- Broadcast Delivery: RTSP Push, RTSP Pull.
- Physical Output: SDI (requires a TVU Transceiver for decoding).
- TVU Ecosystem: TVU Pack (Return Video Feed / VoIP).
- Direct Social Media: Native API integration for “Direct” posting to YouTube, Facebook, Twitch, X, and Other.
MediaHub Open API features
The TVU MediaHub Open API is a set of programming interfaces designed to allow broadcasters and developers to automate, customize, and integrate the MediaHub routing engine into larger media supply chains.
Rather than relying solely on the drag-and-drop web interface, the Open API allows for programmatically managing complex signal matrices, which is essential for large-scale operations or software-defined master control rooms. Users can also use the Open API to integrate capabilities within our ecosystem with their workflow via API calls.
Key API functional areas
- Routing Control: Trigger “Connect” or “Disconnect” actions programmatically to start/stop live routes between sources and destinations.
- Output Provisioning: Create, delete, and modify output destinations (e.g., generating a new RTMP, HLS, or SRT endpoint on the fly).
- Encoding Profiles: Define technical parameters for routes, including bitrate, resolution, and frame rate. Profiles can be pre-created via the UI or dynamically generated via API.
- Source Management: Register new input sources (SourceObjects) into the router database to make them available for routing.
- Folder Integration: Group multiple output destinations into a “Folder” for batch management and simplified orchestration (start/stop the whole group at once).
MediaHub primary software features
TVU MediaHub is defined by its transition from a simple routing tool to an intelligent orchestration hub. The software features focus on eliminating the technical barriers of traditional hardware (like port limits and manual patching) through automation and a visual-first approach.
Key features:
- Drag-and-Drop and One-Click Routing: An object-oriented visual UI that lets non-technical staff route complex signals without specialized engineering training. Operators can either drag a source onto a destination or click the Route button on a source to send it to one or multiple output destinations at once — enabling fast one-to-many distribution with no manual patching.
- Real-Time Previews: Users can see live thumbnails of all sources and destinations within the routing matrix to ensure the correct feed is being switched.
- Integrated AI Tools: MediaHub emphasizes integration with TVU’s AI ecosystem, enabling automated ingestion, transcription, and indexing of live feeds.
- Hybrid Architecture: Can run entirely in the cloud, on-premise in data centers, or in a hybrid configuration to maintain low latency for local SDI environments.
- Analytics & Redundancy: Includes a dashboard for monitoring bandwidth and signal flow, with built-in redundancy that automatically triggers backup paths if a signal is lost.
Visual routing and management
- Object-Oriented UI: MediaHub uses a workspace where inputs and outputs are visual objects. You route signals by literally “drawing” a connection between them.
- Live Thumbnail Previews: Every input and output on the interface displays a real-time, low-latency video thumbnail. This allows operators to verify content visually before switching it to a live destination.
- Destination output and source sharing: Users can now share access to their sources and outputs with other users and subgroups within the same root group.
- Infinite I/O Scaling: The software doesn’t have a fixed matrix size. You can “spin up” new software-defined ports on demand as your production grows.
- Latency: Maintains sub-second latency across most IP-to-IP routes, specifically optimized when using TVU’s ISX (Inverse StatMux) technology.
- Deployment: Cloud (SaaS), On-Premise, or Hybrid.
Automated signal processing (the “invisible” features)
- Auto-Conversion (UDX): The software automatically detects the source resolution/frame rate and matches it to the destination’s requirements. It handles Up/Down/Cross conversion in the background without needing external gear.
- Protocol Bridging: MediaHub acts as a universal translator. It can take an NDI source and simultaneously output it as an SRT stream for a remote studio and an RTMP stream for YouTube.
- Dynamic Resource Allocation: The software intelligently manages CPU/GPU cores. It only consumes processing power when a route is active, which powers the “pay-as-you-go” pricing model.
Operational control and automation
- Advanced Scheduling: You can pre-program routing changes based on a calendar. For example, the software can automatically switch an output from a “Pre-game” feed to a “Game-start” feed at a specific time.
- Redundancy & Failover (opt-in): The software monitors signal health. If an input feed drops, it can be programmed to automatically switch to a backup source (e.g., a “Slate” or a secondary SRT feed).
- TVU Pack mode (opt-in): TVU Pack is a new destination type. Users can send any video to a TVU Pack as a return video feed or a Voice over IP (VoIP).
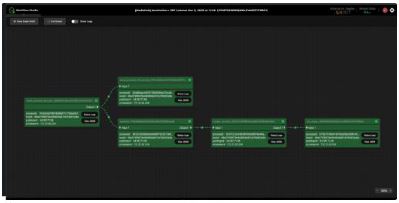
- Workflow builder (opt-in): The Workflow builder assists users and support by providing troubleshooting tools to assist with a specific input or output. When selecting an input destination and Workflow Management icon, the Workflow Studio page opens in a new tab. The new tab shows a graphical representation of the underlying modules that are running and their status.
- Enhanced SCTE and metadata transmission: SCTE and closed caption metadata cross box pool transmission optimization.
- True Passthrough as Default for SRT & UDP: SRT and UDP passthrough pipelines now run on an optimized path that preserves exact PIDs, stream padding, codec parameters, and bitrates without triggering internal re-encode cycles.
- SDI Output Timecode Default: Newly created or re-saved SDI outputs now have the on-screen timecode overlay set to Off by default. If your workflow requires burned-in timecode, enable it explicitly in the output properties. Refer to “Enabling SDI Output Timecode Overlay.”
- Disaster Recovery Controls: Detection mode settings have been consolidated under Automatic Detection, with explicit manual-override safeguards to prevent unintended failbacks during intermittent upstream signal loss. Refer to “Configuring Disaster Recovery and Failover.”
Ecosystem integration (TVU Cloud Services)
- TVU Search Integration: Automatically sends routed feeds to TVU Search for AI-driven transcription and metadata tagging.
- TVU Producer: Feeds from MediaHub can be sent directly into the TVU Producer cloud switcher for multi-camera live production.
- Analytics Dashboard: A built-in software module that tracks bandwidth usage, signal stability, and routing history for data-driven post-show analysis.
- TVU Agent integration: TVU Agent enables SDI Input/Output functionality or to deploy MediaHub on your infrastructure.
- Integrated Partyline Intercom: Connect any MediaHub source to TVU Partyline sessions to function as low-latency return video, custom multiviewer monitoring, or production communication.
Quick Start guide
This Quick start guide provides detailed information on the following topics:
- Signing up for MediaHub
- Signing in to MediaHub
- Logging in to the MediaHub user interface
- MediaHub user interface overview
- Adding Sources
- Adding output destinations
- Using MediaHub
- Exiting MediaHub
Before you begin
TVU Networks makes it easy to sign up for a MediaHub account. Log in to the MediaHub onboarding user interface and sign up or sign in to get started. In addition, our new user onboarding with self-service billing is also available online.
Sign up for TVU MediaHub
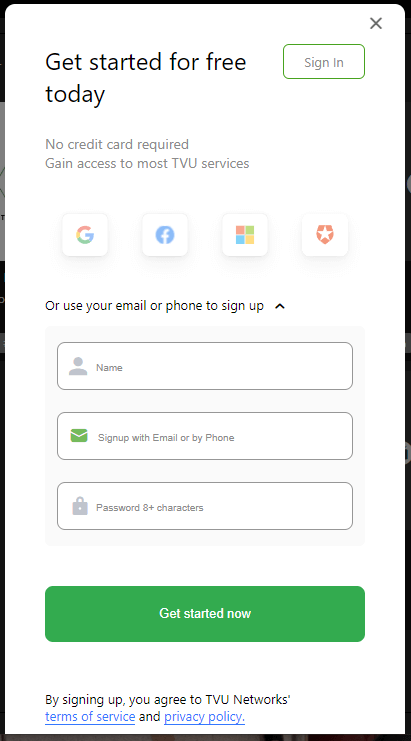
- To sign up for TVU MediaHub, click the Sign up Caret and enter your name. Choose to sign up by email or phone, and enter a password.
- Click Get Started Now and follow the prompts.
Sign In to your TVU MediaHub account
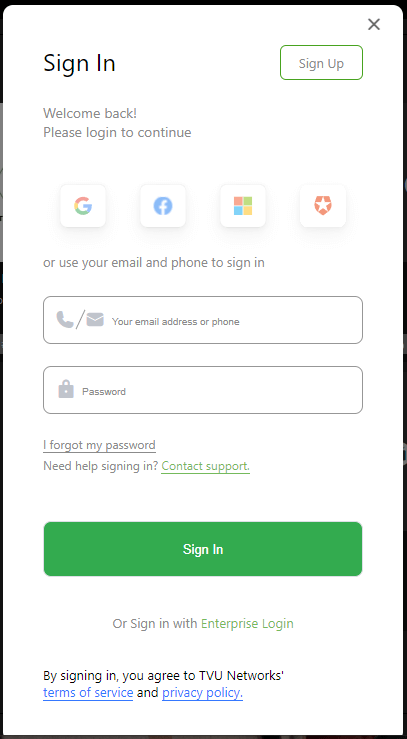
- To sign in to TVU MediaHub, log in to the MediaHub user interface and click Sign In.
- Enter your User ID and Password.
- Click Sign In.
Logging in to the TVU MediaHub user interface
To log in to the TVU MediaHub user interface:
- Open a Web browser window and enter: http://mediahub.tvunetworks.com
- Click Enter. The MediaHub interface displays.
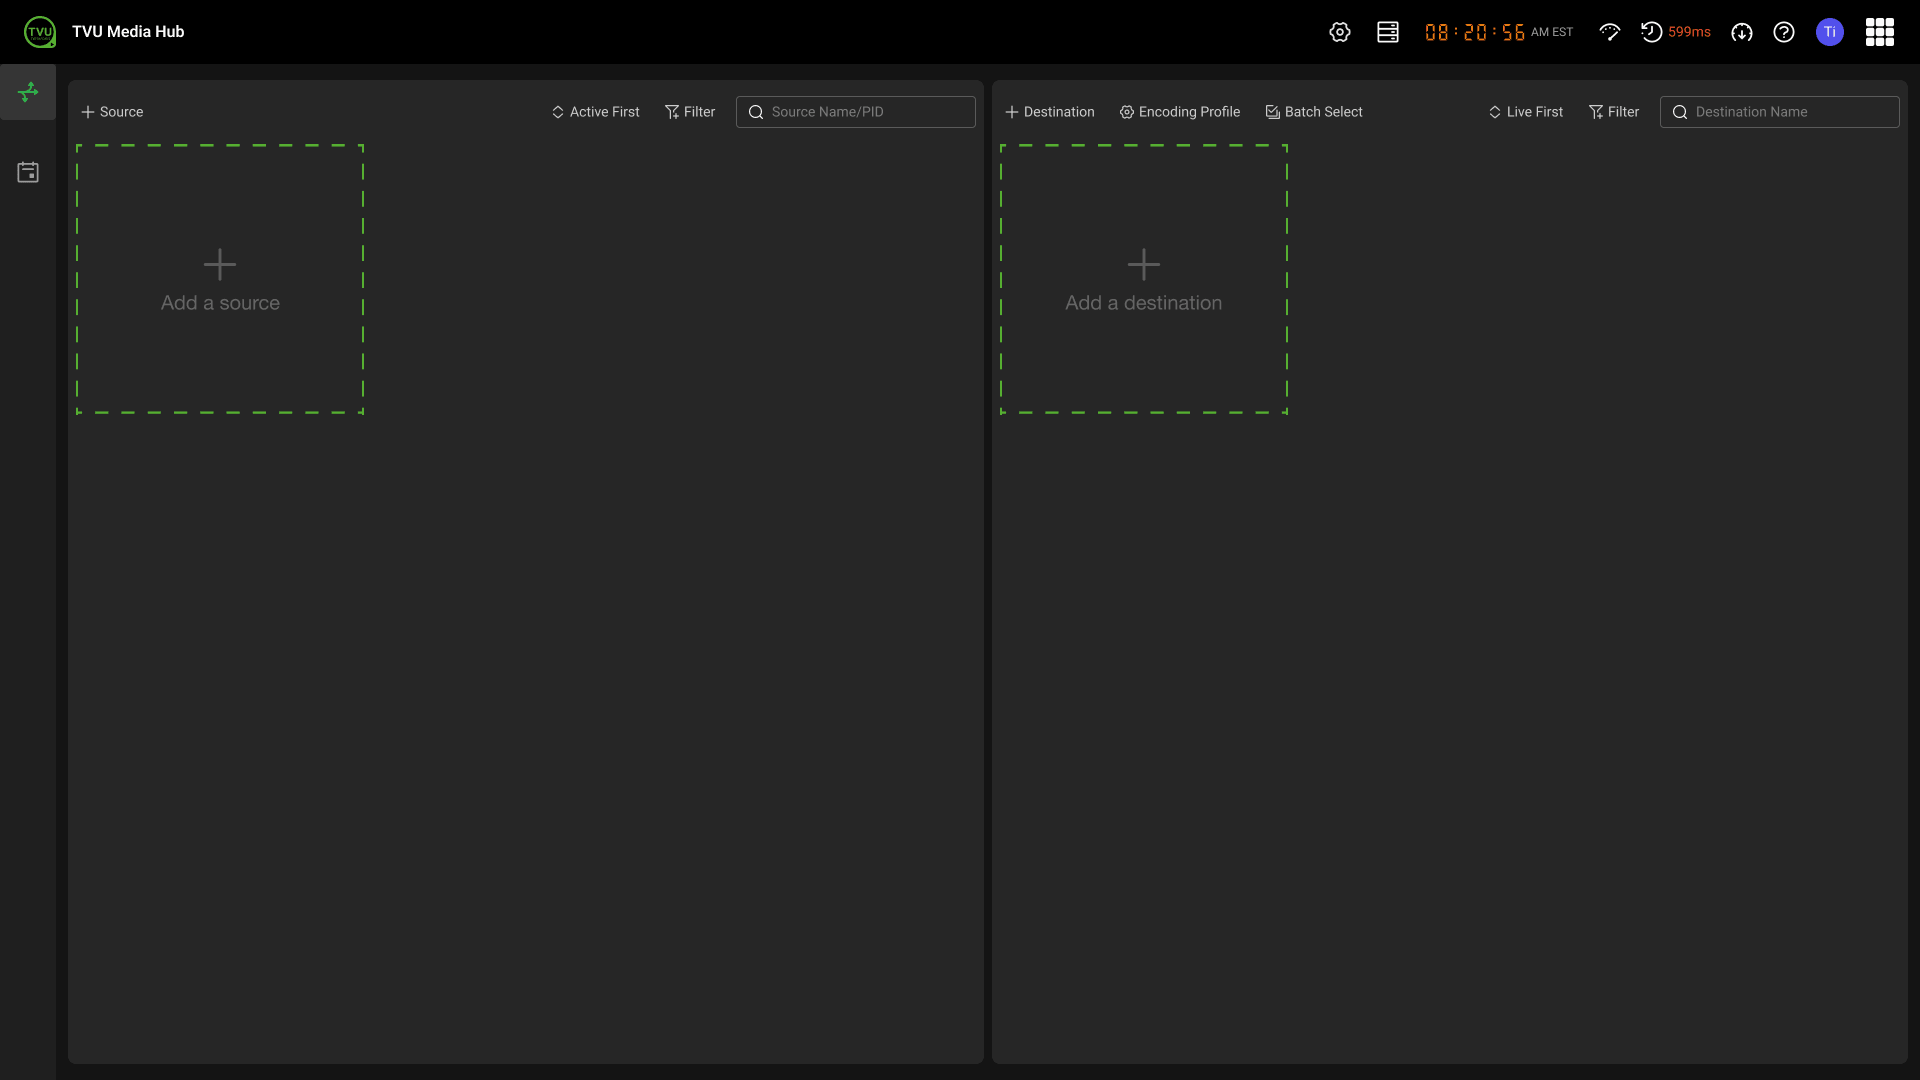
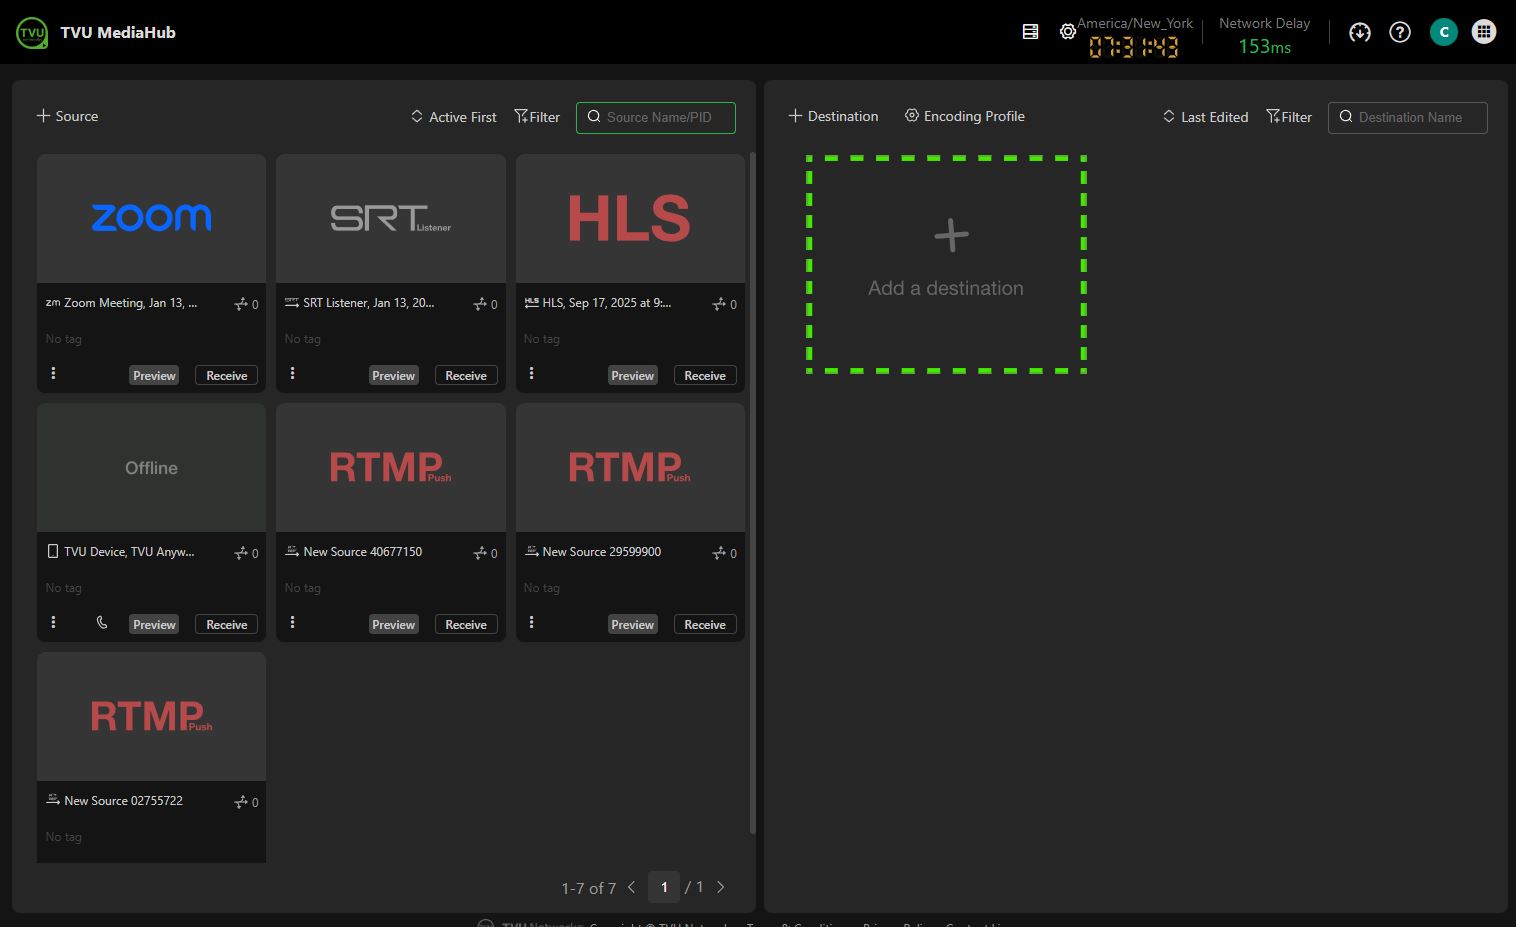
- The Add a Source box is a visual placeholder that guides users to start populating the workspace with video inputs.
- The Add a destination box is a visual placeholder for creating the output nodes that will receive video from the sources.
MediaHub user interface overview
MediaHub is a virtual video router that can be added to your existing infrastructure, whether in the cloud or on-premises. Its Advantages are:
- Anything in, anything out
- From anywhere to everywhere
- Unlimited scalability
- Removes the hardware complexity
- Removes the operation complexity
- Supports scheduler (schedule your destination for output)
- Supports Recording in a Transport Stream (TS)
- Extends control to an on-premise router
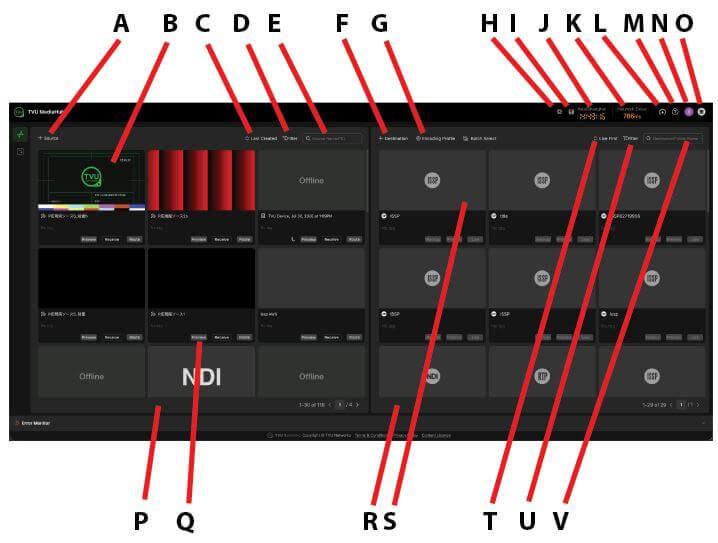
The following list describes the TVU MediaHub user interfaces’ operations in the Source and Destination panels:
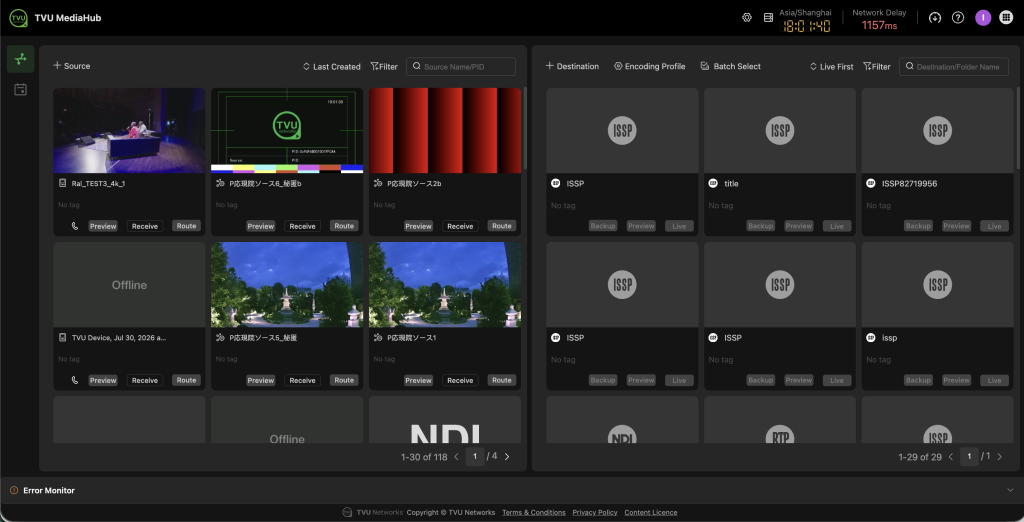
(A) + Source: The + Source icon allows users to add new input sources to the Source panel.
(B) Source: Added source block.
(C) Display sources: Organize source inputs based on status; by Active First, Last Edited, Last Created, and Alphanumeric.
(D) Filter Source feature: The Source panel Filter feature displays your source search results by Tag or Input type or Created by me.
(E) Search by Name or PID: Enter a source Name or PID in the Search field to find a specific source.
(F) + Destination: Allows users to create new output endpoints, such as social media platforms (RTMP), professional receivers (SRT), or physical SDI decoders..
(G) Encoding Profile: Click the Encoding Profile gear icon in the Destination panel to open the Encoding Profile Management window. Here, you can “+ Add” a custom Encoding Profile and use the Video Encoder Management window to manage technical settings such as Aspect Ratio, resolution, and audio encoding for the output feeds.
(H) Box Pool icon: Click the Box pool icon to open TVU Home and enable SDI Input/Output functionality or to deploy MediaHub on your own resources. This icon opens the Management window to download and install the TVU Agent software and manage Agent devices.
(I) Default Resource Configuration icon: This icon allows users to choose TVU Resources or a TVU Agent as your default resource configuration.
(J) Clock/Timezone: Displays the local time (e.g., America/New York) to help synchronize live broadcast events.
(K) Network Delay: Shows the current latency (e.g., 153ms), which is critical for monitoring the health of cloud-based routing.
(L) Speed test icon: This icon provides critical real-time diagnostics for the platform’s cloud-native routing environment.
(M) What’s New (?) icon: Click the What’s New (?) icon for the latest MediaHub updates.
(N) User Preferences: Click the User Preferences icon to Sign Out of MediaHub, Open TVU Home to access the Token Purchasing Portal, and change languages from EN to Chinese.
(O) Service Menu icon: When enabled, the Service Menu icon opens a list of TVU services you can access.
(P) Source panel (left panel): This area is dedicated to managing all incoming video feeds.
(Q) Source block: The source block in the source panel acts as the primary container for managing all incoming live video feeds. It provides a protocol-agnostic workspace where physical and digital signals are treated as unified “objects” for routing.
(R) Destination panel (Right panel): The Destination panel displays live single and multi-output folders. This panel manages where the video signals are being sent.
(S) Destination block: The Destination Block (located in the right panel of the workspace) acts as the endpoint manager for your live video signal. While the Source Block brings video into the hub, the Destination Block controls where that video is sent and in what format. The Destination Block provides real-time previews and status indicators to confirm that the routed signal is successfully reaching its endpoint.
(T) Last Edited: Sorts destination output types by Live First, Last Edited, Last Created, and Alphanumeric.
(U) Filter: The Destination panel Filter feature allows users to organize destination outputs by sorting tags “Made by me.”
(V) Destination Name search field: Enter a Destination Name to find a specific Destination.
Getting Started – Adding Sources
To get started, users must add their sources to the Source panel. The panel allows users to add and display any type and number of sources and configure any source with multiple outputs.
To add sources to the Source panel:
- Click + Source in the source panel.
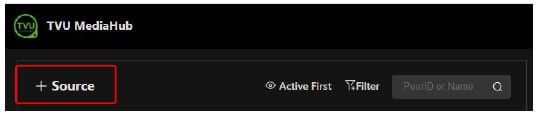
- The Source window opens.
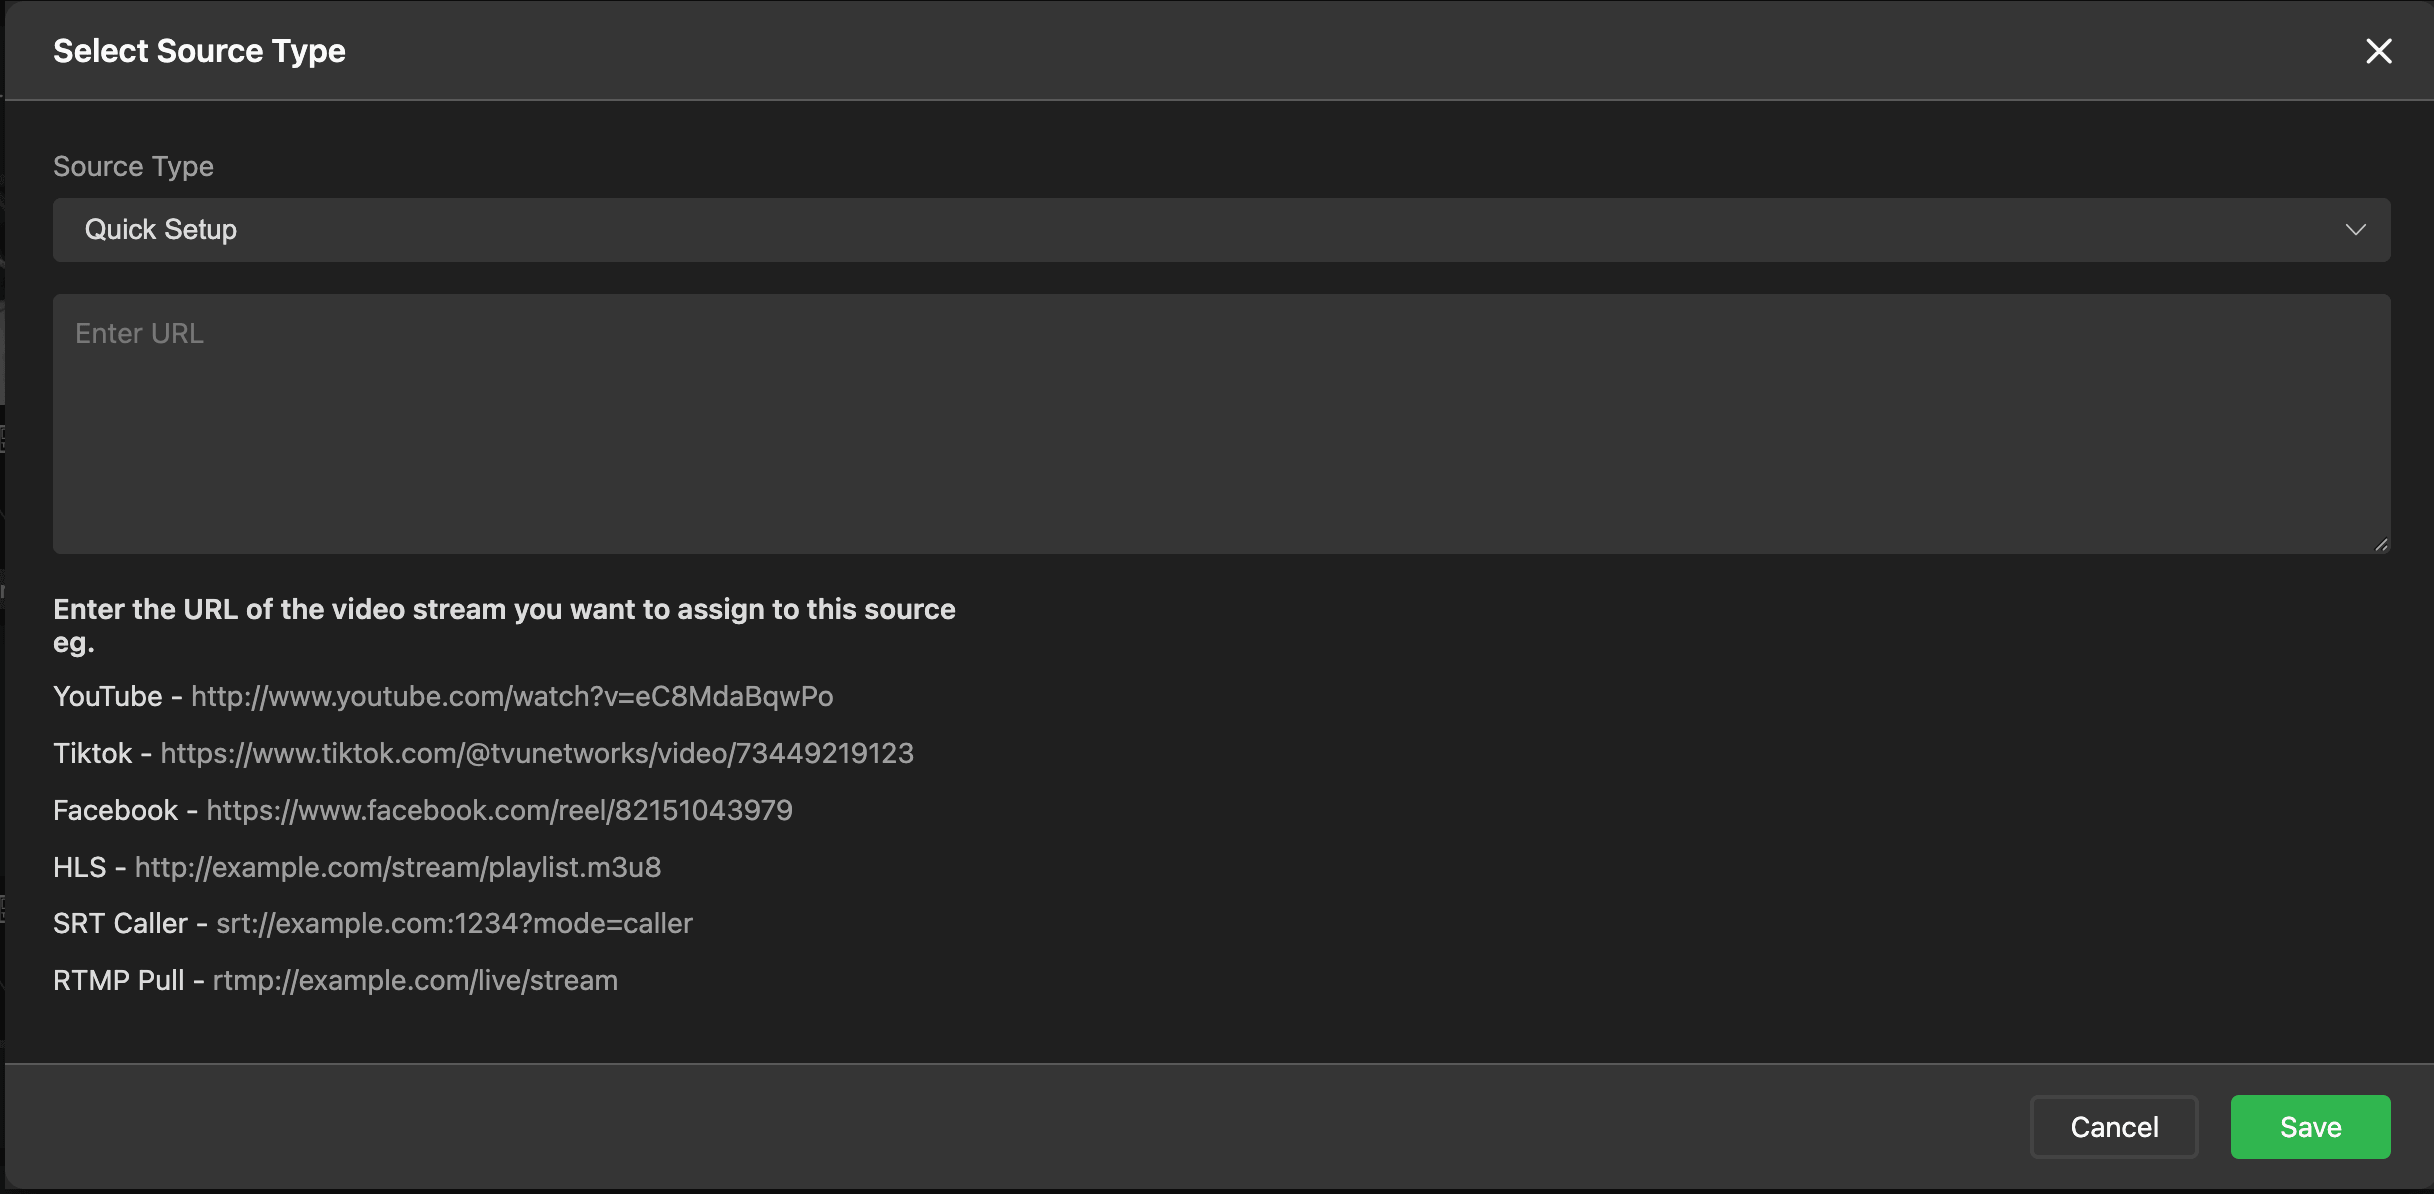
The Source Type menu supports different source types:
- TVU Device: For physical hardware like TVU One transmitters or TVU Anywhere mobile app.
- EXT IP sources: For EXT IP sources, enter the required connection details (e.g., URL, Port, or Stream Key).
- EXT IP streams: For adding standard IP streams like SRT, RTMP, NDI, or HLS.
- Grid source: For receiving point-to-multipoint feeds from the TVU Grid network.
Selecting a Source Type
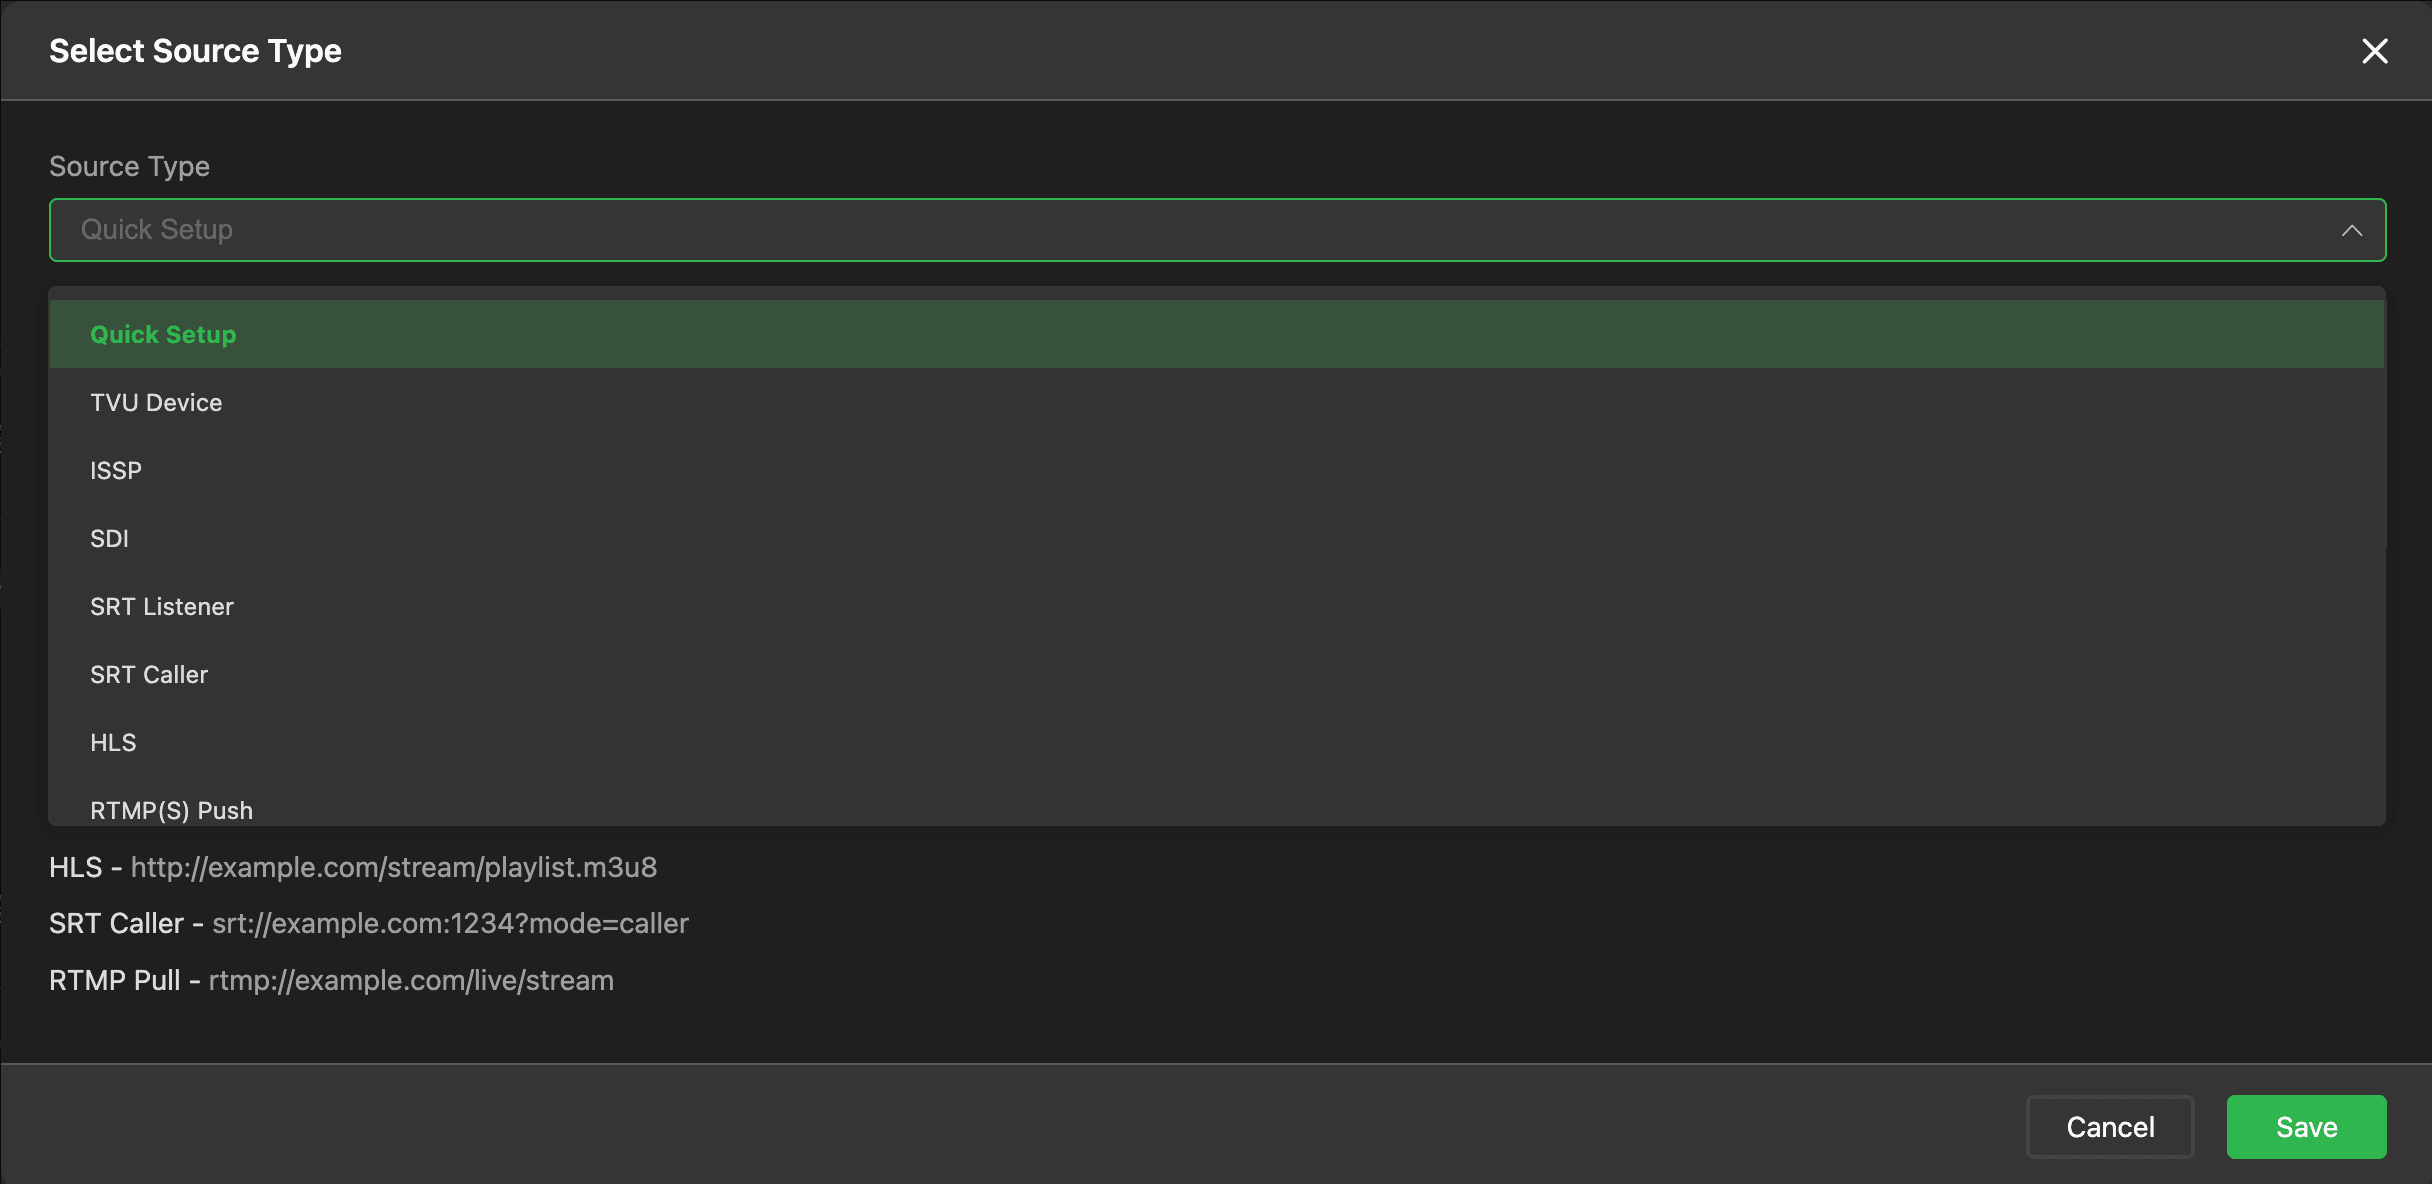
Expand the Source Type menu and select the new source type you want to add. Each selection lets you set the output parameters for each source type.
The Source Type menu options are categorized into five groups and are explained in the following topics:
- URL source
- TVU Device
- Other
- SDI Input
- TVU MediaMesh
Adding a URL source
To add a video stream URL source type:
- Expand the Source Type menu and select a URL source type. The configuration window will automatically open for the selected source type.
- Enter the Stream URL of the video stream you want to assign to your source.
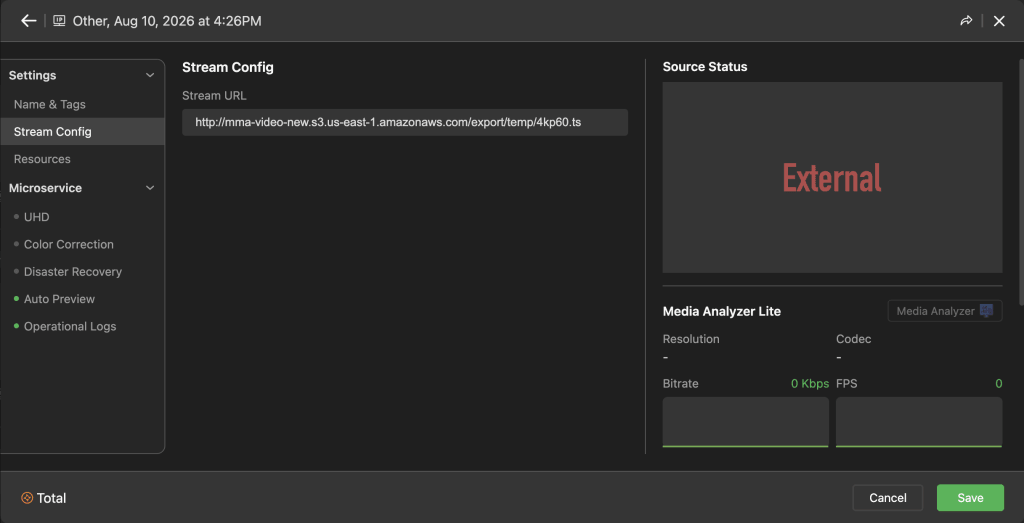
- Click the Share icon to share your object to your collaborators.
Note: The Arrow icon at the top of the window allows source owners to share live or archived content instantly to users across multiple platforms. Refer to “Source sharing feature” for more information.
- Enter a source name.

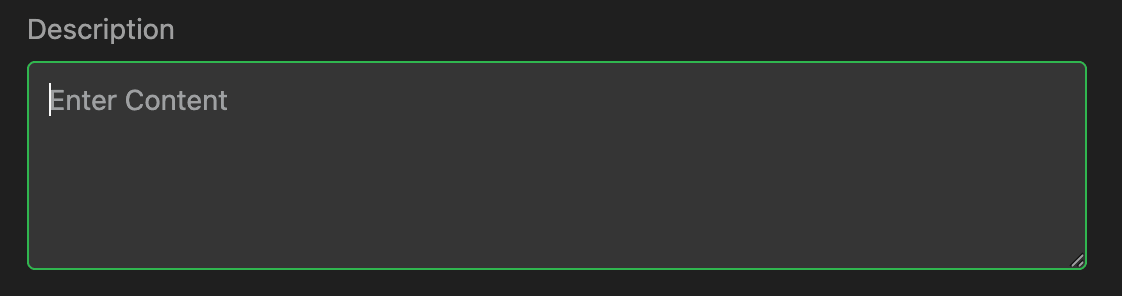
- In the Name & Tags tab, click the Description field to enter additional source details.
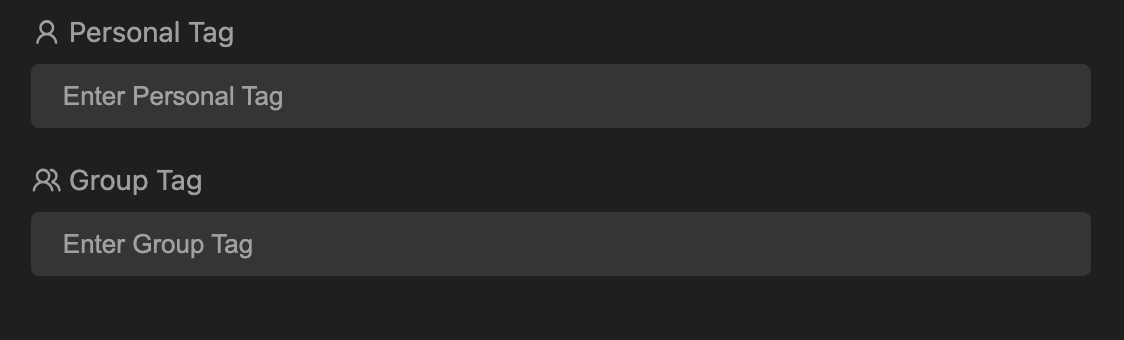
- Click the Personal Tag or Group Tag fields to enter tag names.
Core Tag categories:
- Personal Tags: These are used by individual operators to categorize their own specific assets or sources. They help a single user quickly filter and find their own feeds in a workspace shared by many.
- Group Tags: These are used for team-level organization. By applying a Group Tag (e.g., “Main Stage” or “Court 1”), any member of the production team can filter for all sources related to that specific part of the production.
- Enable more microservices if applicable. The Microservices shown will vary depending on the source type. The microservice settings shown are:
- UHD Toggle: An on/off switch to enable Ultra High Definition (4K) processing for the selected signal. UHD sources require additional resources if the input source’s resolution is higher than 1920×1080.
- Auto-Start Preview When Take Live: A toggle that, when enabled, automatically launches a real-time visual preview as soon as a source is “taken live” or routed.
- Color Correction: To adjust video color in YUV color correction.
- Disaster Recovery: Set and cut the backup source when a low bitrate source or a black frame is detected. Refer to “Configuring Disaster Recovery and Failover.”
- Operation log: Records user operations.
- Click Save.
TVU Device source types
The TVU Device source window lists available and occupied TVU device source types.
Selecting TVU Device lets users assign the following TVU Device source types:
- TVU Pack
- TVU Anywhere (see “Adding a TVU Anywhere device source”)
- TVU Grid-Pac
- TVU Grid-SD
- TVU Grid-MediaHub
- All (of the above)
Assigning a TVU Device source
Essential Prerequisites:
To assign a TVU Device source except a TVU Anywhere device:
- Account Pairing: Before a device will appear in the list, it must be paired to your TVU organization. If you do not see your device, ensure it is registered in your TVU Home or Command Center dashboard.
- Active Status: For a live preview to appear, the TVU One or other device must be powered on and actively transmitting to the TVU cloud.
- Click + Source in the Source panel.

- The Source window opens.
- Expand the Source Type menu and select TVU Device.
- The TVU Device window opens.
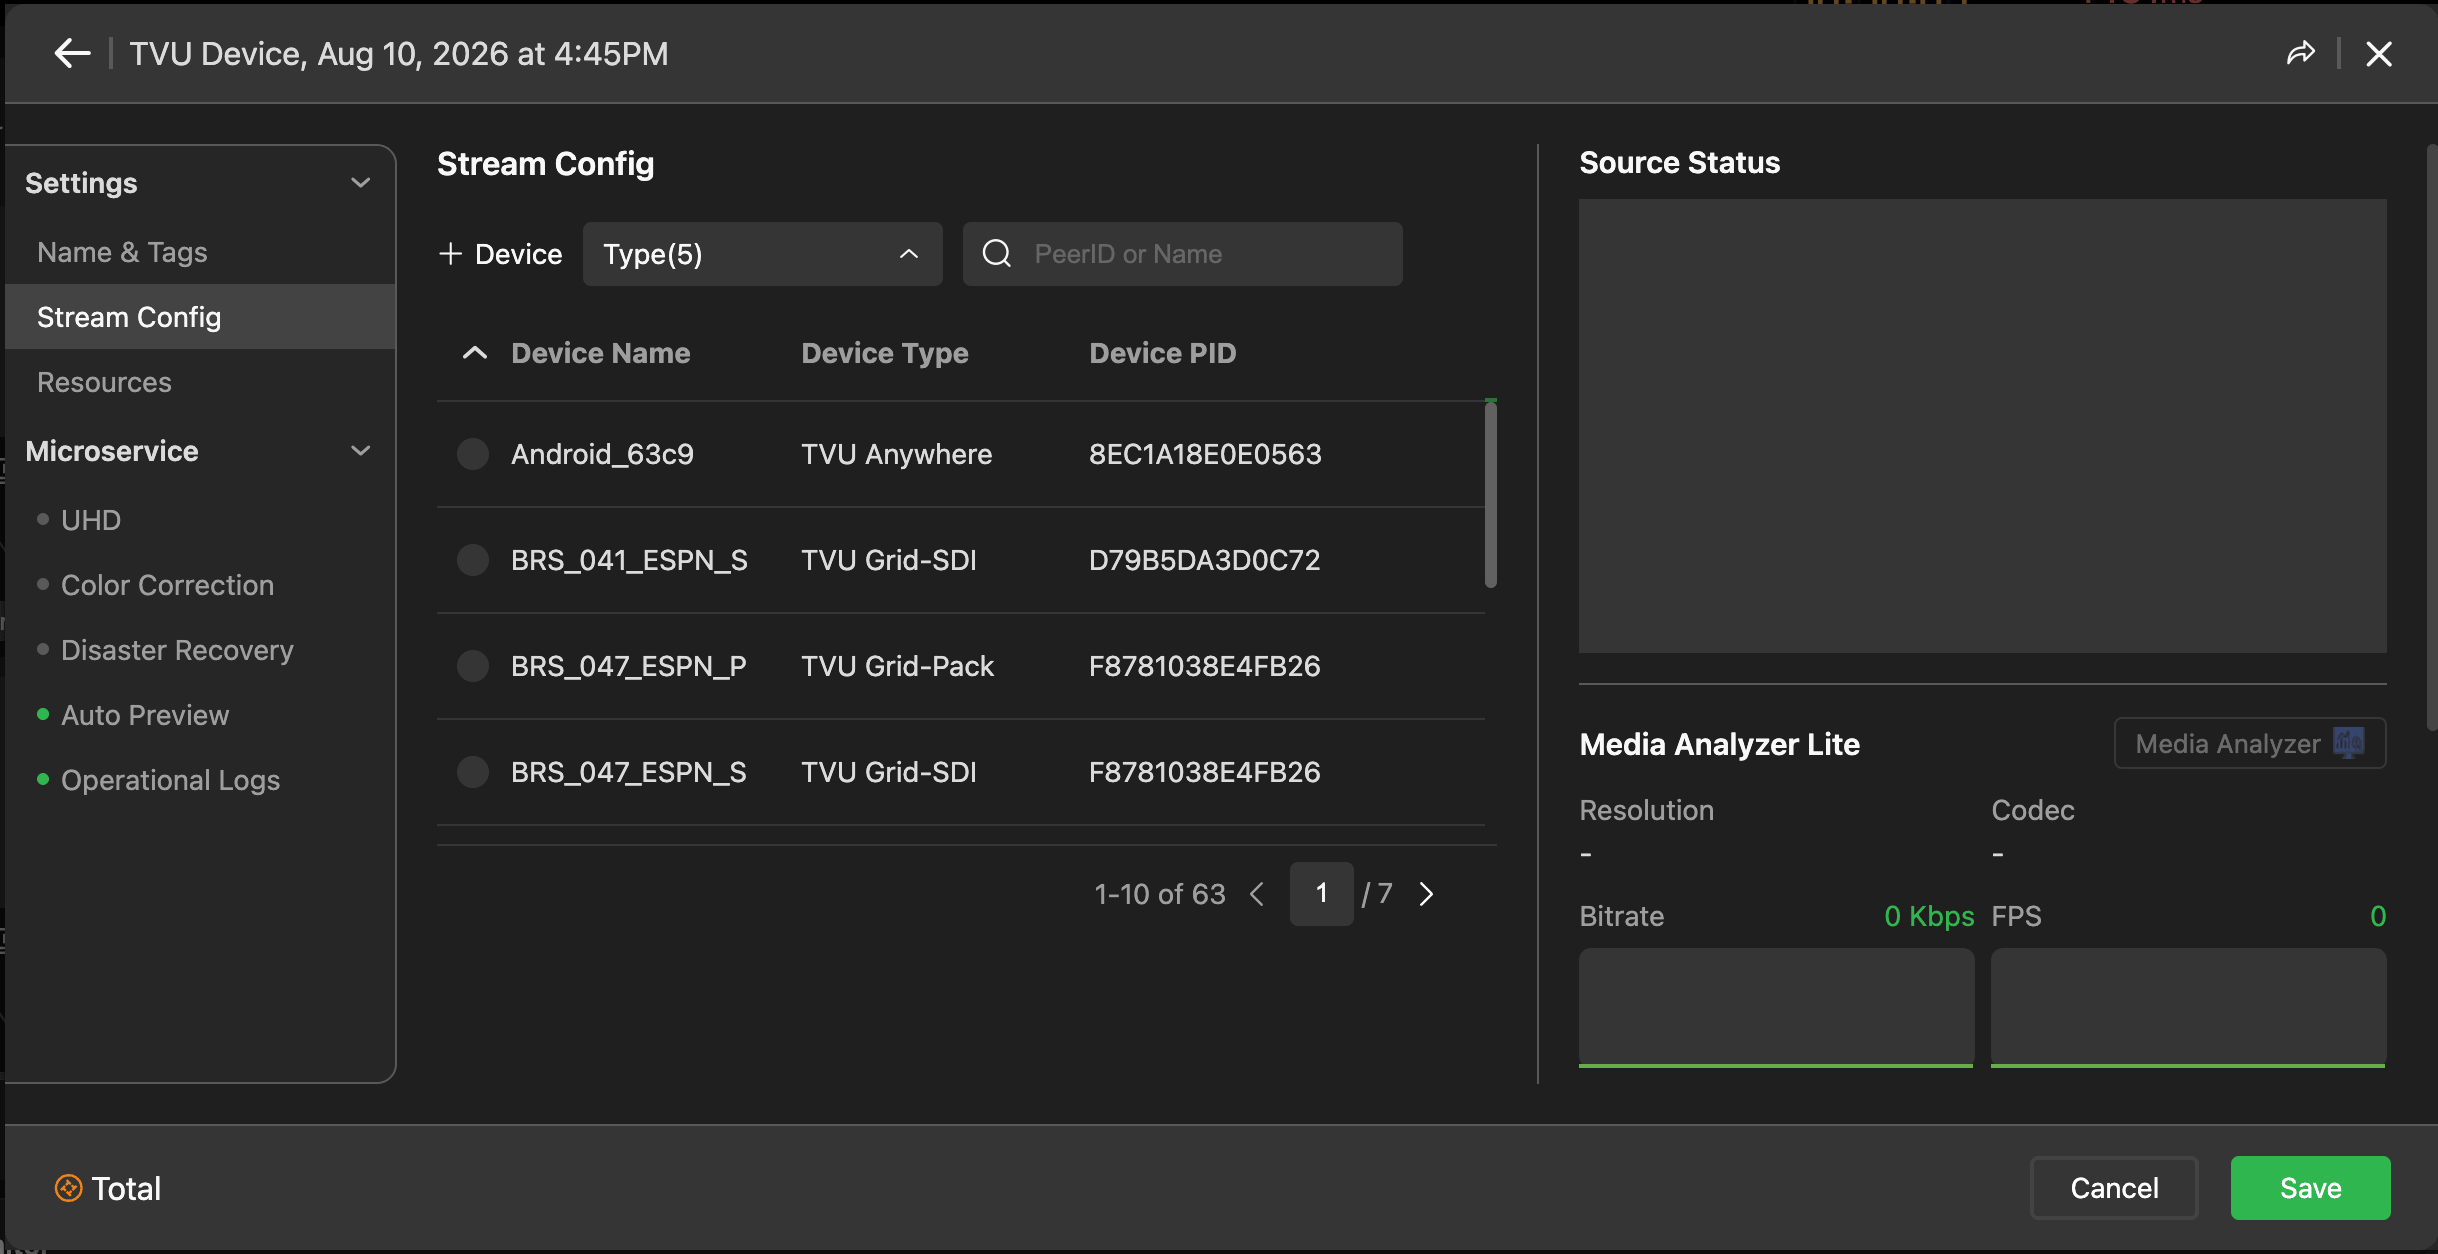
- To display a specific device type, make a selection from the Type drop-down menu to filter your choices.
- A list of all TVU devices authorized and paired to your account will be displayed.
- Enter the PeerID or Name in the search field to locate a specific device.
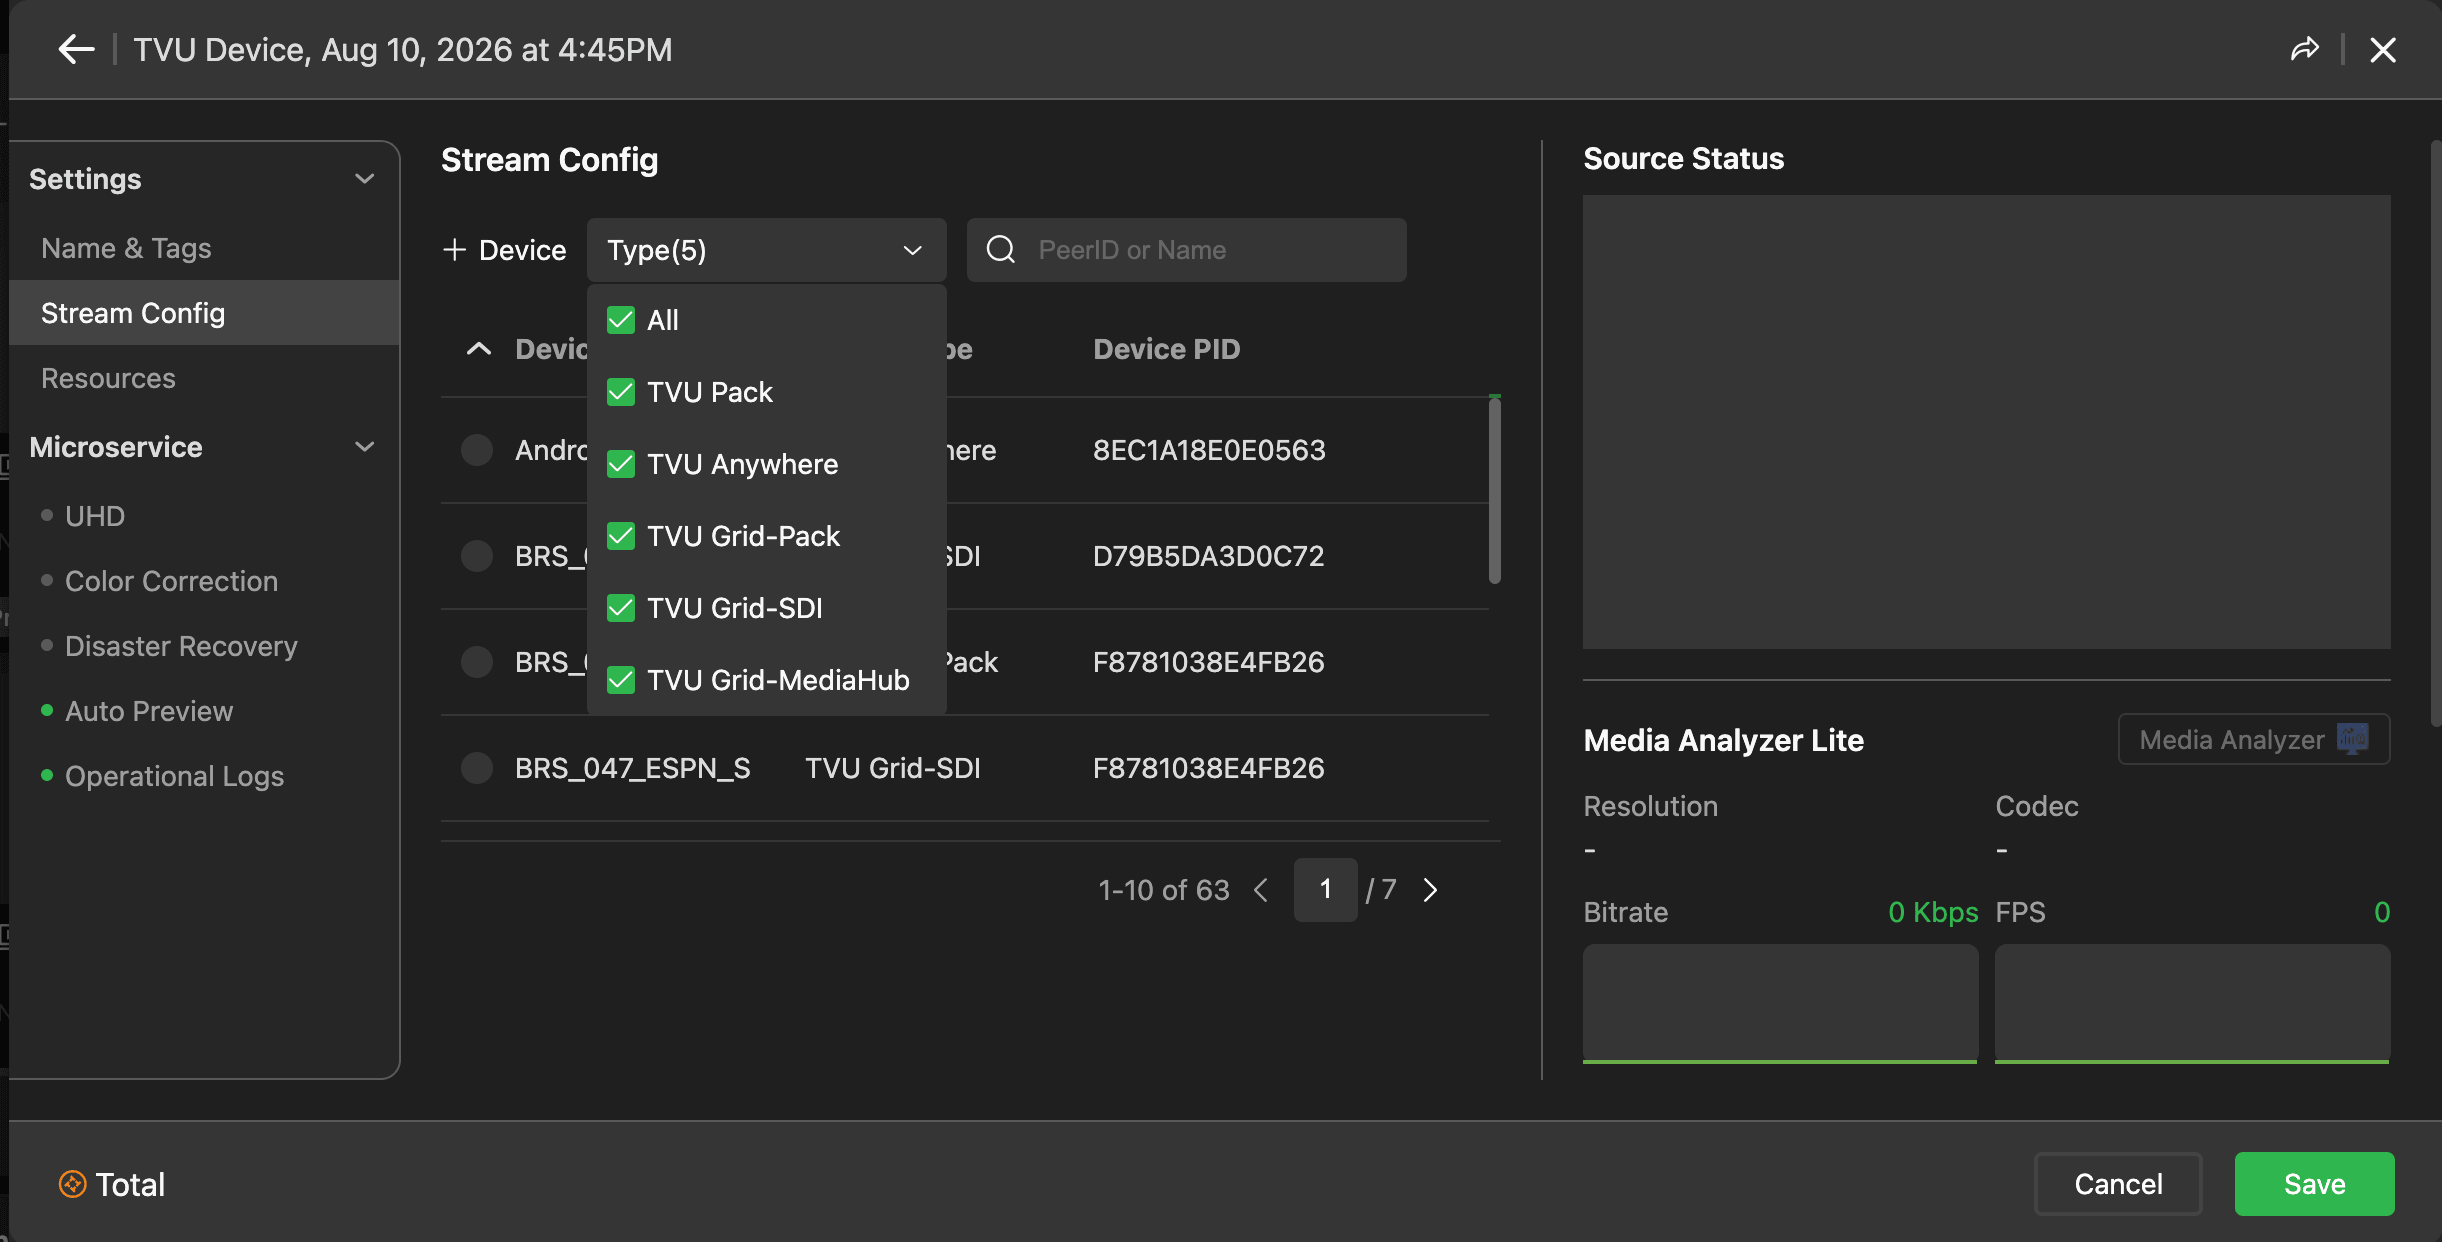
- The device list displays available devices. Click the device radio button to select one from the list.
Note: For Pack or Grid sources, a list of authorized devices paired to your account will appear.
- Click Save.
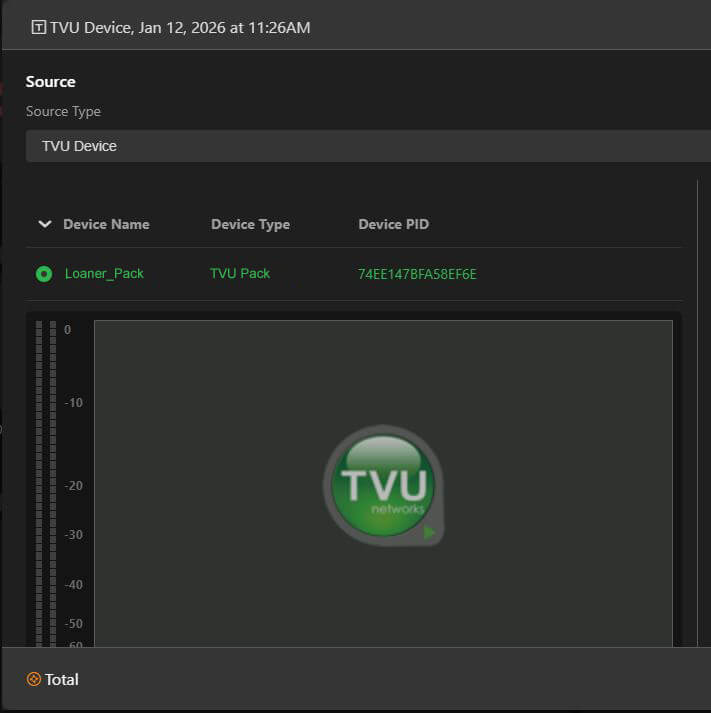
Note: If you see “Receive Source” below the program window, it indicates that you must choose a Plan to receive the source. Click “Receive Source” to purchase a MediaHub plan.
- Click Name & Tags to enter a source name, description, and tags to your source.
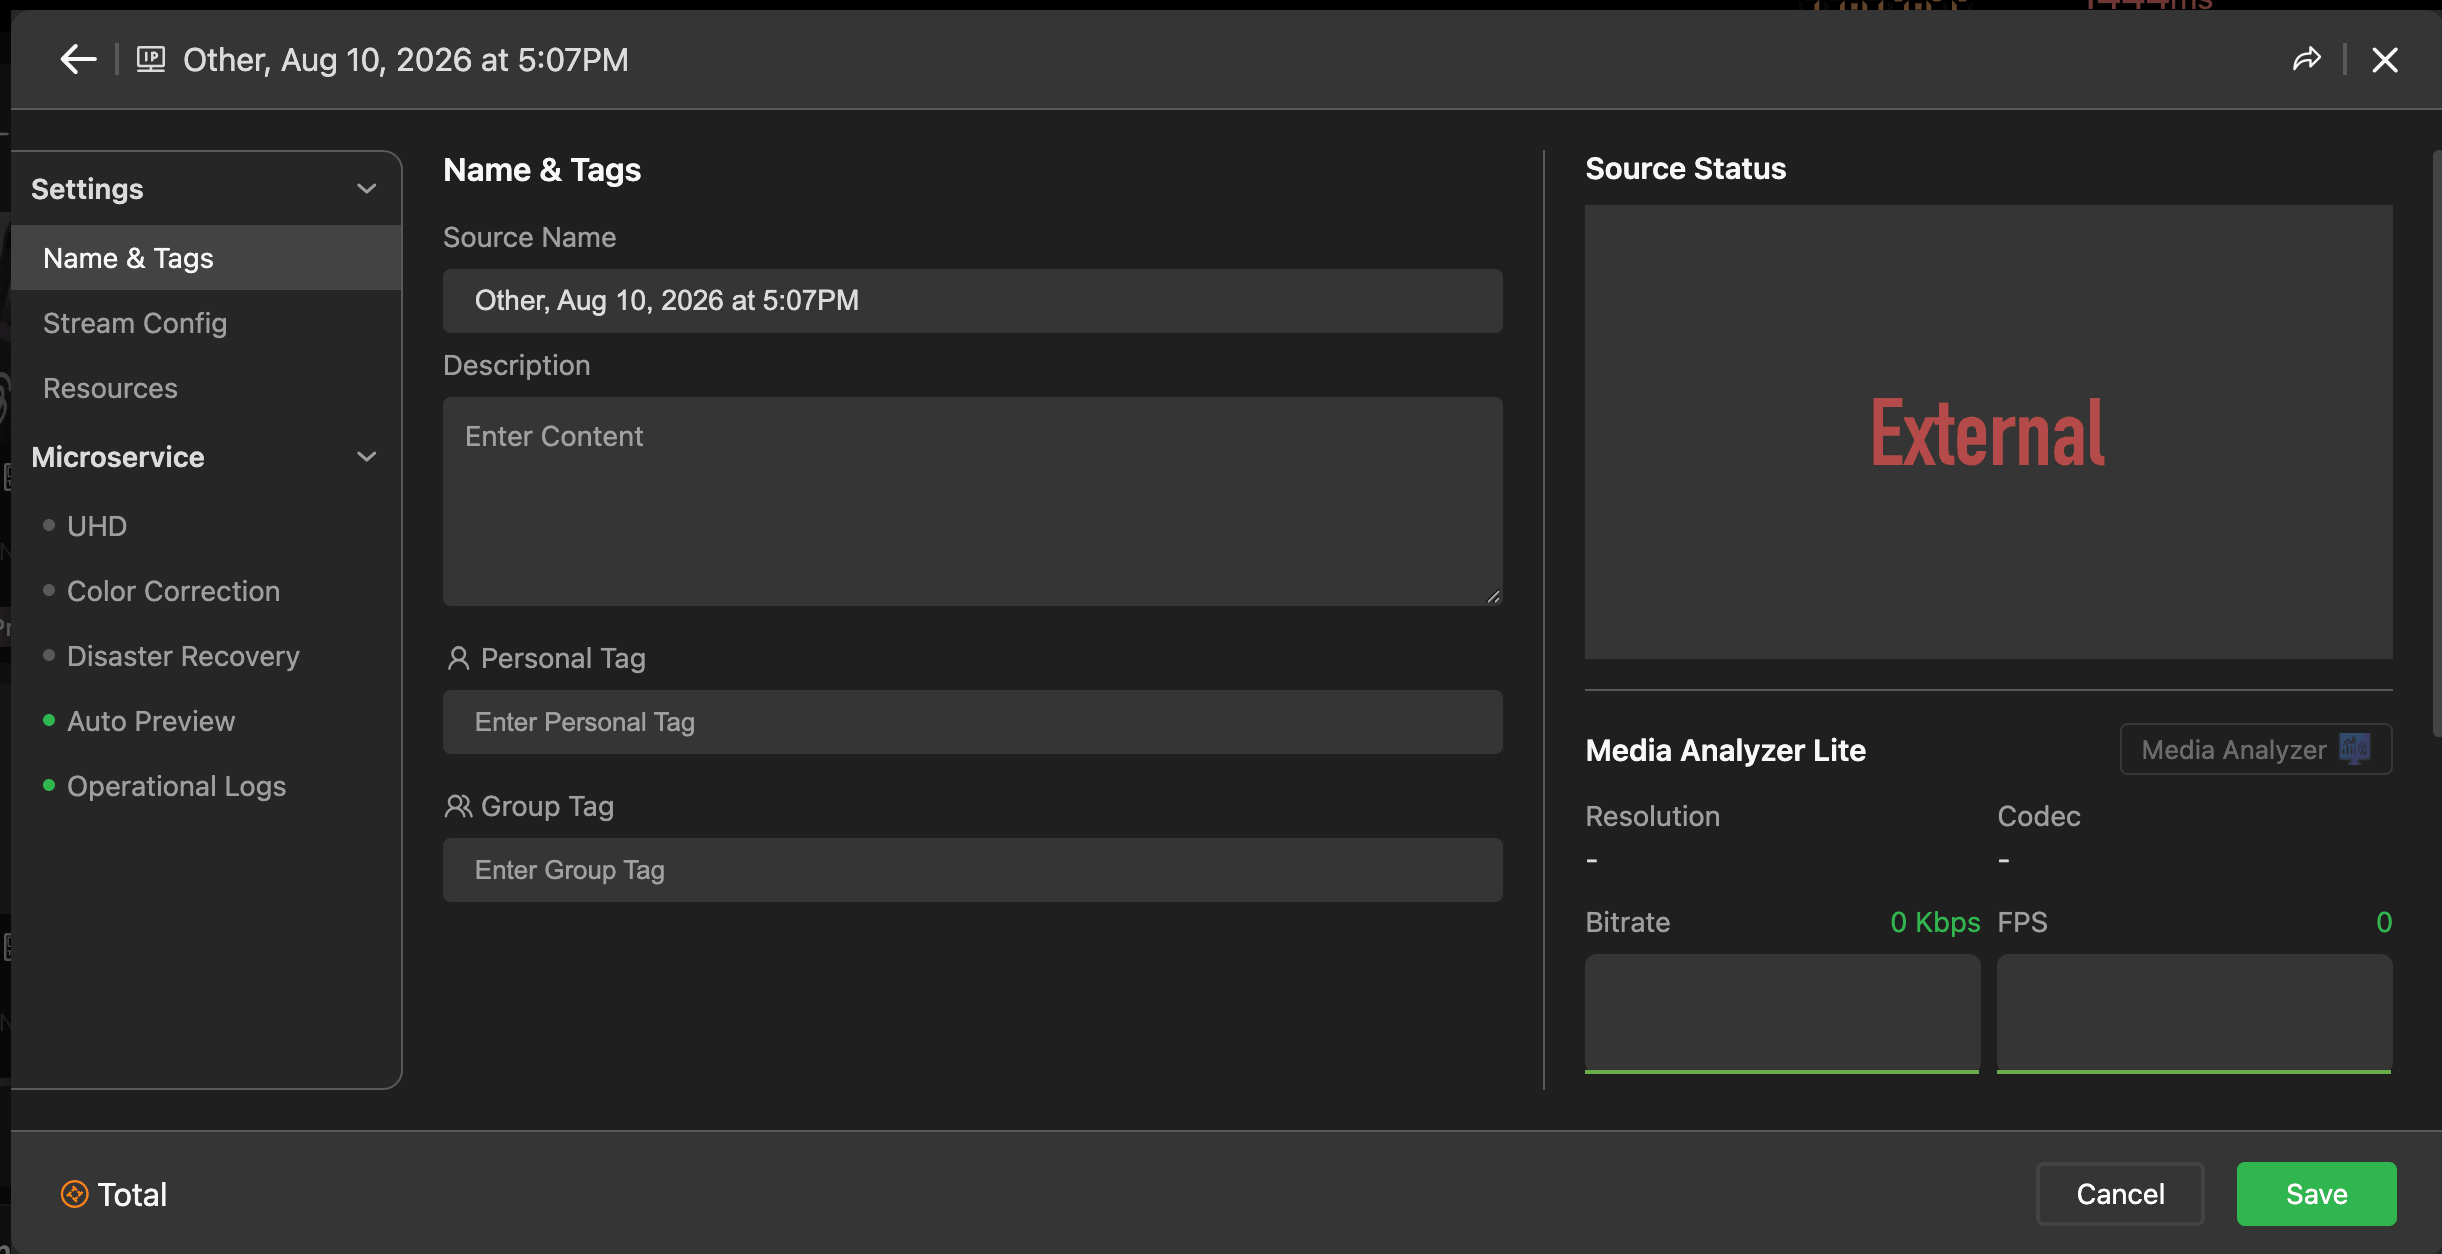
- Click Save.
Assigning a TVU MediaMesh source
MediaMesh Global Shared Memory (GSM) pipelines built in MediaMesh are directly routable in MediaHub without additional encode or transport hops. Refer to “Ingesting and routing TVU MediaMesh sources.”
VoIP sources and Partyline integration
- Any MediaHub source can join a TVU Partyline session as a participant, functioning as a real-time communication channel and custom multiviewer.
- Create, configure, and monitor standalone VoIP contributors on agent devices (recommended hardware: ART USB Dual Pre audio interface).
VOIP feature for the TVU Pack (Beta)
In TVU MediaHub, the VoIP (Voice over IP) feature for a hardware “pack” (such as the TVU One) is a specialized communication tool that establishes a real-time, bi-directional audio path between a field operator and the master control room (MCR) or studio floor.
Hardware setup for the Pack
To use VoIP on a physical TVU One pack, specific hardware accessories are typically required to facilitate the audio exchange:
- Bluetooth Connectivity: The procedure often involves connecting a USB Bluetooth audio transmitter/receiver to one of the USB ports on the TVU pack.
- Audio Monitoring: A 3.5mm jack cable is connected from the pack’s audio output port to the Bluetooth transmitter.
- Wireless Earphones: The field operator pairs wireless Bluetooth earphones with the transmitter to hear the studio audio clearly without being tethered to the pack.
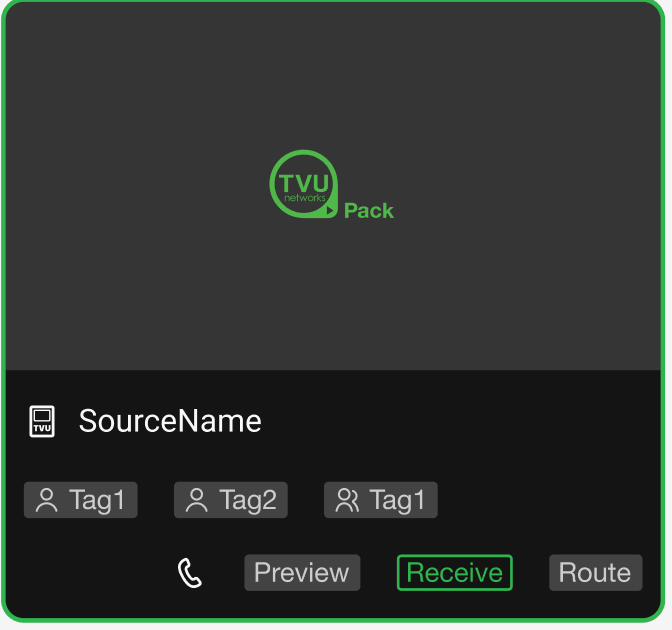
To enable the VoIP feature, click on the phone icon on the MediaHub Pack source object.
Adding a TVU Anywhere device source
Key Features for Mobile Sources:
- Automatic Re-pairing: Once a phone is paired, you do not have to scan the QR code every time; the device will remain in your source list for future use as long as the app is open.
- High-Quality Transmission: While MediaHub shows a low-quality preview to save resources, the actual broadcast output can reach full 1080p depending on your phone’s signal strength.
- Remote Control: Producers can remotely adjust camera settings such as zoom, brightness, and framing on the TVU Anywhere app through the centralized interface.
To add a TVU Anywhere device:
- Click + Source in the Source panel.
- The Source window opens.
- Expand the Source Type menu and select TVU Device.
- The TVU Device window opens in the left panel.
- Click + Device next to the Type drop-down menu.
- Follow the steps in the Add TVU Anywhere Device pop-up window.
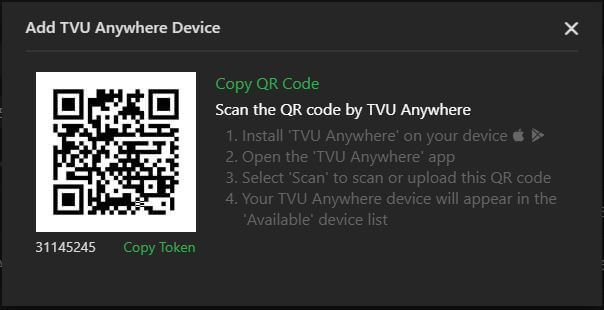
- Launch the TVU Anywhere App.
- Press the Scan icon (located in the receiver bar).
- Center the QR code displayed in the pop-up window within the green frame on your phone.
- Scan the QR code.
- Confirm the pairing on your phone. The TVU Anywhere source box will appear in the source panel.
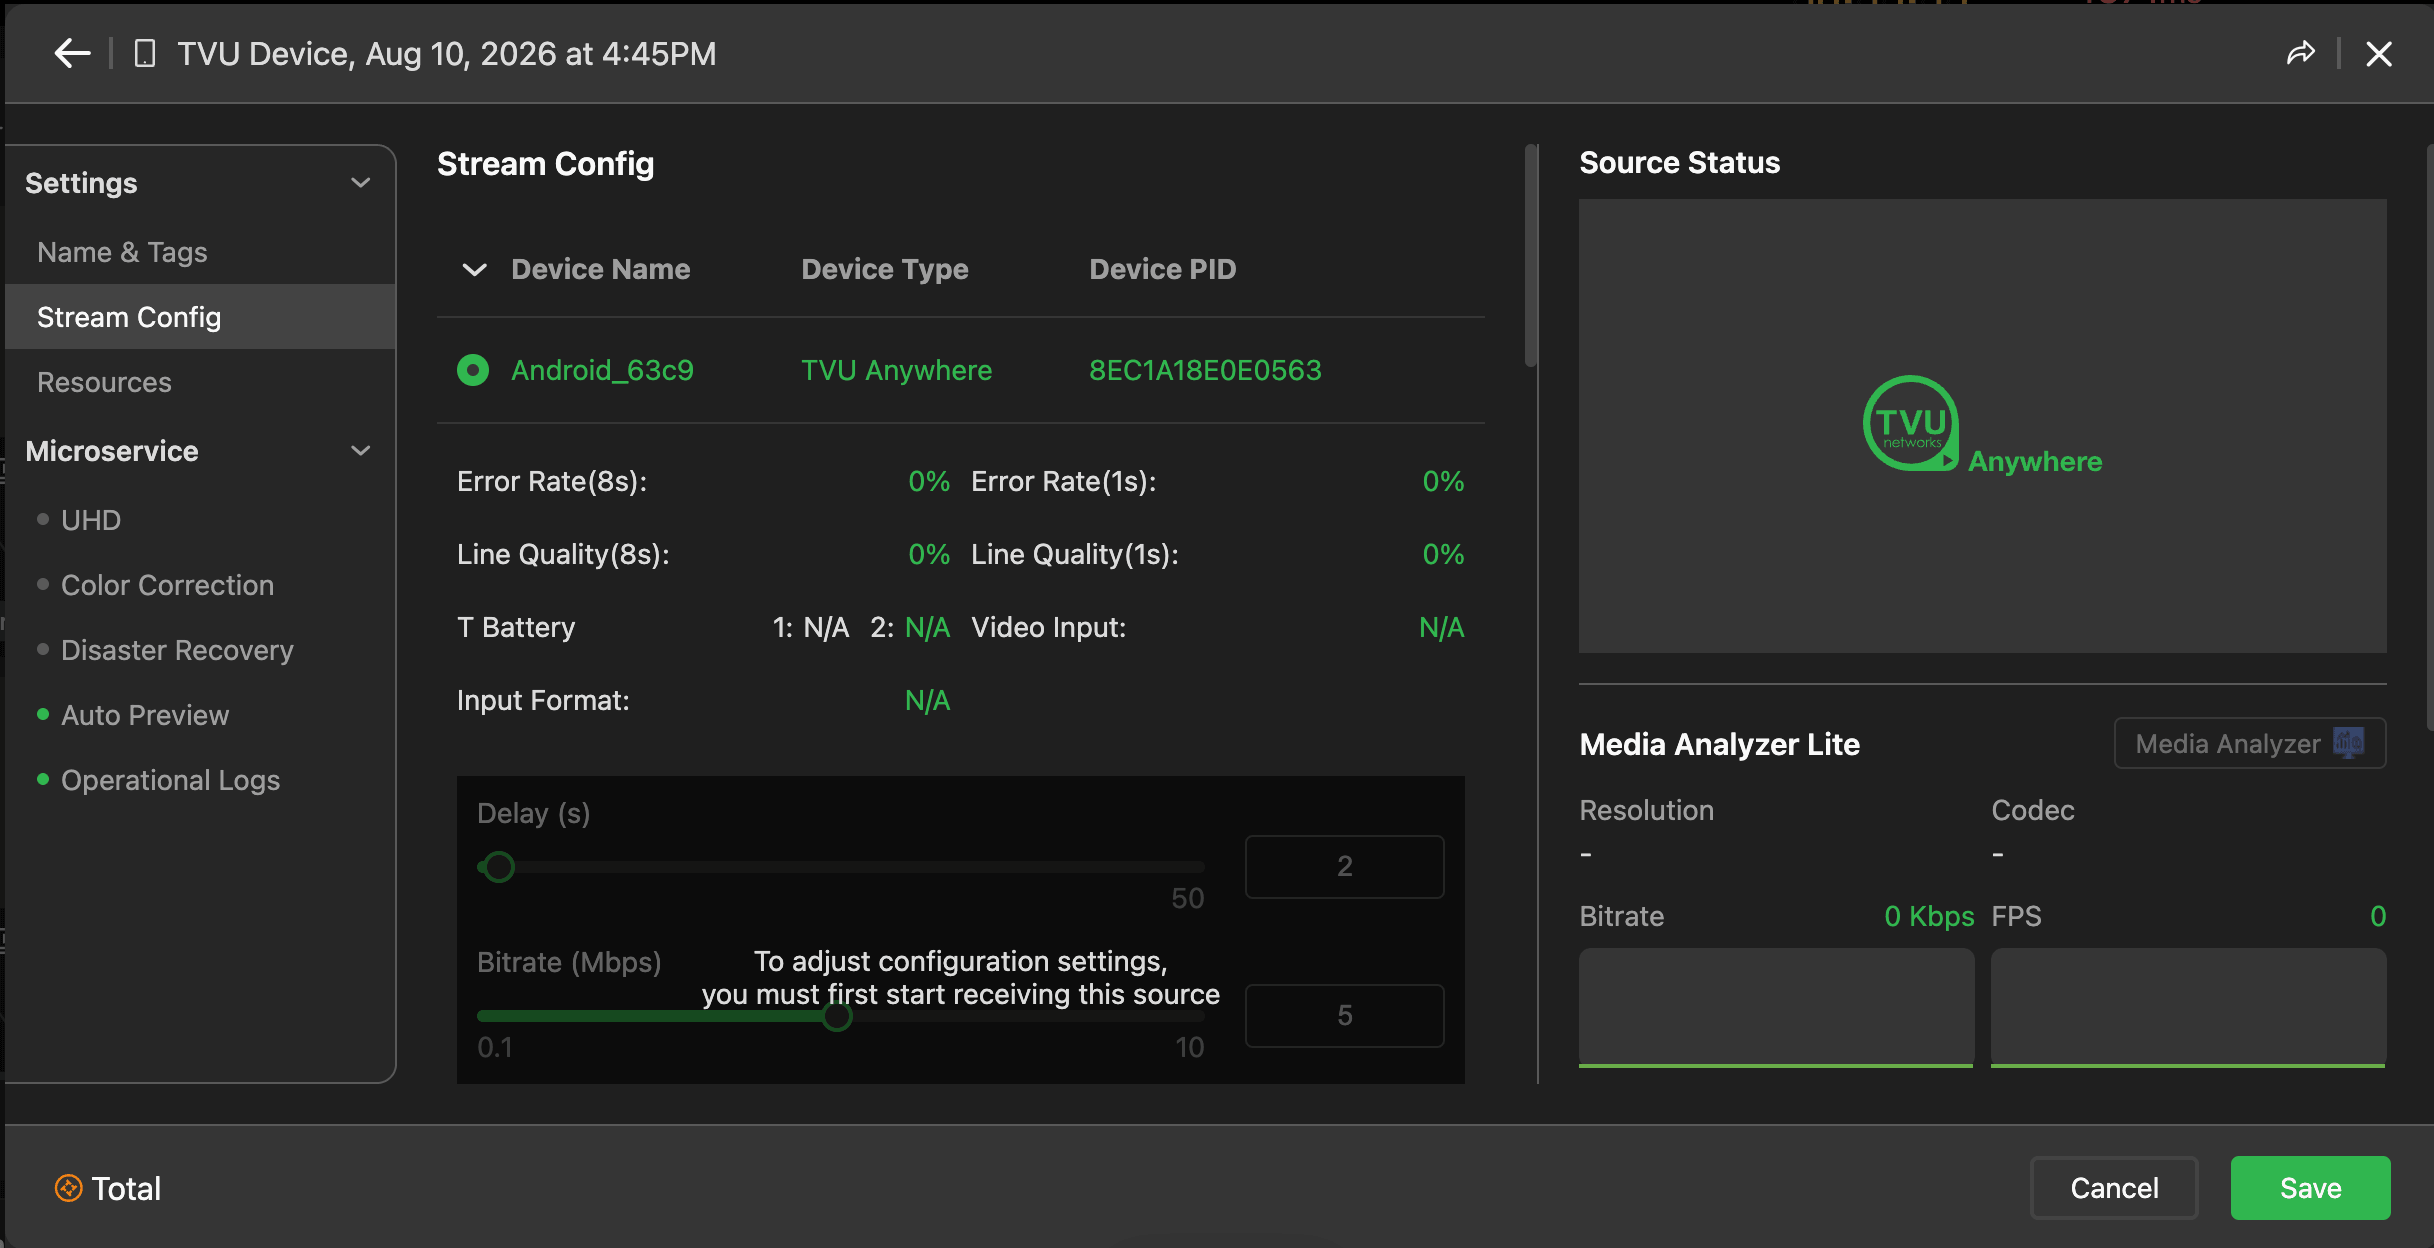
- Click the source box. Your TVU Anywhere device will display in the device list.
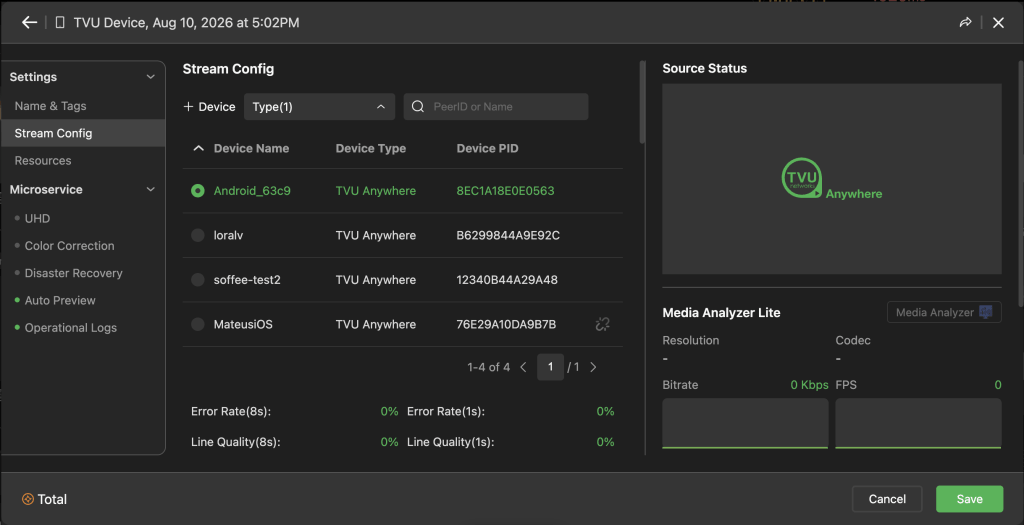
- Select the TVU Anywhere device radio button in the TVU Device list.
- Enter the applicable “Other Details” in the Name & Tags tab.
- Click Save.
Other source
The Other source type allows users to add and customize parameters for the following source types:
- RTMP / RTMPS: For standard web-based live streams.
- SRT (Caller/Listener): For secure, low-latency transport over unpredictable networks.
- NDI: For local network IP video sources.
- UDP / RTSP: For direct network stream ingestion.
- Zoom Meeting: The Zoom source adds a Zoom participant as a video source, active speaker, or specific speaker during the meeting.
Adding Other sources
In TVU MediaHub, the “Other” source type allows users to ingest non-TVU proprietary streams, such as local video files or third-party IP feeds.
To add Other sources:
- Click + Source in the Source panel.
- The Source window opens.
- Expand the Source Type menu and select Other.
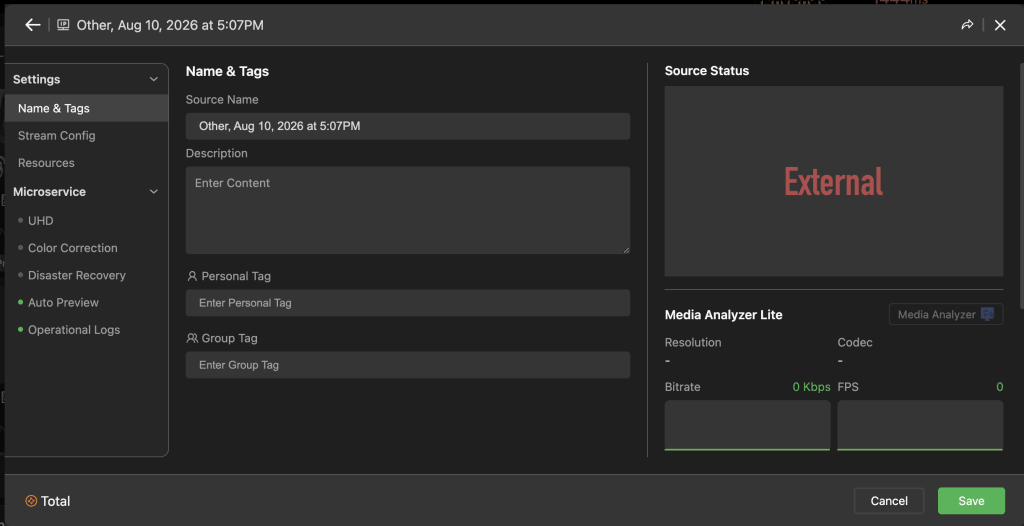
- The Other configuration window opens.
- Enter the required source details.
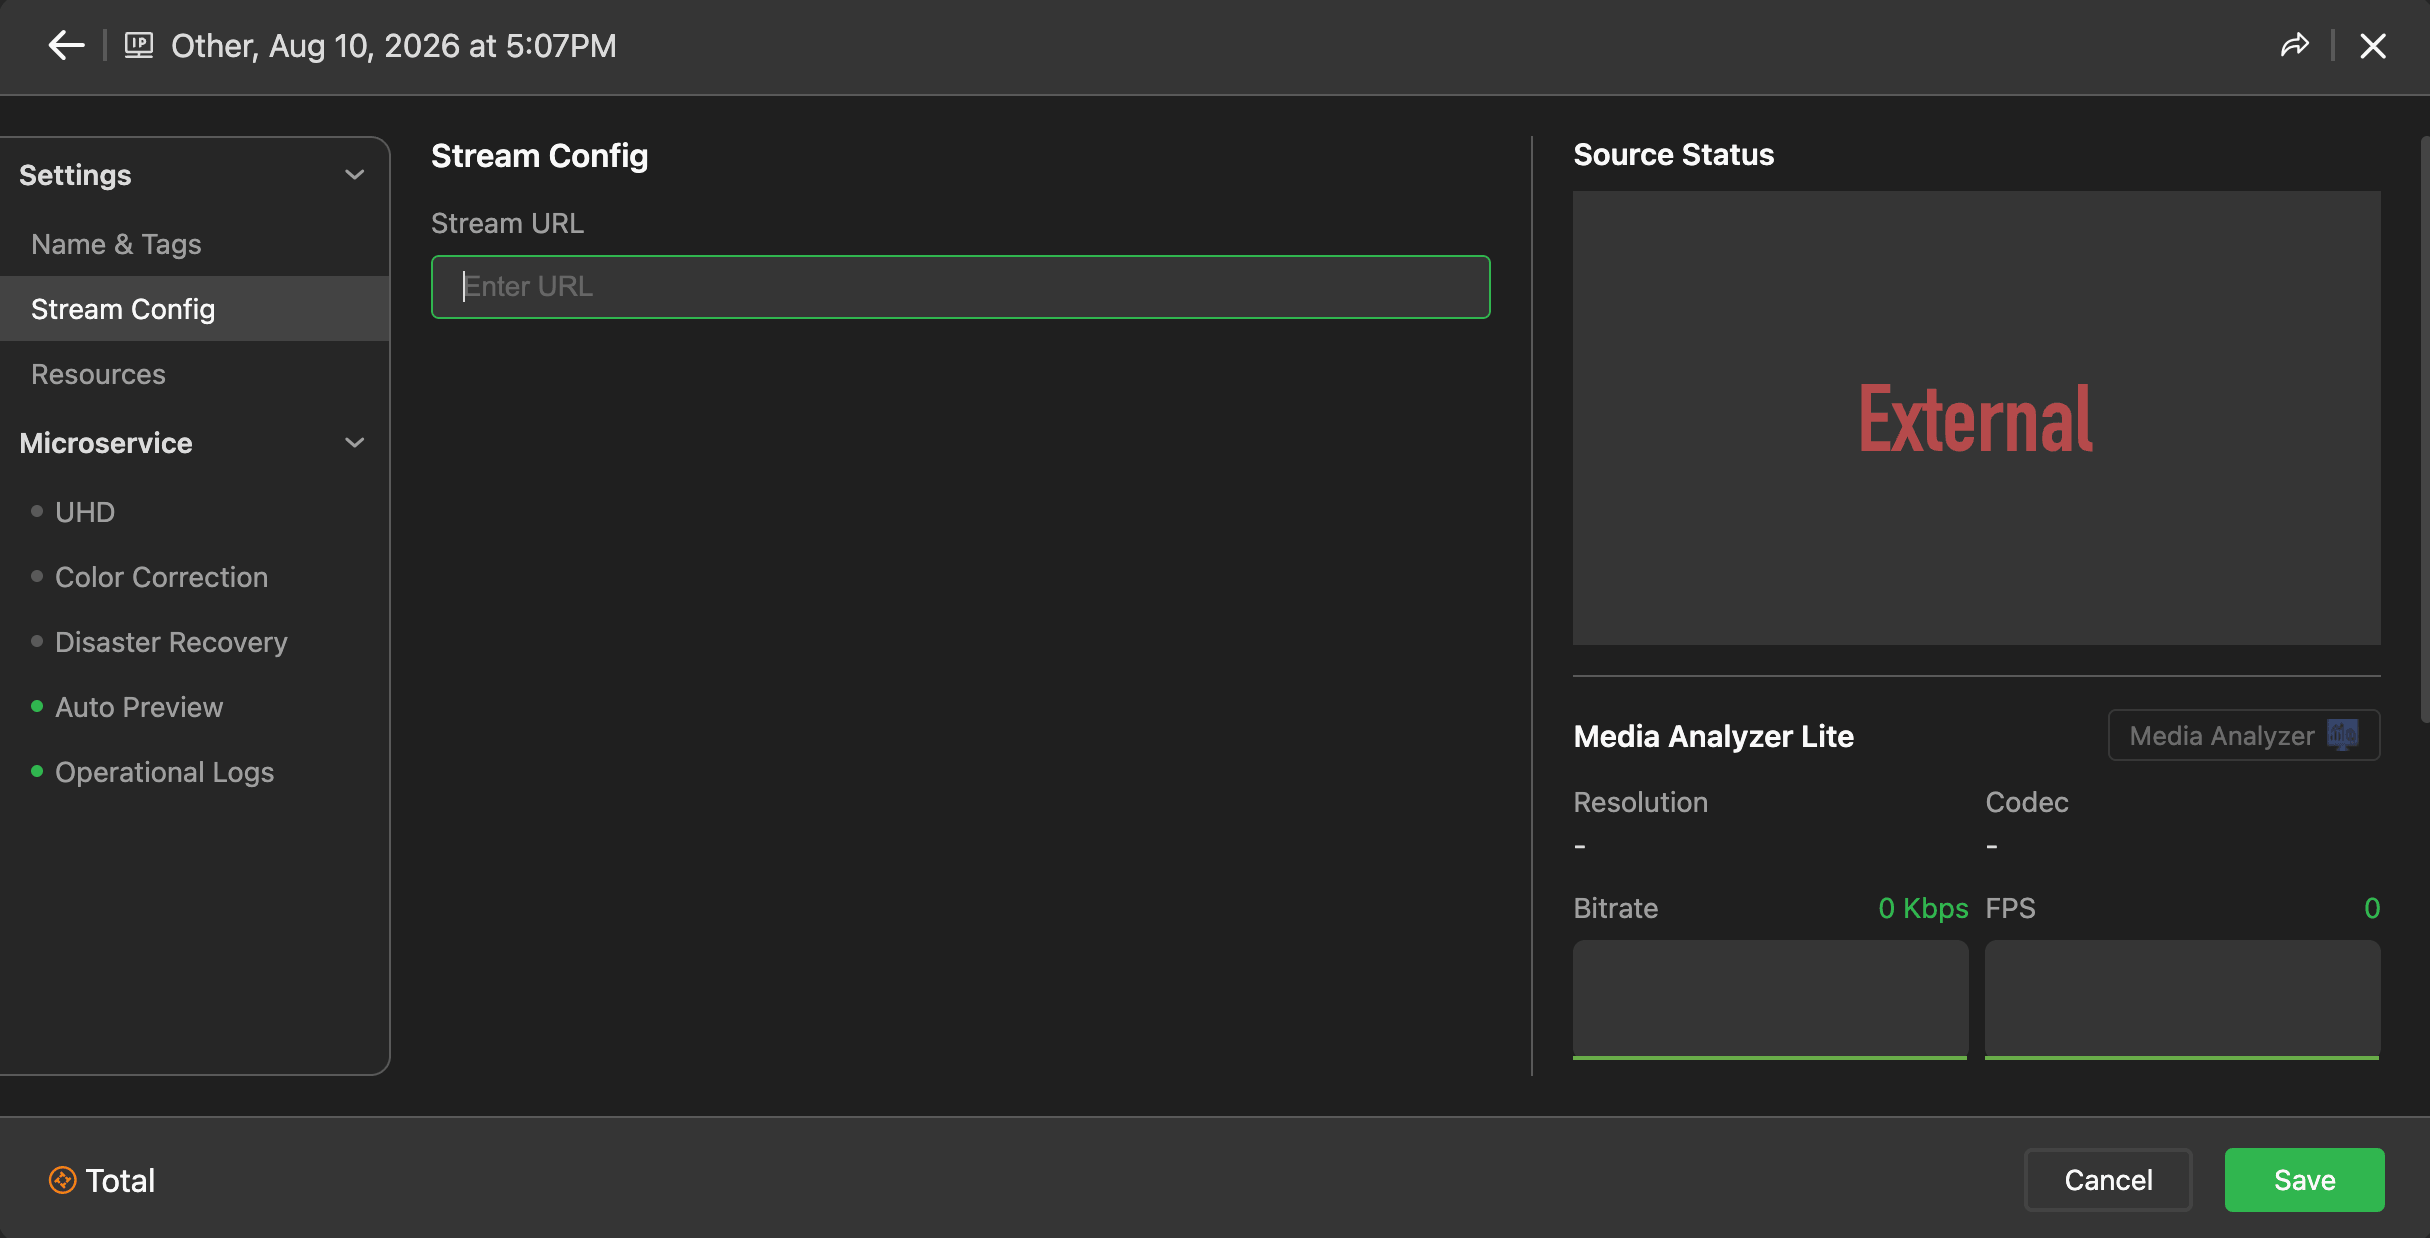
- Click Name & Tags to enter a source name, description, and tags to your source.
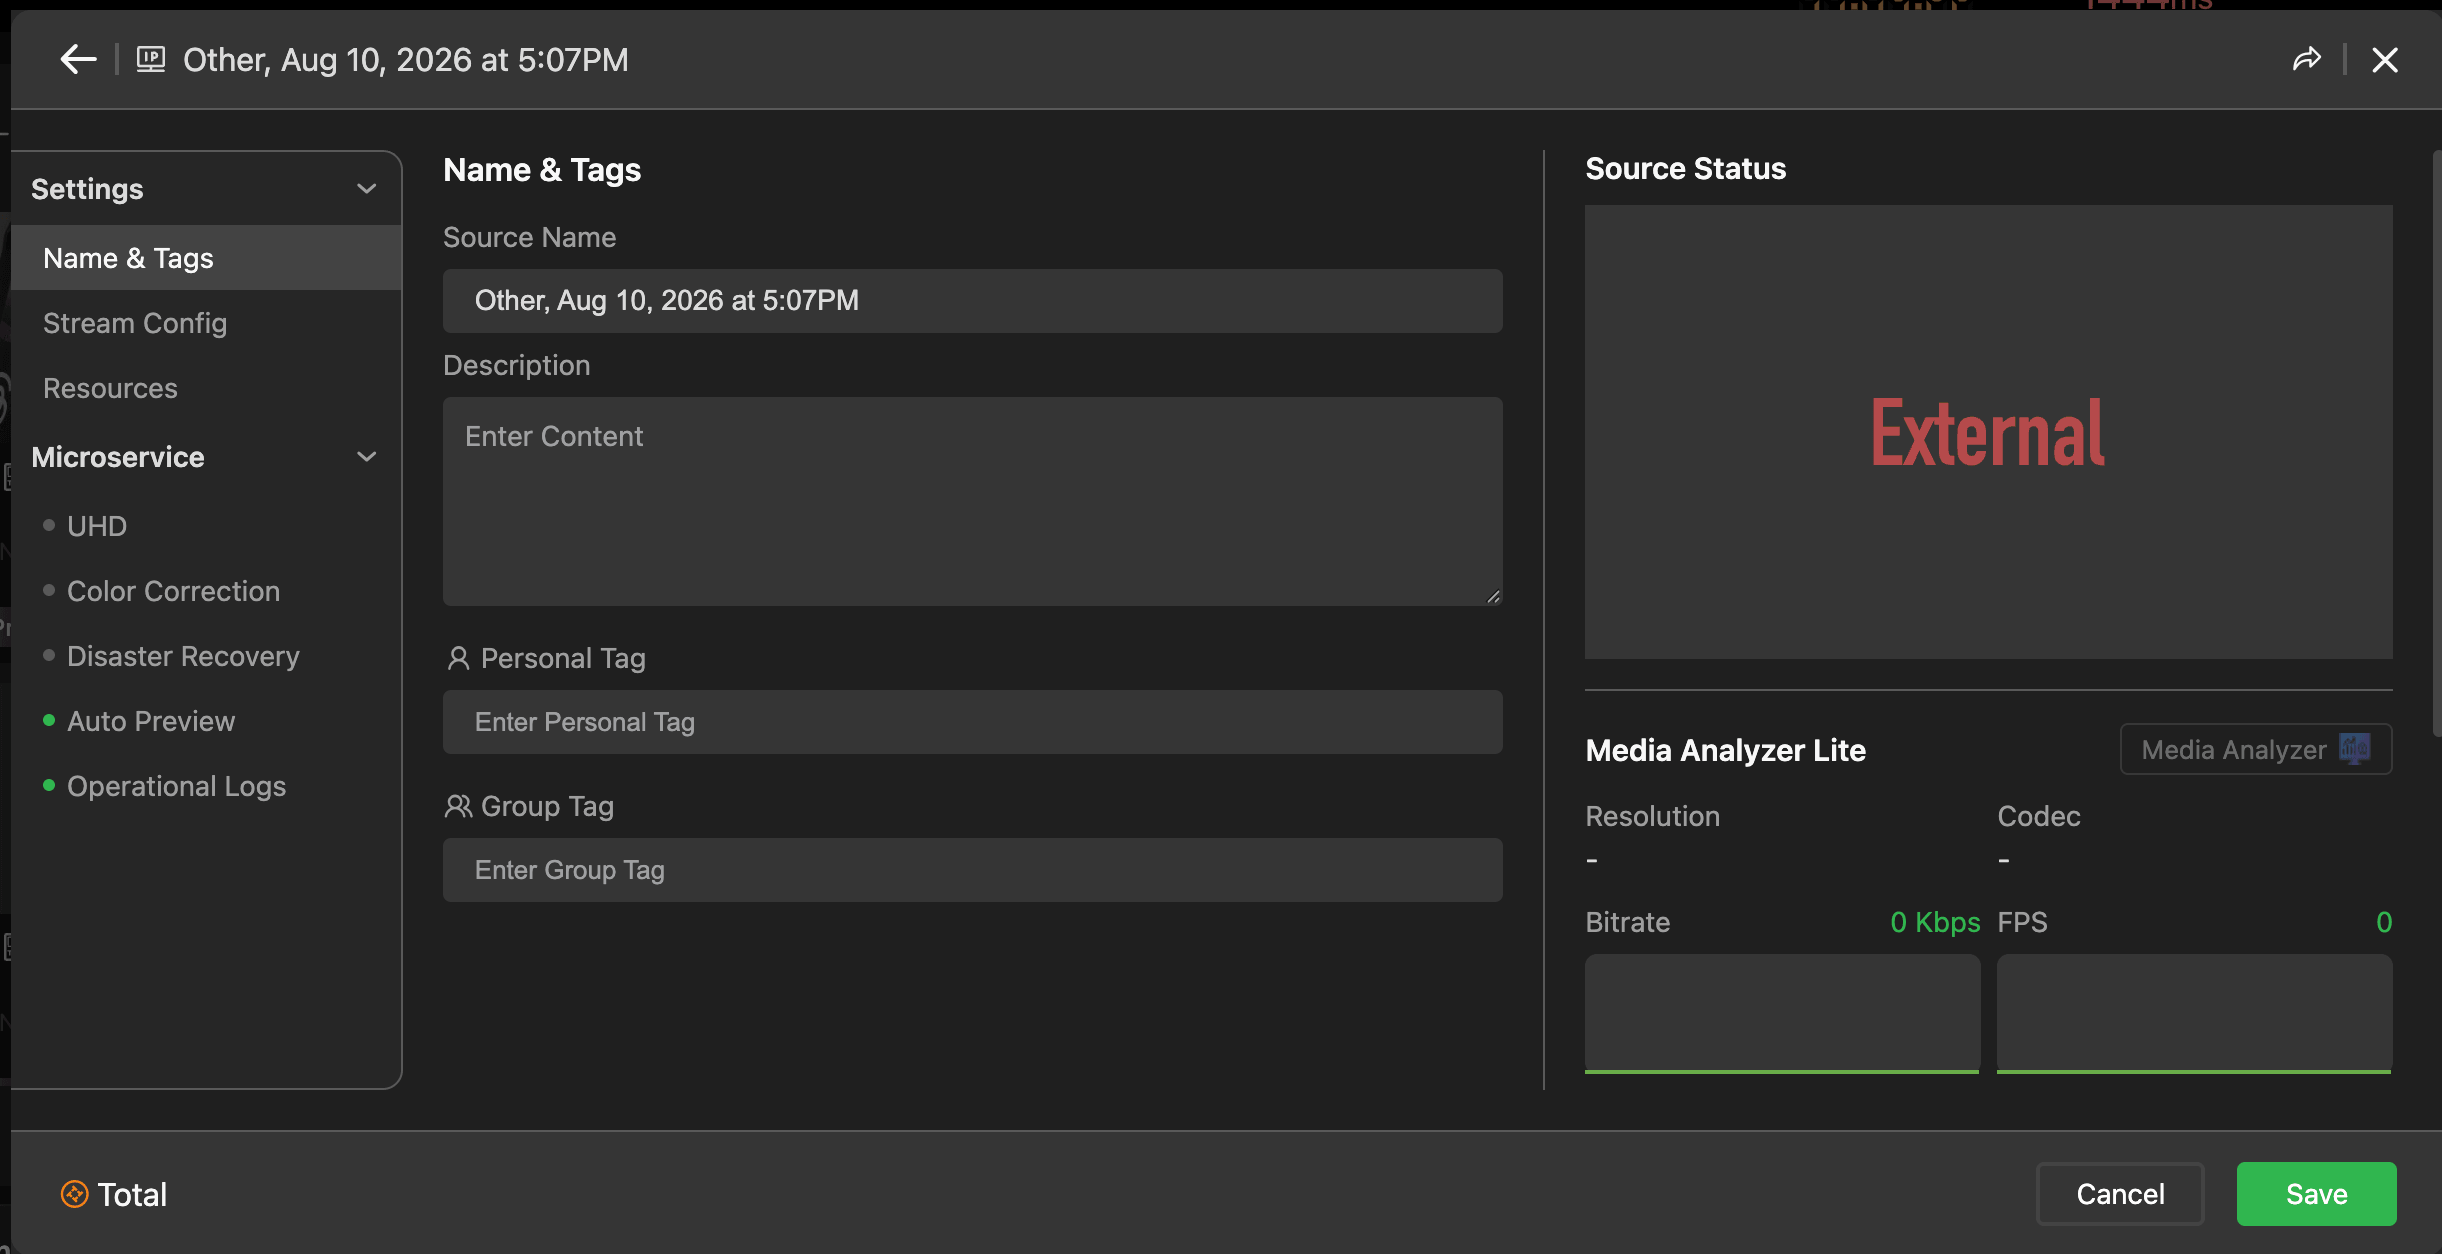
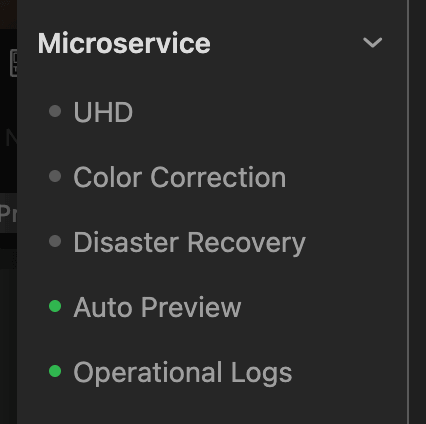
- Enable more microservices if applicable. The microservices shown will vary depending on the source type. The microservice settings shown are:
- UHD Toggle: An on/off switch to enable Ultra High Definition (4K) processing for the selected signal. UHD sources require additional resources if the input source’s resolution is higher than 1920×1080.
- Auto-Start Preview When Take Live: A toggle that, when enabled, automatically launches a real-time visual preview as soon as a source is “taken live” or routed.
- Color Correction: To adjust video color in YUV color correction.
- Disaster Recovery: Set and cut backup source when a low bitrate source or black frame is detected. Refer to “Configuring Disaster Recovery and Failover.”
- Operation log: Records user operations.
- Click the Resources tab to select TVU Hosted resource from the Resources menu and Server location from the drop-down menu.
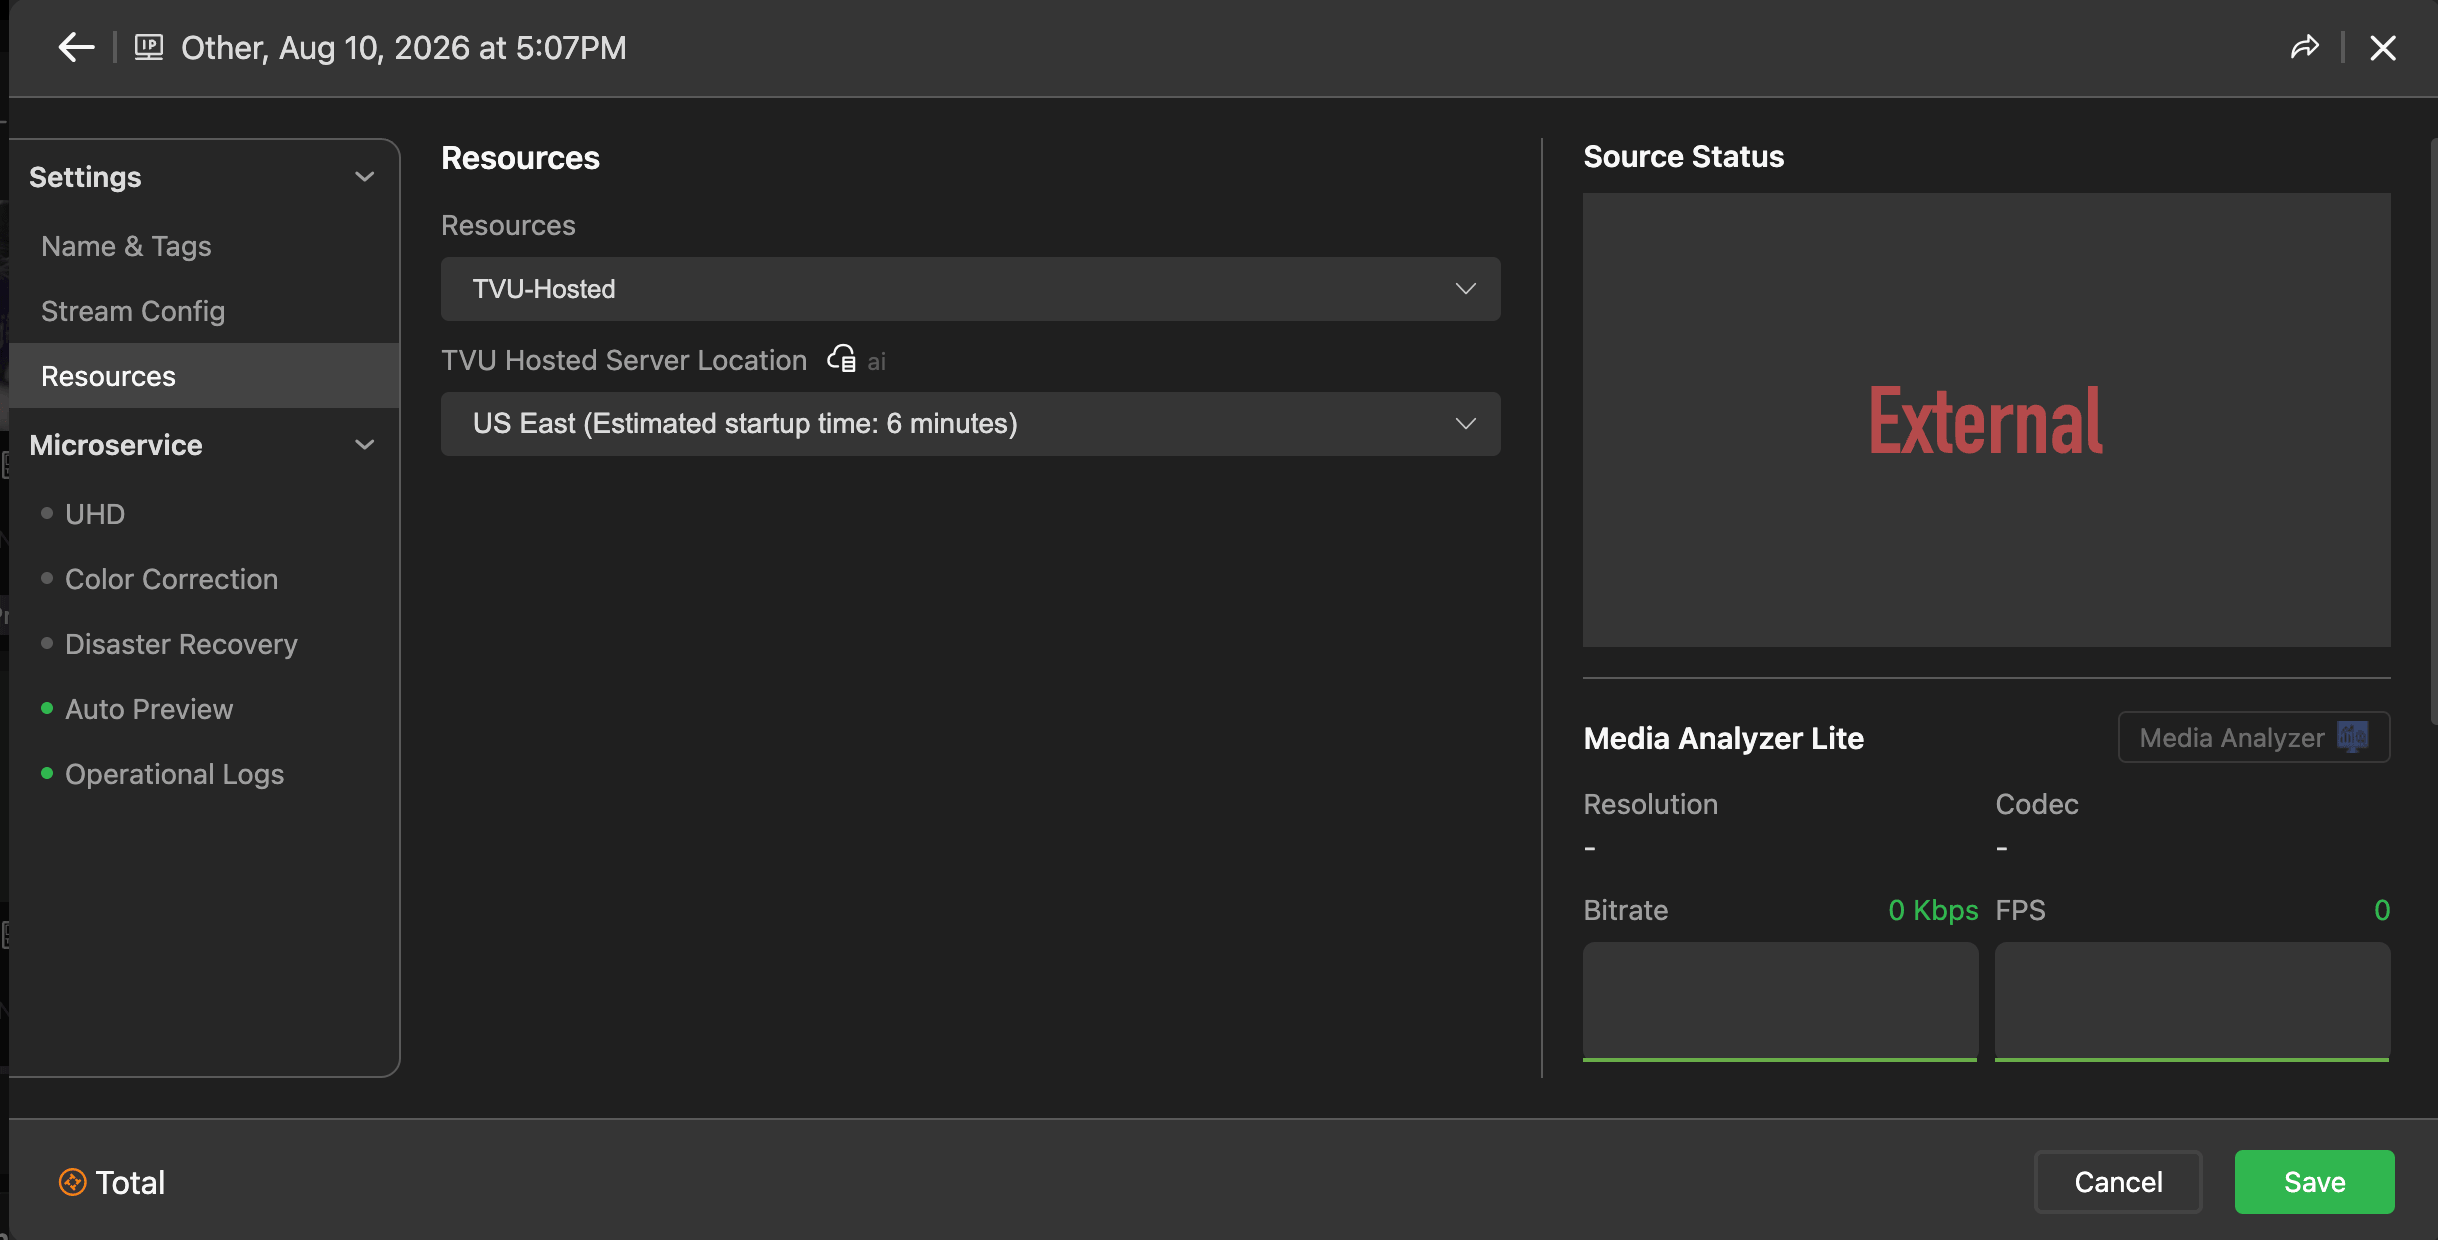
- Click Save. The source will appear as a new box in your Source panel.
Adding SRT Caller/Listener sources
In TVU MediaHub, configuring an SRT (Secure Reliable Transport) source requires choosing between Caller or Listener mode to establish the handshake between the sender and the receiver. This supports up to 10 independent receiver SRT destination endpoints from a single listener output, each negotiating its own latency and packet recovery buffer.
SRT Mode configurations:
- Listener Mode: MediaHub acts as the “server” and waits for an external device (the caller) to initiate the connection.
- Caller Mode: MediaHub proactively reaches out to the IP address and port of a remote device that is set to “Listen”.
- Click + Source in the Source panel.
- The Source window opens.
- Expand the Source Type menu and select SRT Caller or Listener.
- The SRT configuration window opens.
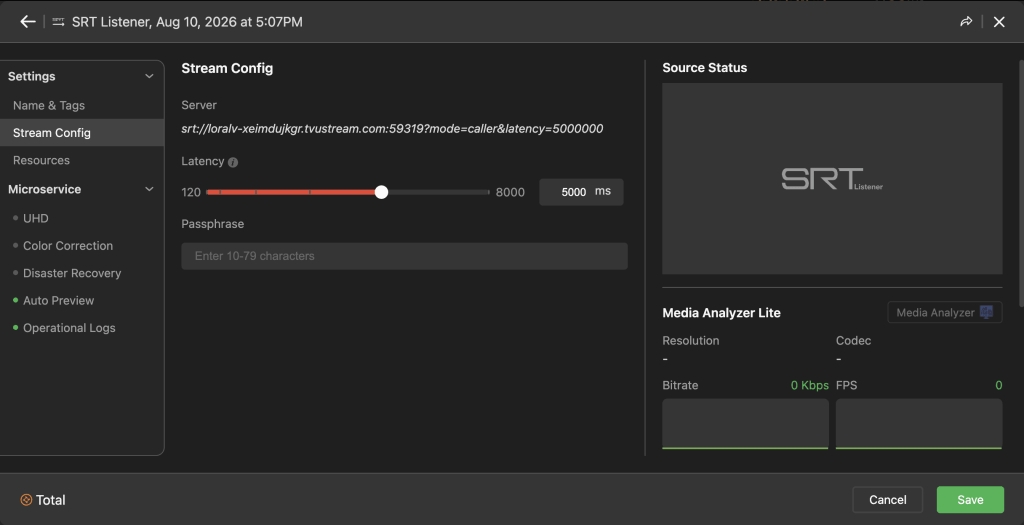
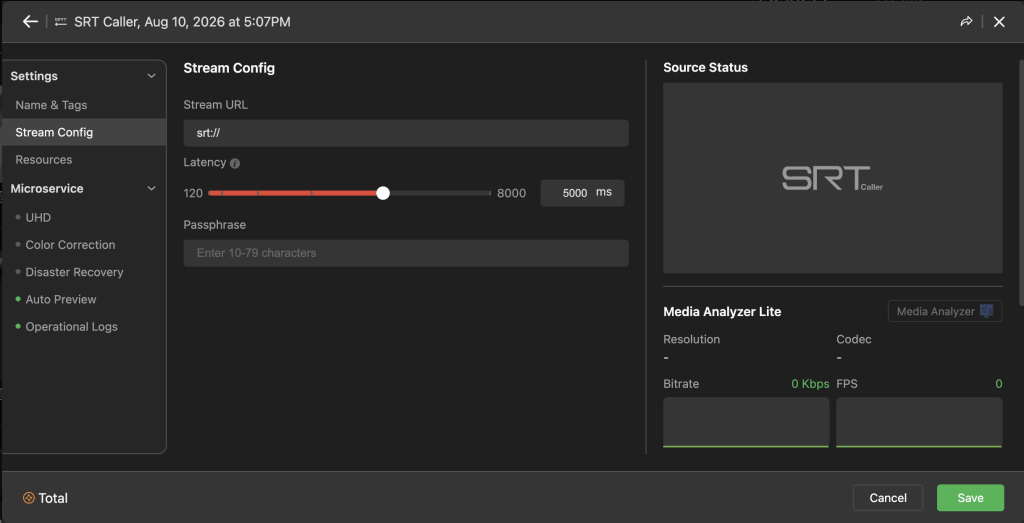
To configure SRT settings:
- Enter the Mode: Select either Caller or Listener based on your network architecture.
- IP Address: If in Caller mode, enter the public IP address of the remote device.
Note: If in Listener mode, this field is usually left blank or set to 0.0.0.0 to accept connections on any interface.
- Port Number: Enter the specific port (e.g., 9000) that both the sender and receiver have agreed to use.
- Latency: Specify the latency buffer (measured in microseconds). For stable internet, 1500ms to 3000ms is common to allow for packet retransmission.
- Passphrase: If encryption is required, enter a secure password. Ensure the remote sender uses the exact same passphrase and AES encryption strength (128, 192, or 256-bit).
- Stream ID: Some receivers require a unique Stream ID string to distinguish between multiple incoming SRT feeds on the same port.
- Click Name & Tags to enter the source name, description, and tags.
Customizing Other source parameters
Users can customize or change the parameters of RTMP Push, SRT Listener, NDI, and Zoom Meeting sources.
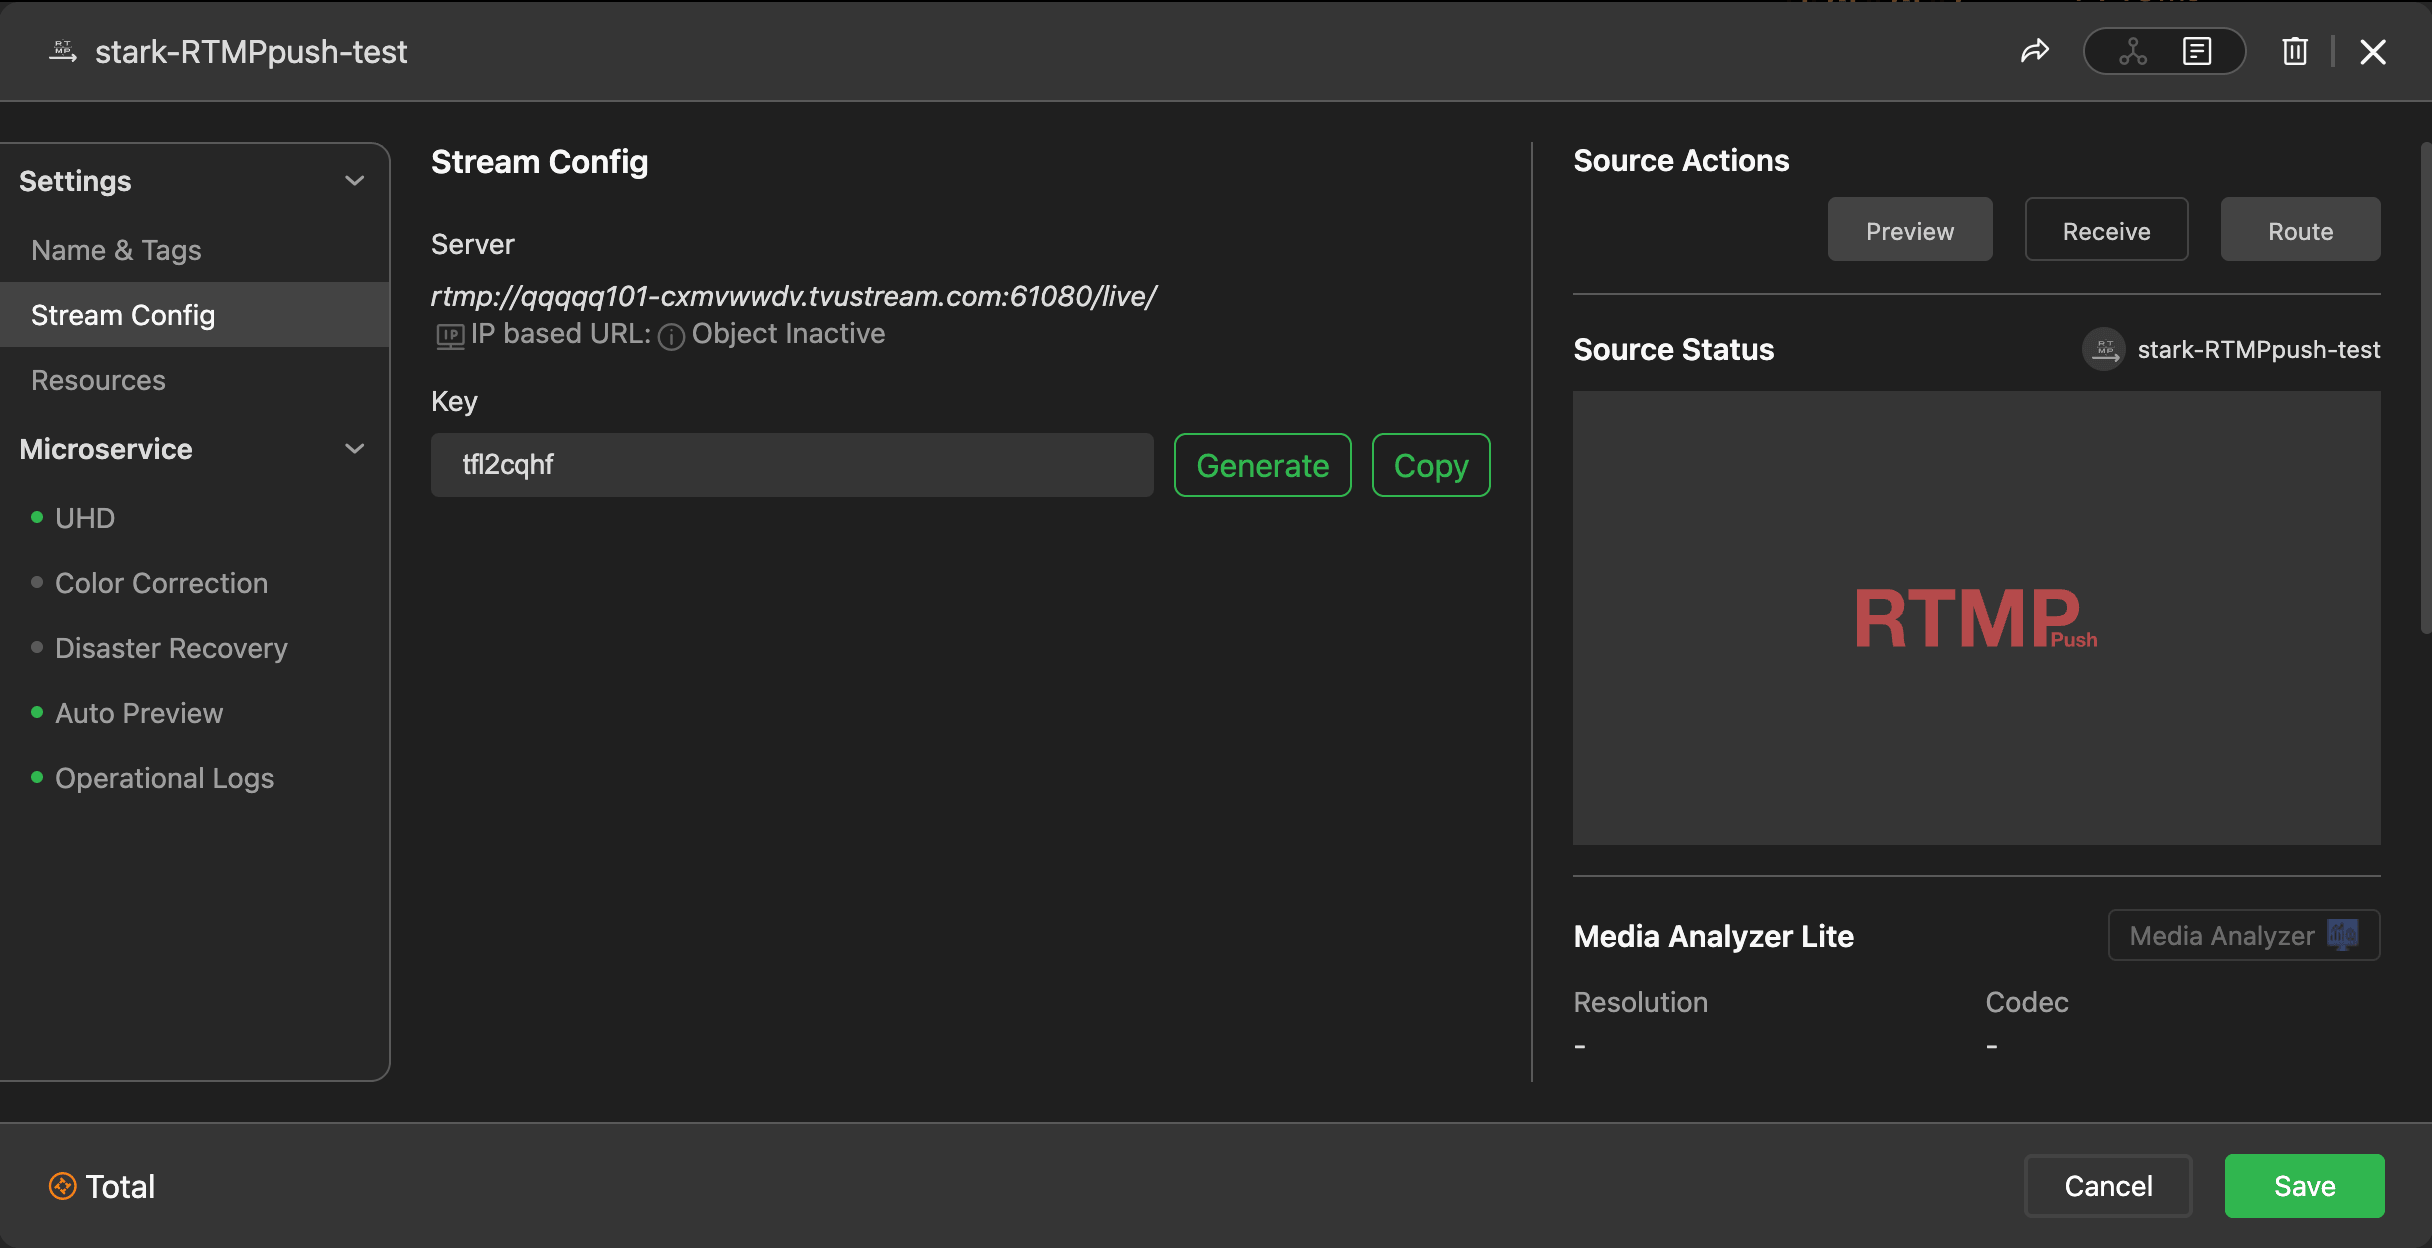
RTMP(S) Push
To change the parameters of an RTMP Push source:
- Click a RTMP(S) Source in the Source panel.
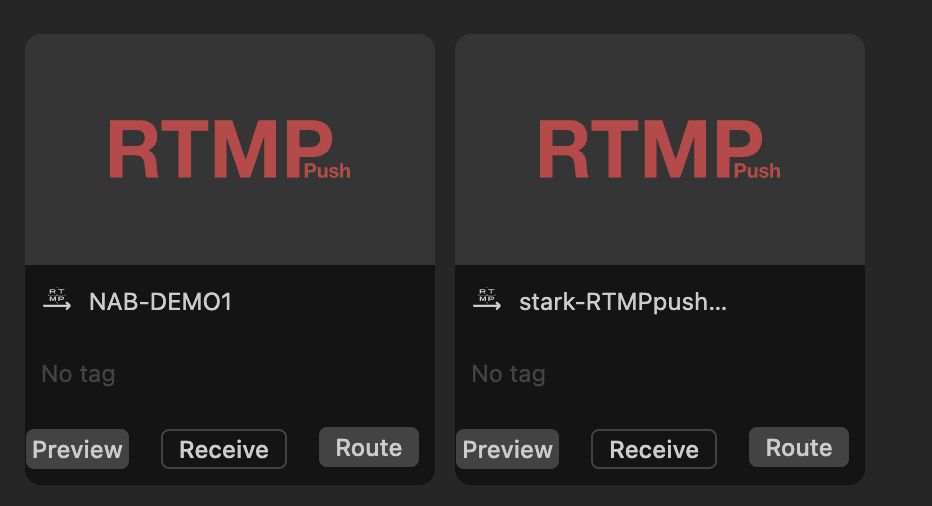
- Expand the Source Type menu and select RTMP(S) Push.
- The RTMP(S) source configuration page will open.
- Customize the applicable parameters and click Save.
SRT Caller/Listener
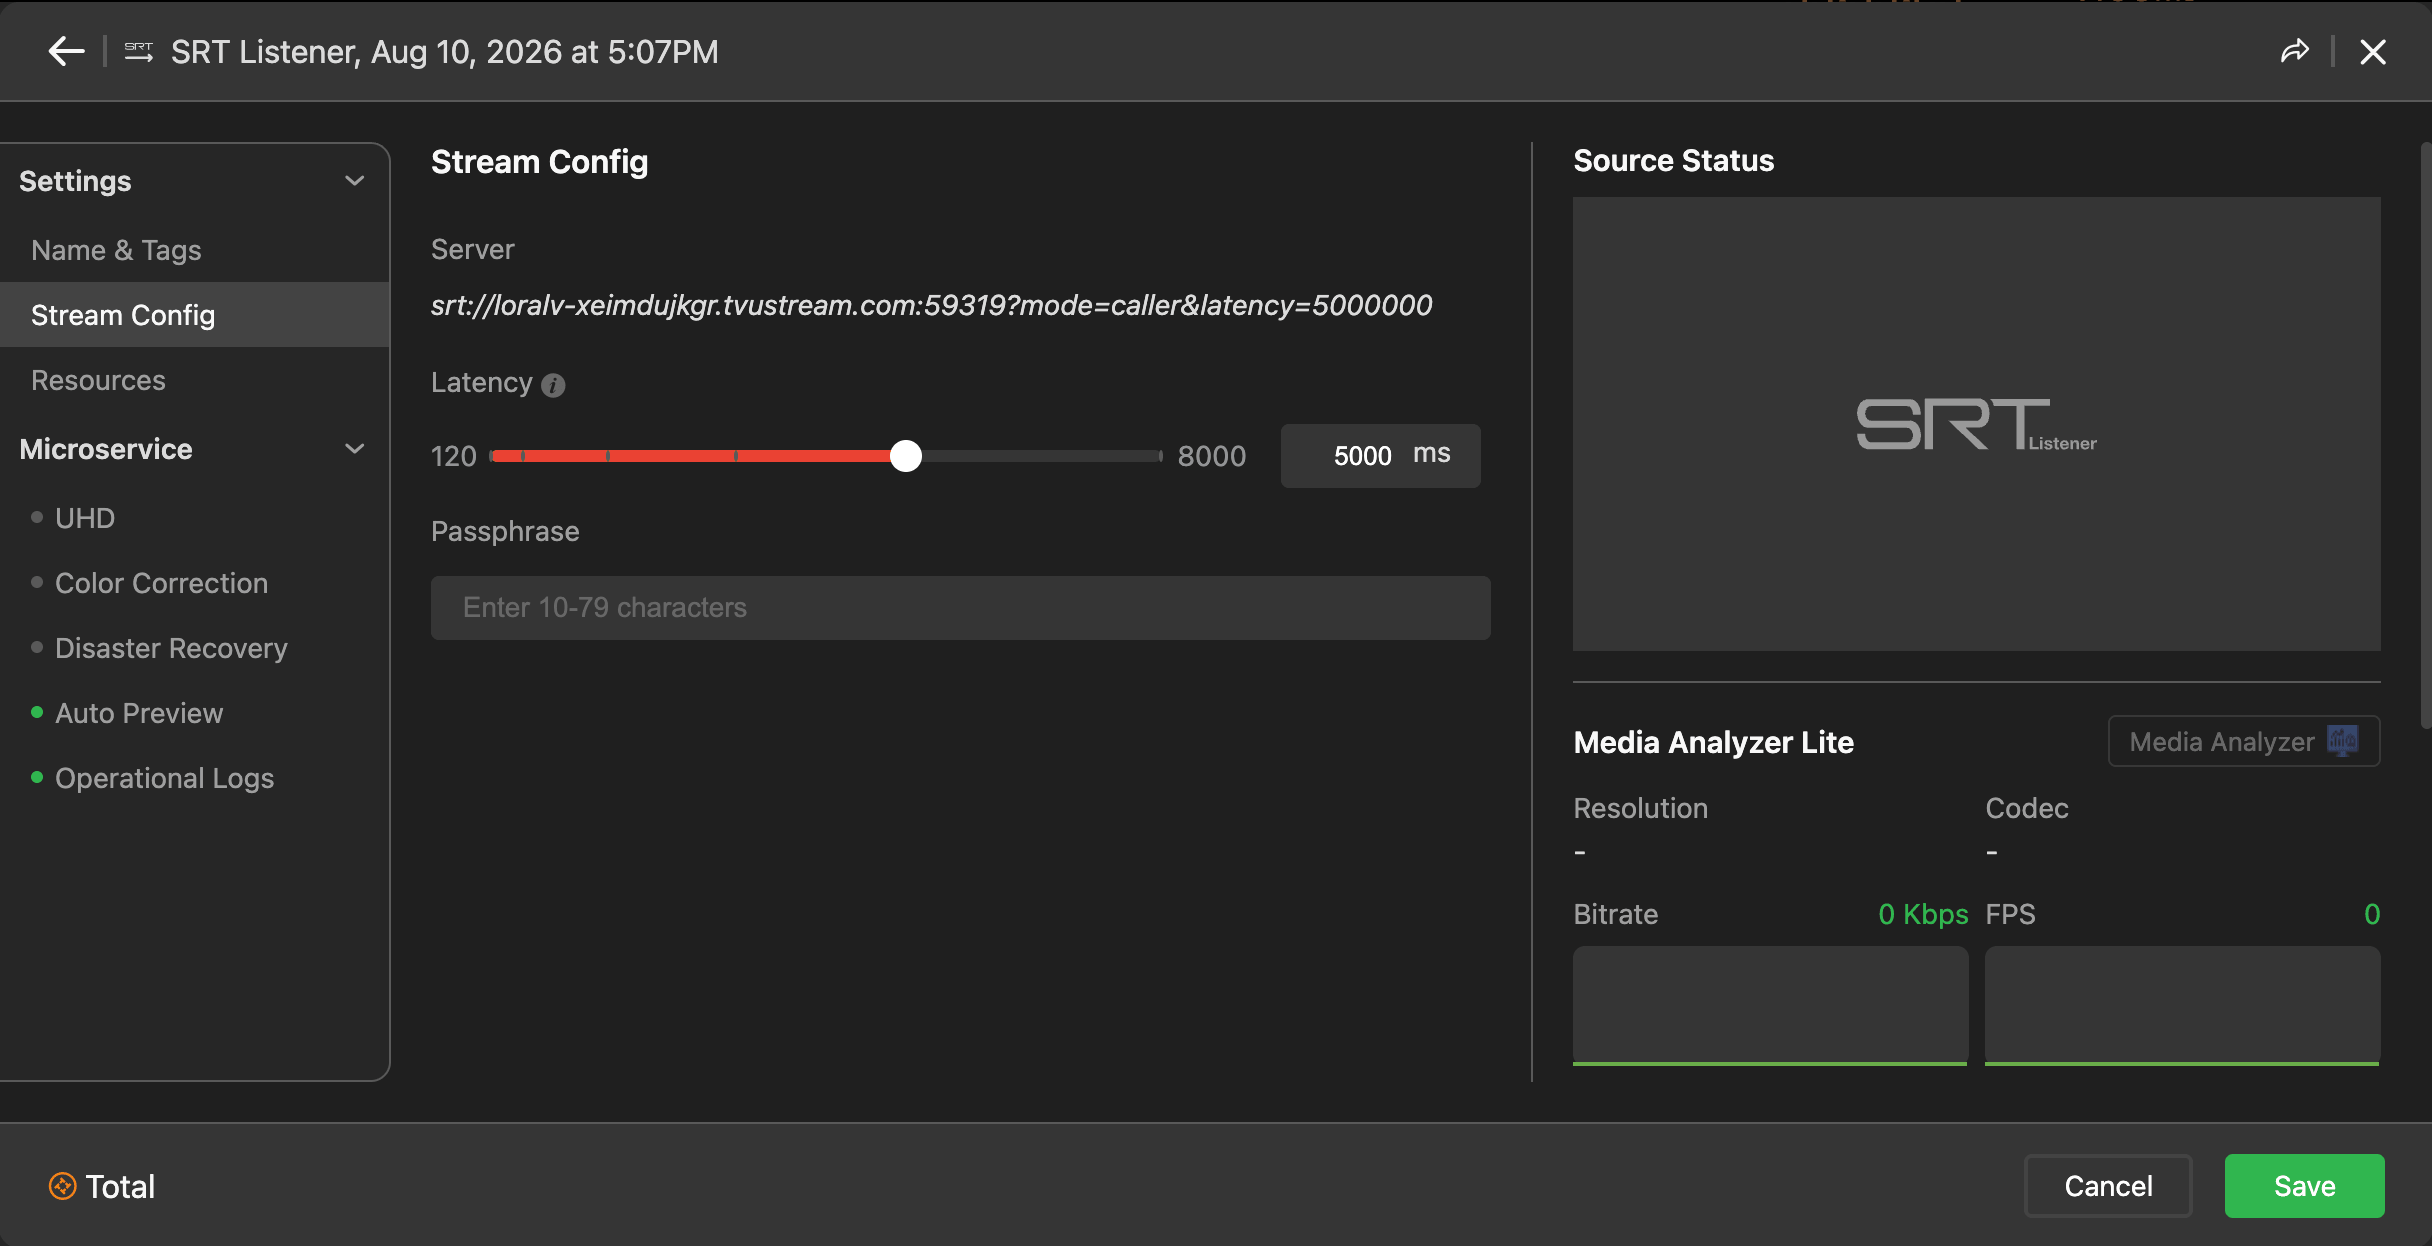
To change the parameters of an SRT Listener source:
- Click the SRT Listener or SRT Caller source in the Source panel.
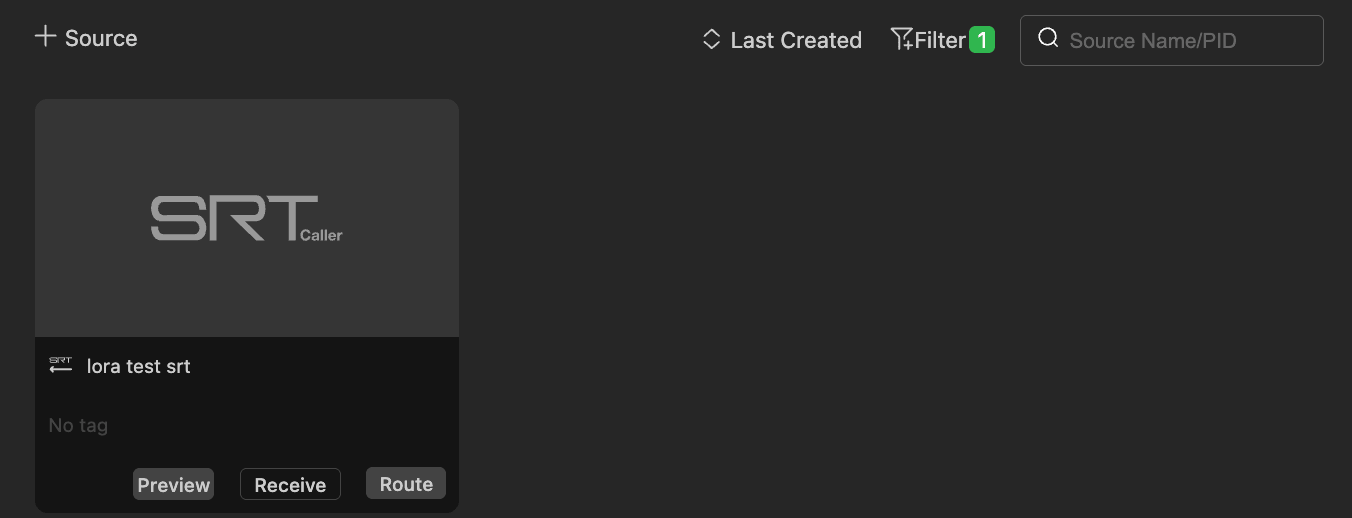
- The SRT source configuration page will open.
- Customize the applicable parameters and click Save.
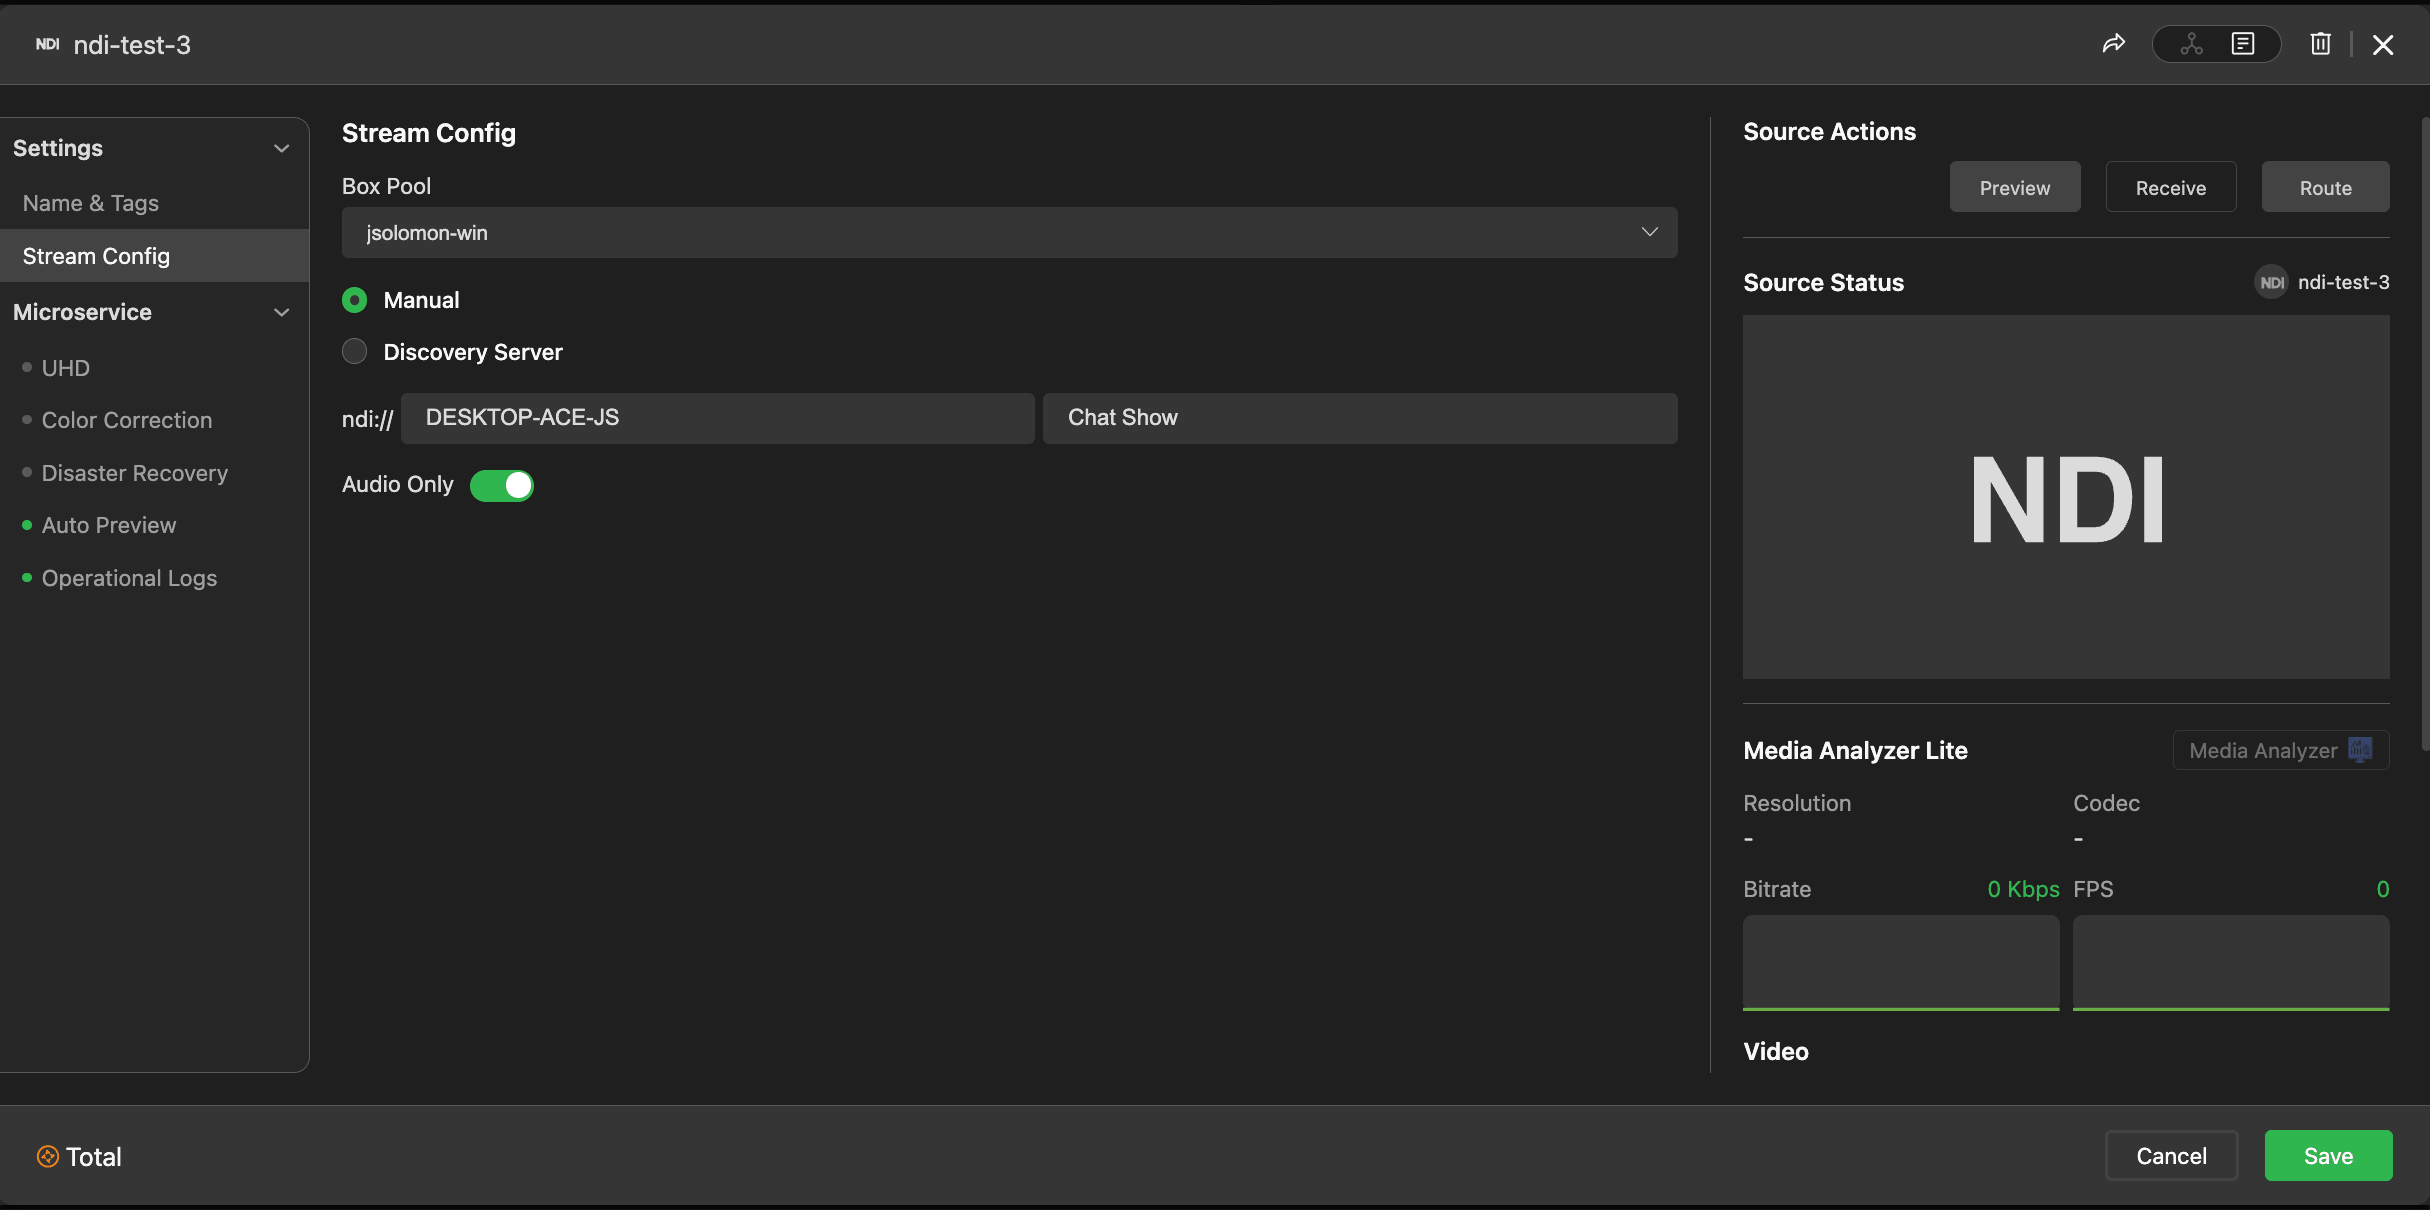
NDI
To change the parameters of an NDI source:
- Click an NDI Source in the Source panel.
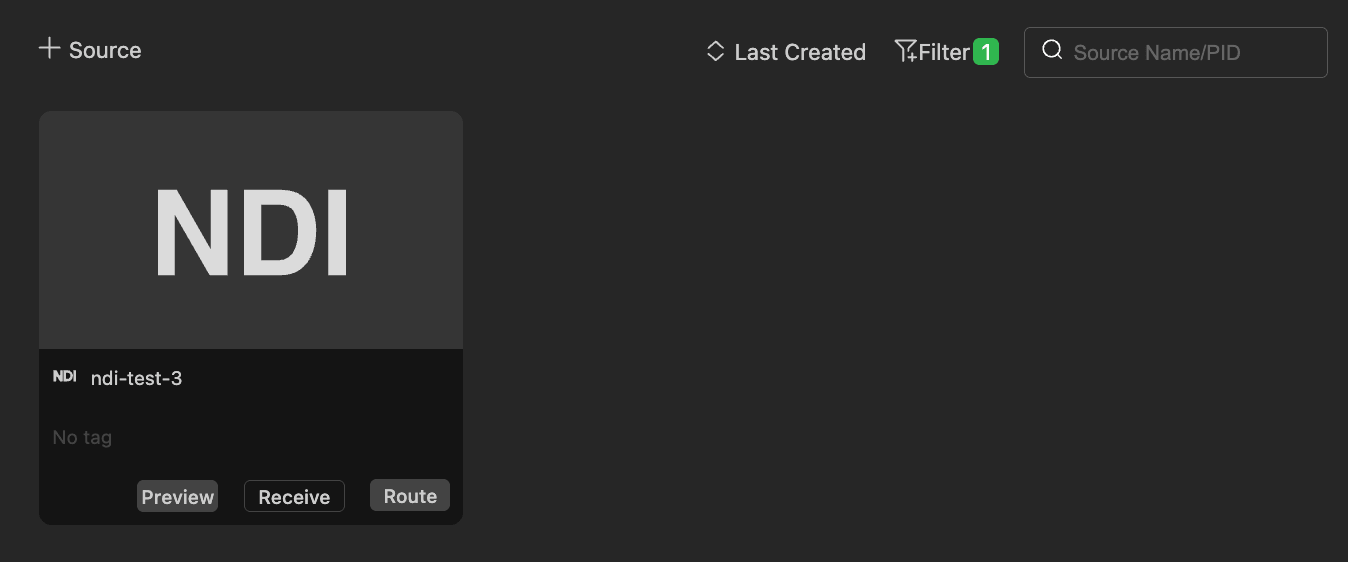
- The NDI source configuration page will open.
- Customize the applicable parameters and click Save.
Zoom Meeting
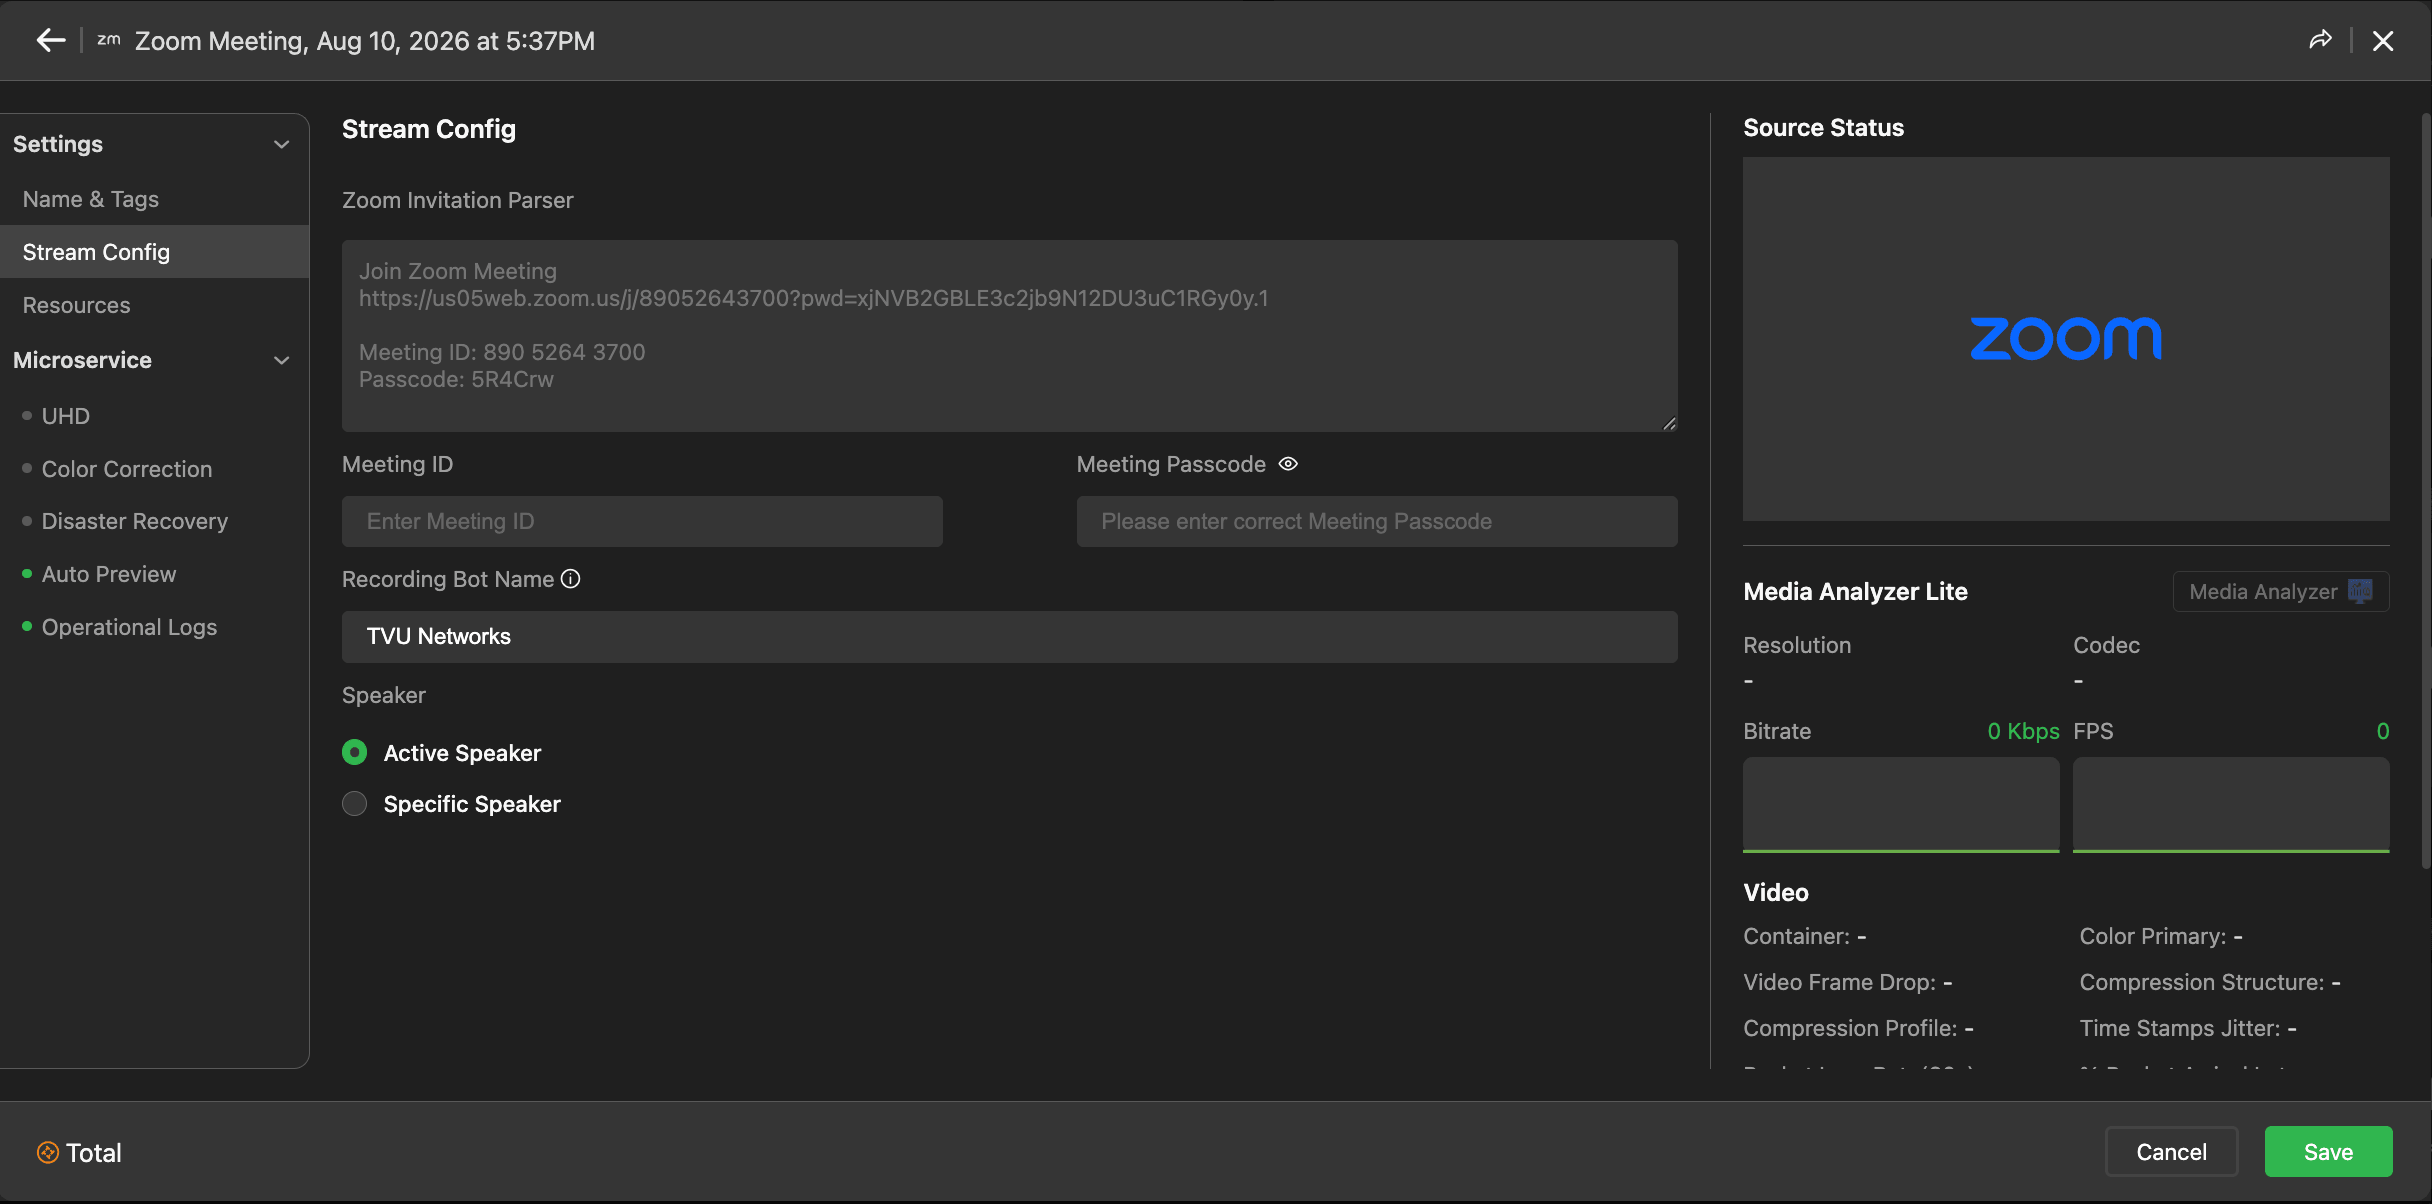
To change the parameters of a Zoom Meeting source:
- Click the Zoom in the Source panel.
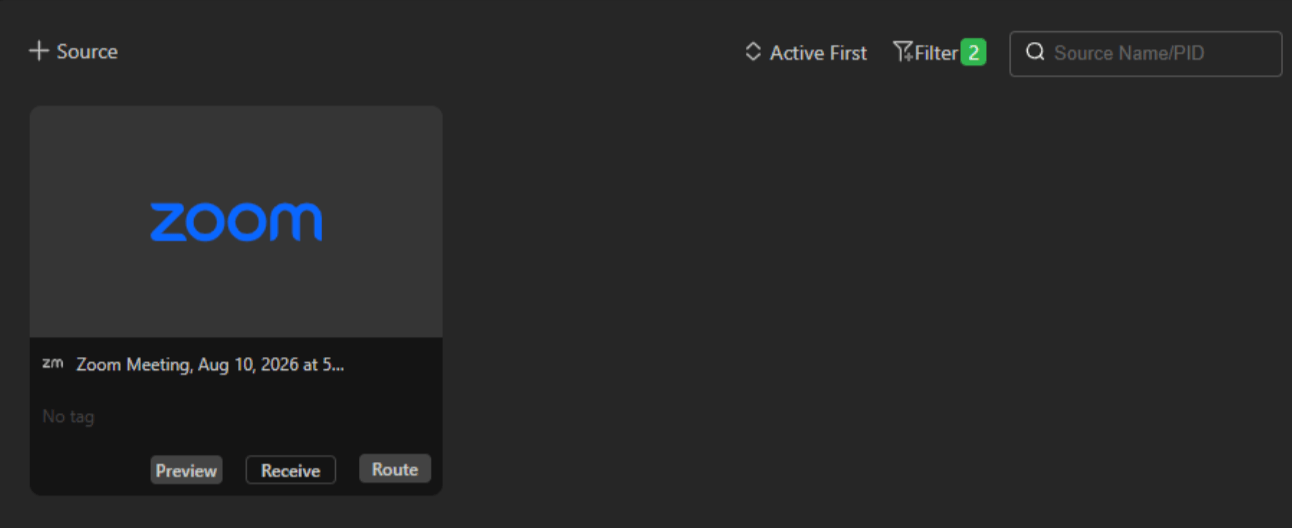
- The Zoom Meeting source configuration page will open.
- Customize the applicable parameters and click Save.
SDI Input source – Agent installation requirement
Select SDI to add an SDI Input source. This selection requires the Lightweight Agent installation to configure SDI input and output parameters.
Note: Contact TVU Support at support@tvunetworks.com if you need assistance with your TVU Agent installation and configuration.
The SDI Input source does not require TVU hardware to enable your devices’ SDI input or output. The Agent is a software component installed on your local server or TVU Transceiver that registers its physical I/O ports (SDI/BNC) with the MediaHub cloud.
Once the Agent is active, all physical inputs and outputs connected to that “box” appear as routable nodes in the MediaHub Source and Destination panels.
Agent installation
The TVU Agent is a lightweight software module used across all TVU SaaS products, including MediaHub and MediaMesh. TVU Agent is further explained in “TVU Agent installation.”
Self-Hosted deployment
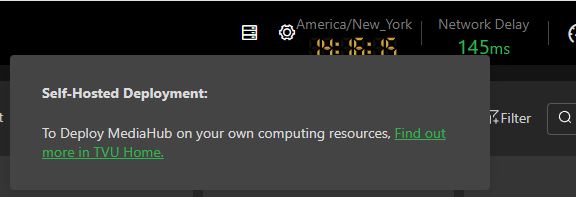
To deploy MediaHub on your own computing resources:
Click the Box Pool icon, then the green Find out more in TVU Home to open TVU Home.
Advanced Configuration – Self-hosted Static IP assignments and requests
Static IP assignments are region-specific (opt-ins) and can only be requested by Group Admins. Contact support for more information.
To assign a requested Static IP:
- Expand the Advanced Configuration panel and select Self Hosted from the Resources drop-down menu.
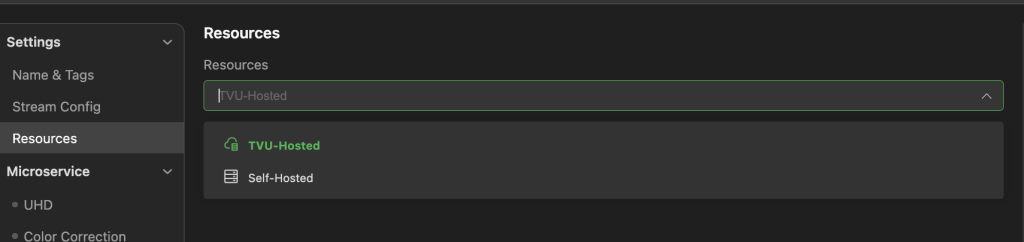
- Click TVU Home.
- You will be redirected to the TVU Home Manage page.
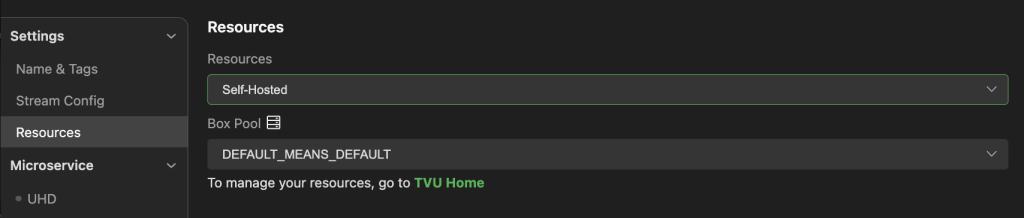
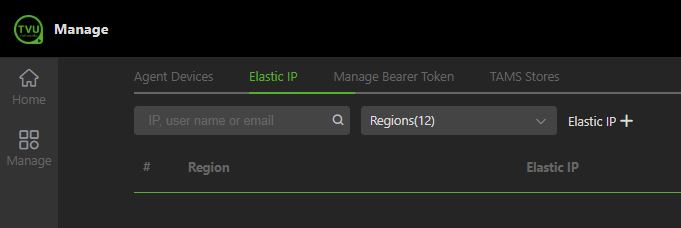
- Click the Elastic IP tab.
- A list of available Static IPs that you have previously requested will appear as selections.
- If no recent Static IPs are listed, Admins can request one by clicking Elastic IP +.
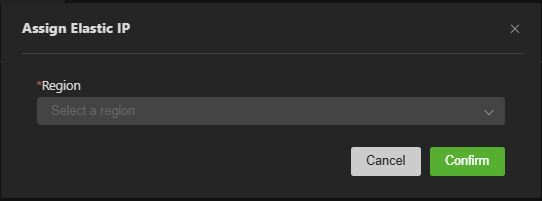
- The Assign Elastic IP window will display. Select a Region and click the Confirm button.
- The Assigned Elastic IP will display in the list.
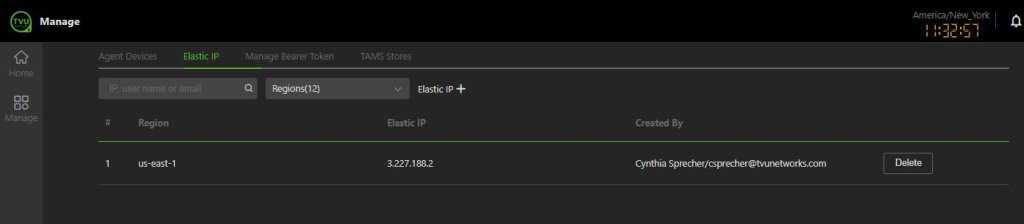
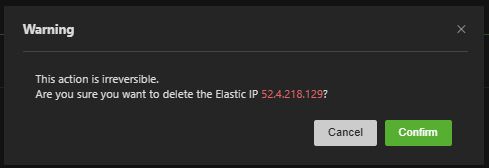
- To delete a Elastic IP, click the Delete button. The warning message appears.
- Click Confirm.
Agent Box Pool management
In TVU MediaHub, the Agent Box Pool (also referred to as the TVU Agent or MediaHub Agent) serves as the bridge between your on-premises hardware and the cloud-native routing interface. This management system allows you to treat local physical SDI or IP resources as if they were part of a unified, global cloud pool.
To manage your Agent Box Pool:
- Click the Setting icon in the top navigation.
- The Default Resource Management pop-up window will display.
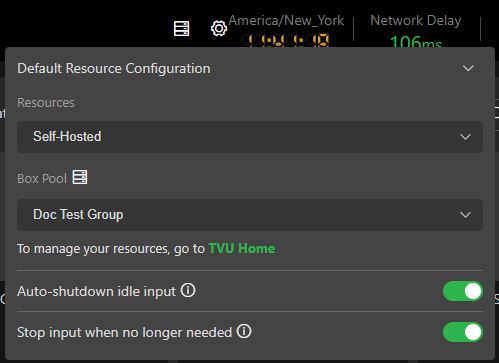
- Click the Resources drop-down menu and select Self-Hosted.
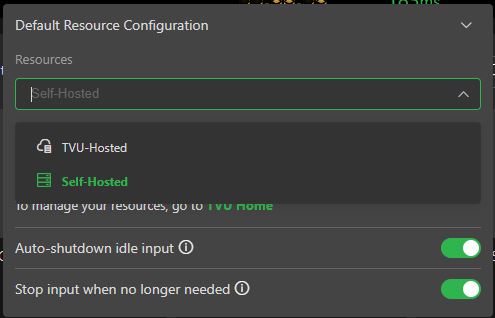
- To manage your resources, click the green TVU Home link.
Adding and Operating a VoIP Contributor Source
Users can ingest standalone VoIP contributors via connected agent hardware (optimized for USB dual-preamp audio interfaces).
To add two-way VoIP / IFB contributors as dedicated objects in MediaHub:
- Connect Audio Interface: Attach a supported USB audio interface (e.g., ART USB Dual Pre) to the TVU Agent device.
- Add a VoIP Source:
- Navigate to Sources > + Source > VoIP source.
- Click Name & Tags and enter a Source Name.
- Click Stream Config and select the Box Pool and the specific Physical Box/Agent.
- Click Save.
- Start the Live Connection:
- Click Connect / Start Live.
- Monitor the connection status and volume directly from the VoIP source card.
Adding an SDI input
To add an SDI Input source:
- Click + Source in the Source panel.
- The Source window opens.
- Expand the Source Type menu and select SDI.
- The SDI configuration window will display.
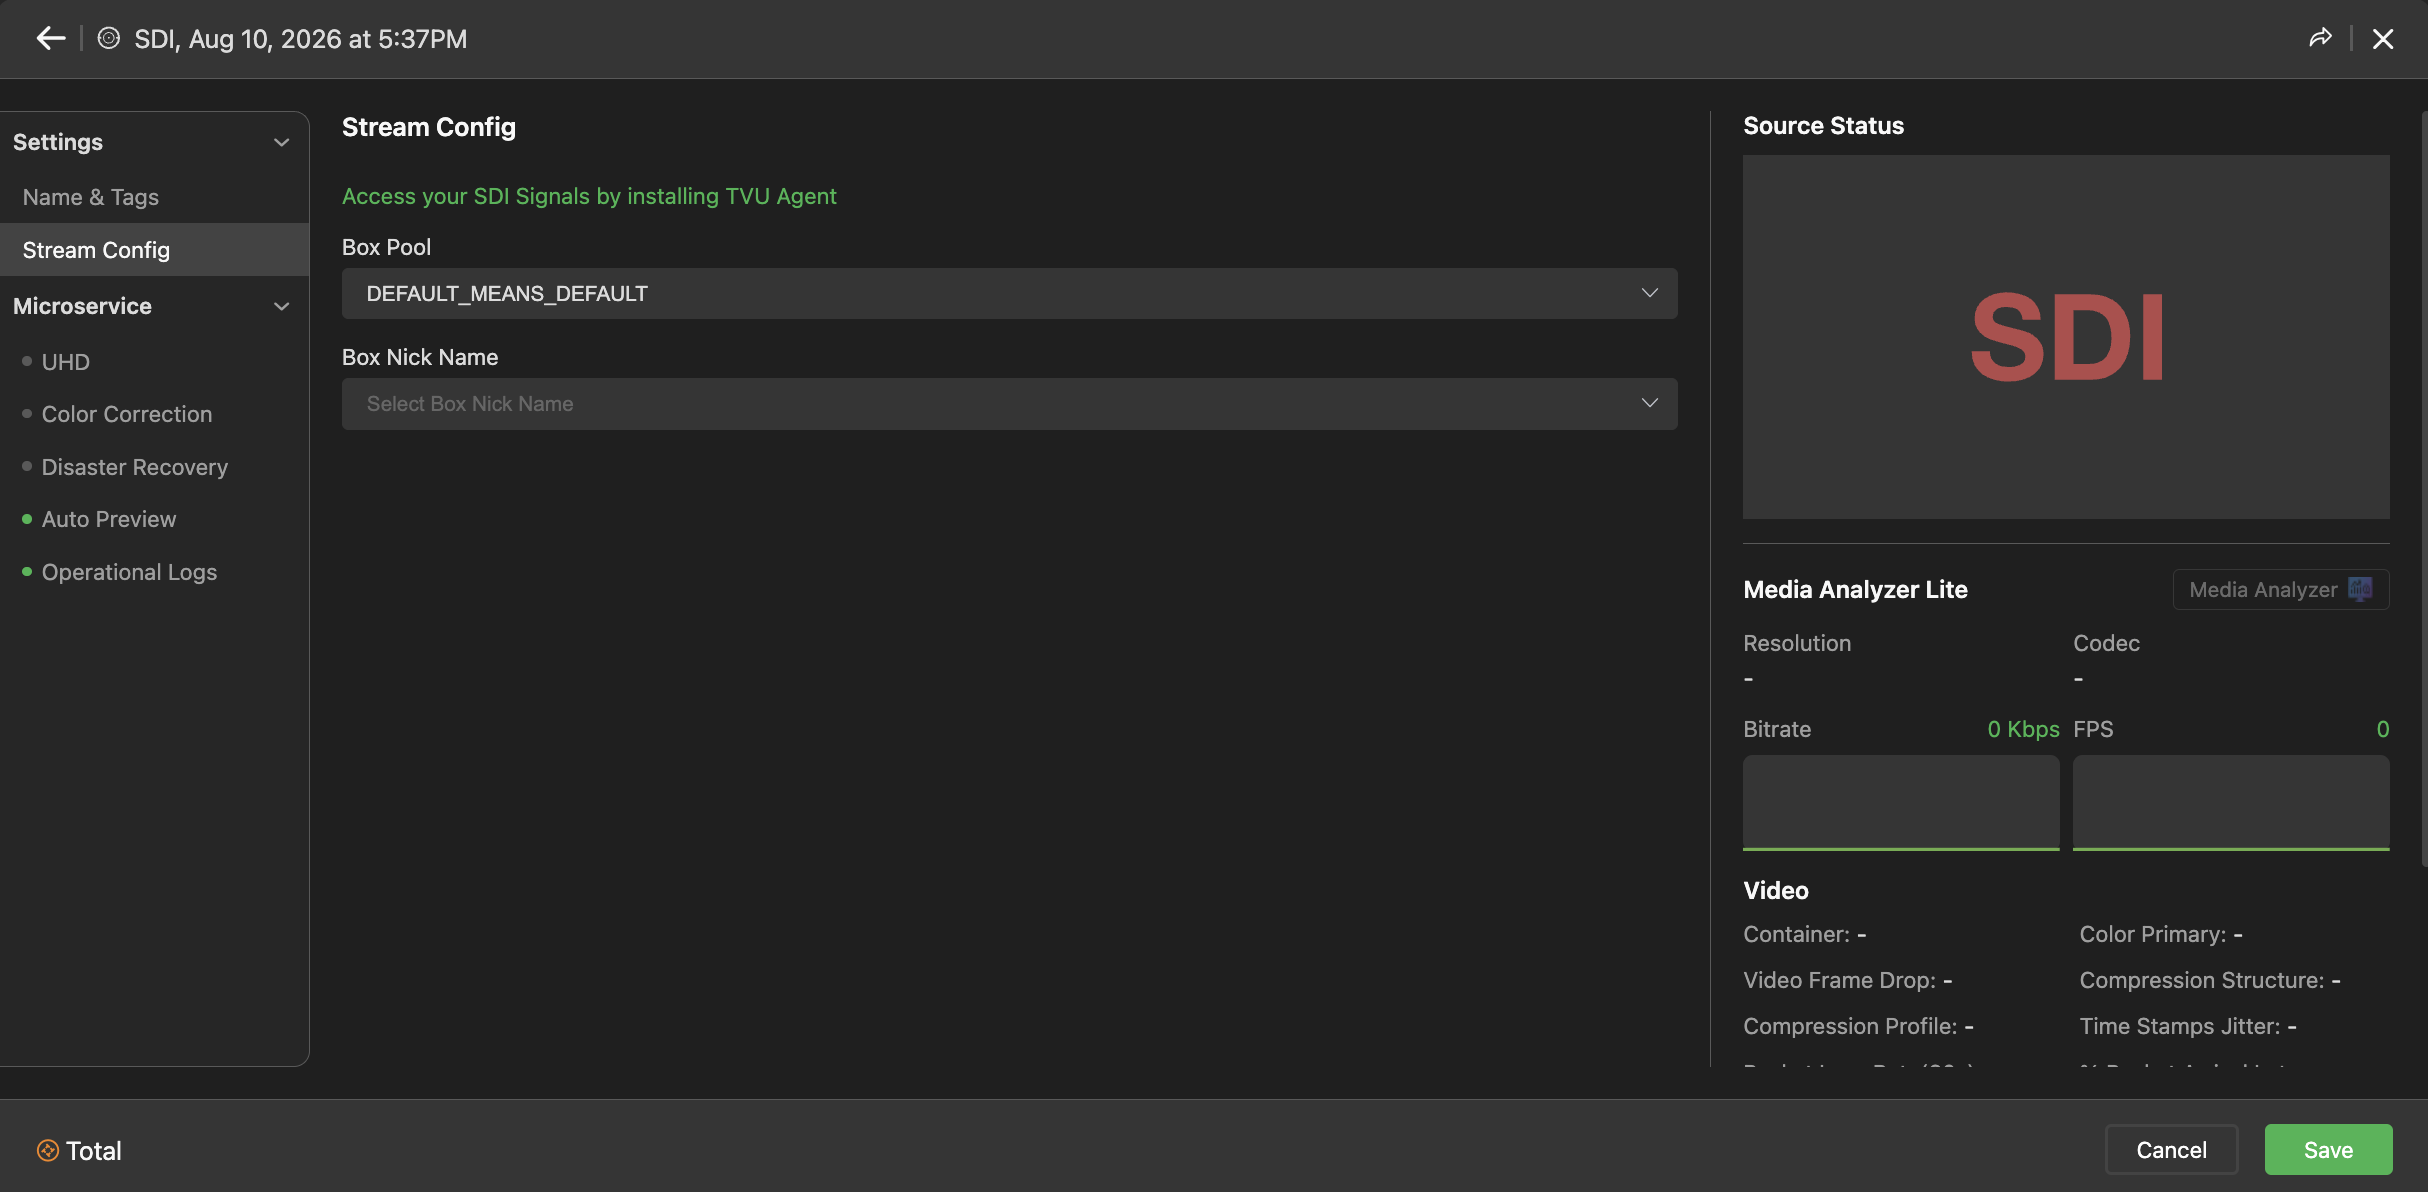
- Click the Box Pool drop-down menu and select a preconfigured Box Pool. If you don’t have a preconfigured Box Pool selection, you can create one in TVU Home.
- Click the Access your SDI Signals by installing Agent link.
- Click the description field at the top of the window.
- Click Name & Tags to enter a source name, description, and tags to your source.
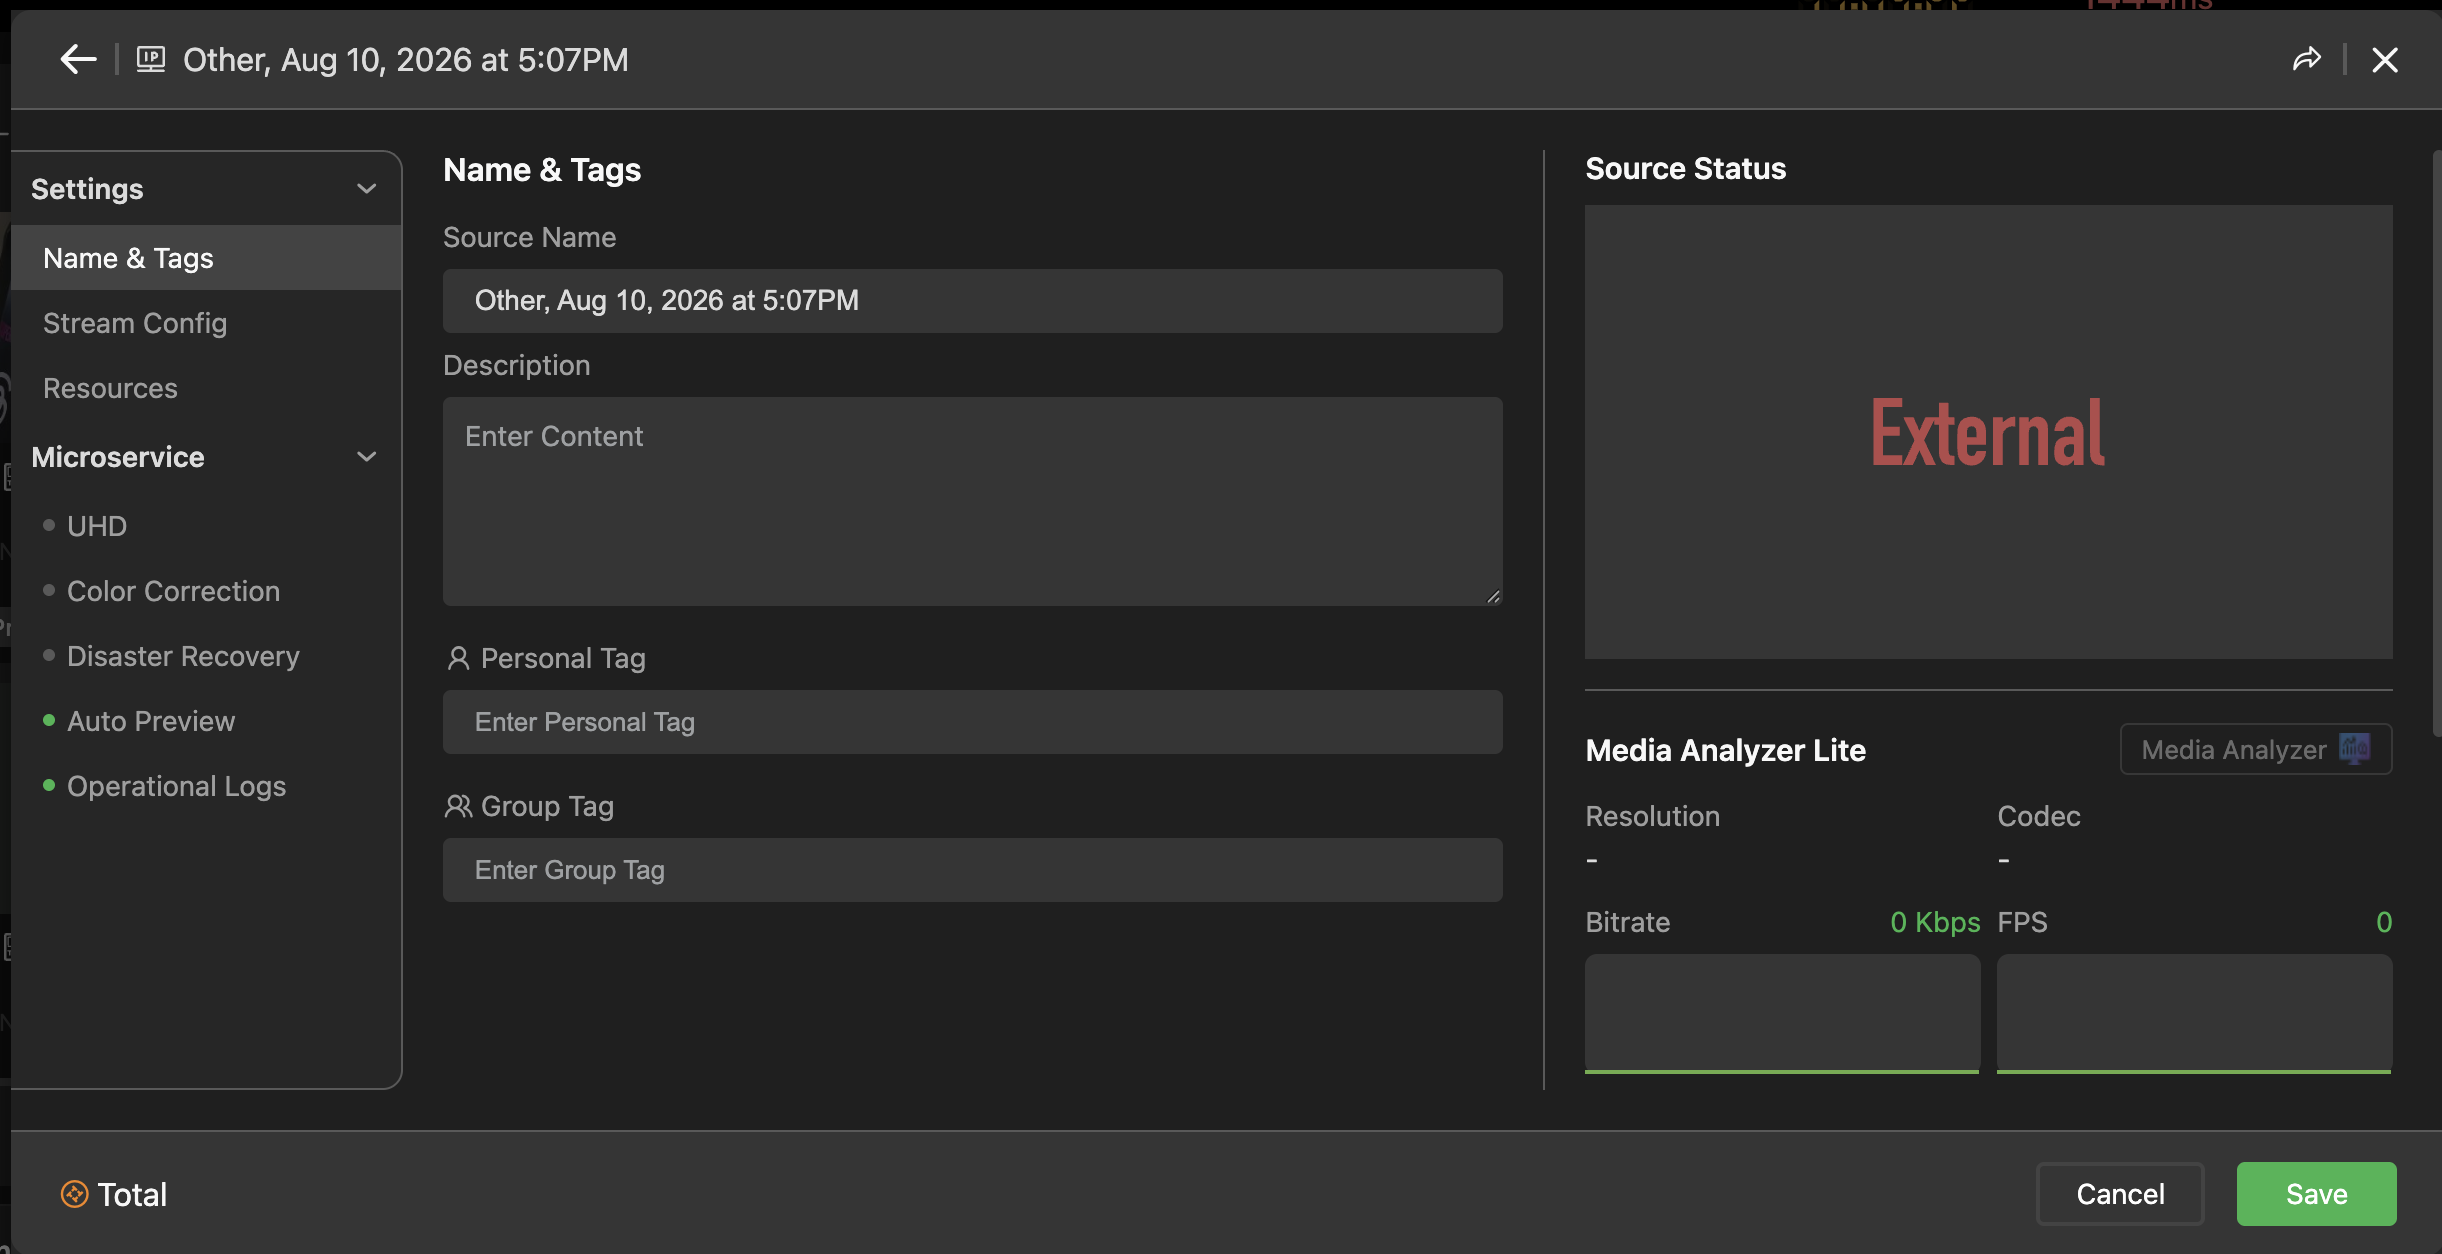
- Enable more Microservices if applicable. The microservices shown will vary depending on the source type. The microservice settings shown are:
- Enable more microservices if applicable. The microservices shown will vary depending on the source type. The microservice settings shown are:
- UHD Toggle: An on/off switch to enable Ultra High Definition (4K) processing for the selected signal. UHD sources require additional resources if the input source’s resolution is higher than 1920×1080.
- Auto-Start Preview When Take Live: A toggle that, when enabled, automatically launches a real-time visual preview as soon as a source is “taken live” or routed.
- Color Correction: To adjust video color in YUV color correction.
- Disaster Recovery: Set and cut backup source when a low bitrate source or black frame is detected. Refer to “Configuring Disaster Recovery and Failover.”
- Operation log: Records user operations
- Click Save.
Color correction feature (opt-in)
TVU MediaHub Color Correction is a paid microservice within the platform’s advanced video processing toolset. It lets you adjust the color of any IP or SDI source in real time using YUV controls, helping the signal meet professional broadcast standards.
Color Correction is applied per source from the source’s Microservice settings. Because it is an opt-in (paid) feature, contact TVU Support to enable it for your account.
To enable and use Color Correction:
- In the Source panel, click a source to open its configuration drawer.
- In the left menu, open the Microservice section and turn on Color Correction (the indicator turns green when the service is active).
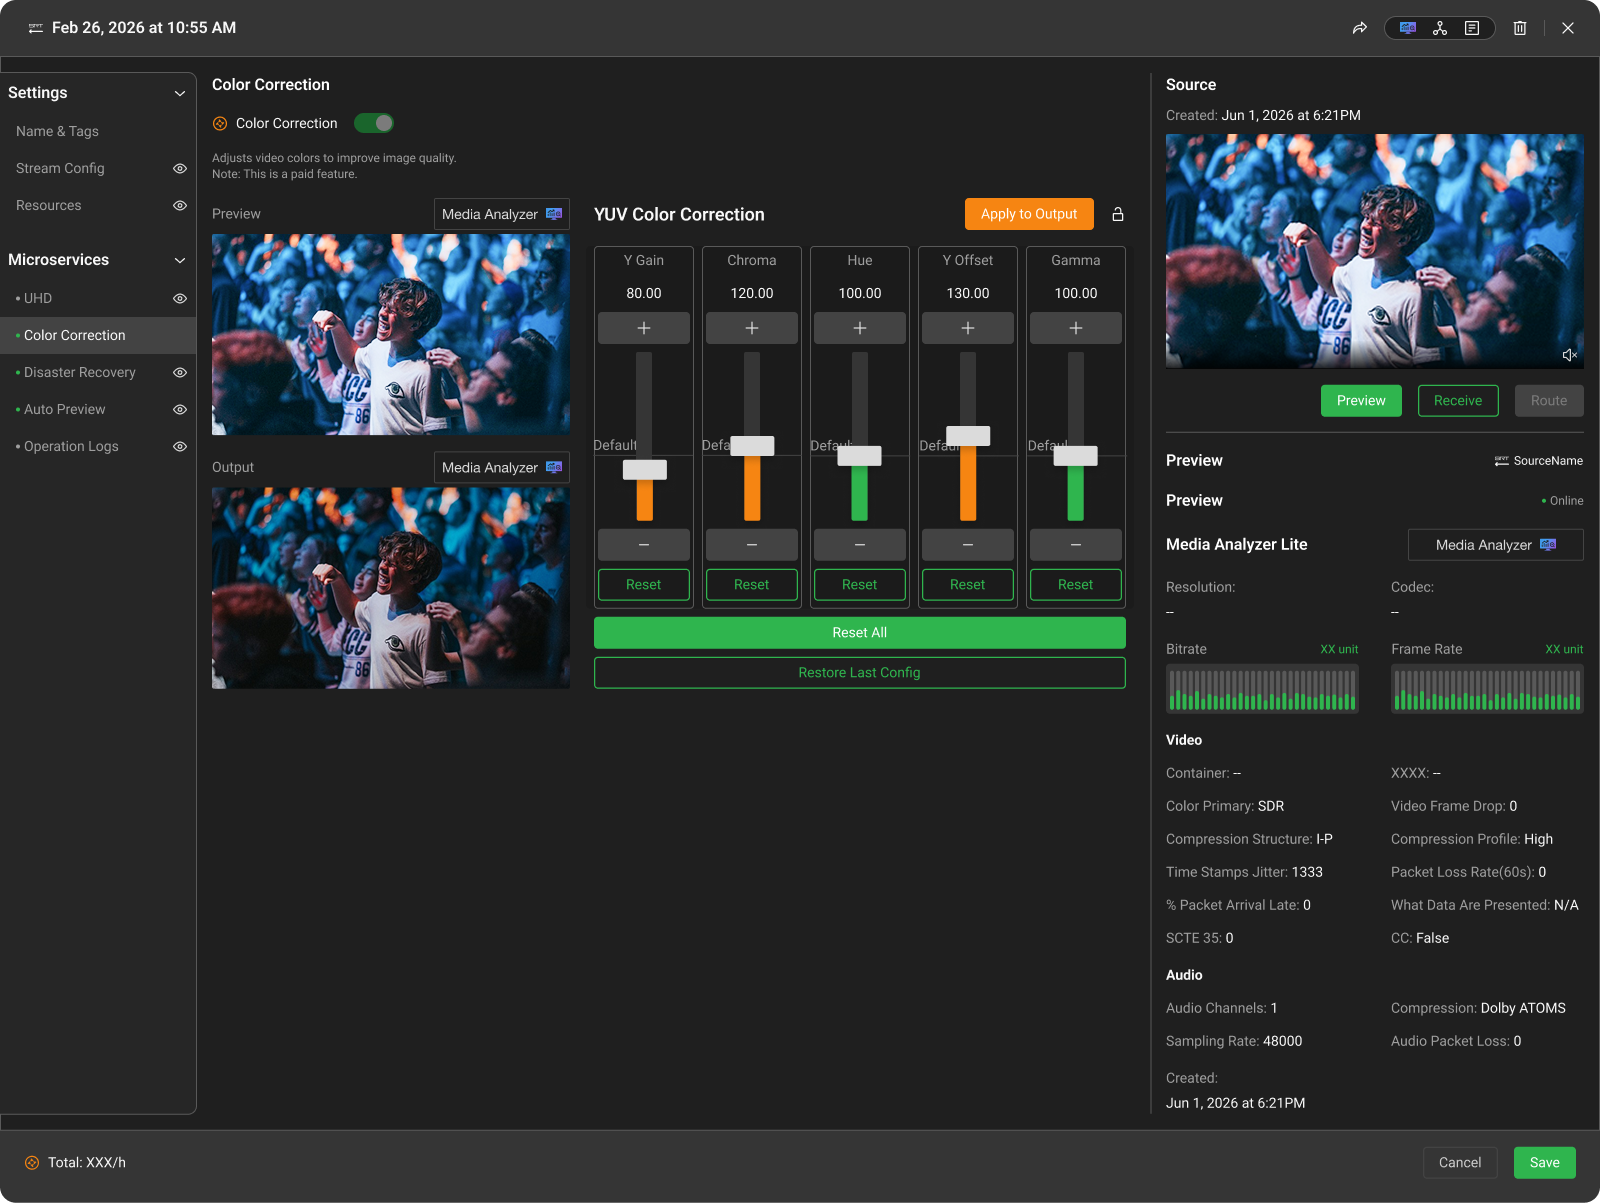
- In the Color Correction panel, use the side-by-side Preview (input) and Output views to compare the image before and after correction. Each view has a Media Analyzer button for detailed signal inspection.
- Turn on Apply to Output, then adjust the YUV Color Correction sliders — Y Gain, Chroma, Hue, Y Offset, and Gamma — with the +/− steppers. Each slider shows its default value and can be reset individually.
- Click Reset All to return every slider to its default, or Restore Last Config to reapply your previous settings.
MediaHub Output Destinations
After adding sources to the Source panel, users must create new output destination types in the MediaHub Destination panel. Users can then select, drag, and drop their sources into a destination block. MediaHub destination blocks can contain multiple simultaneous outputs. Each output can be pre-configured with its encoding profile and destination.
Creating a new output destination
To create a new MediaHub output destination:
- Click the + Add a Destination in the right panel or + Destination at the top of the panel.
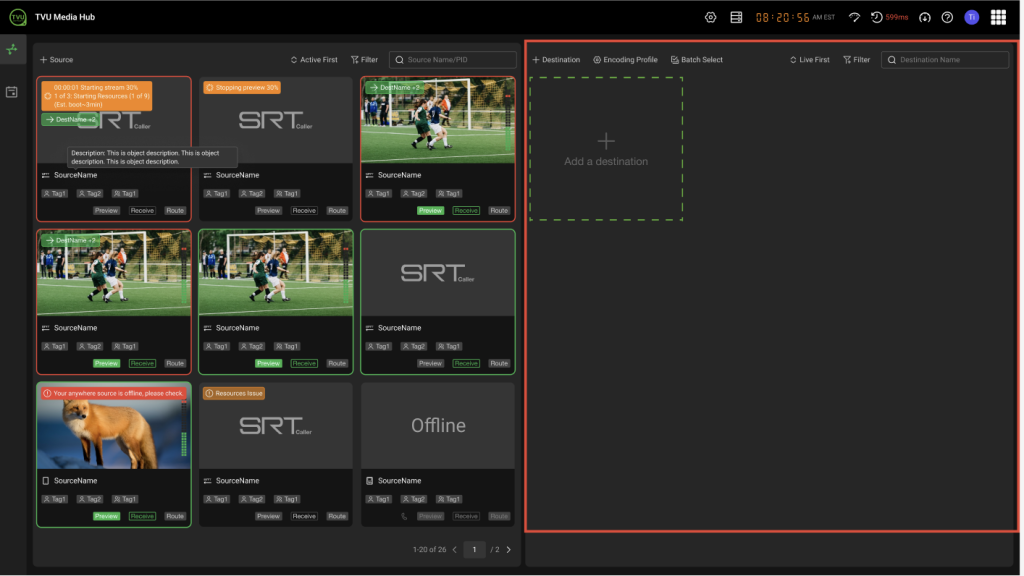
- The Destination window opens.
- Select a Destination type from the drop-down menu.
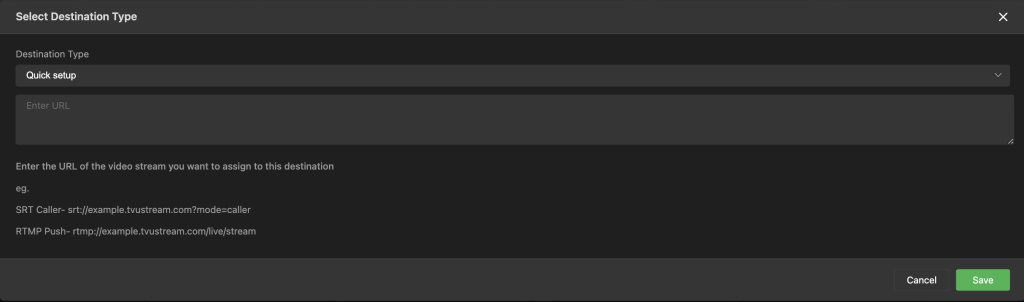
- The Destination configuration window opens.
- Click the Name & Tags tab to Rename your Destination.
- Configure your remaining Destination type information in the left panel.
- The Encoding Profile is set to Default. If you want to create a new Encoding Profile, refer to “Creating a customized encoding profile.”
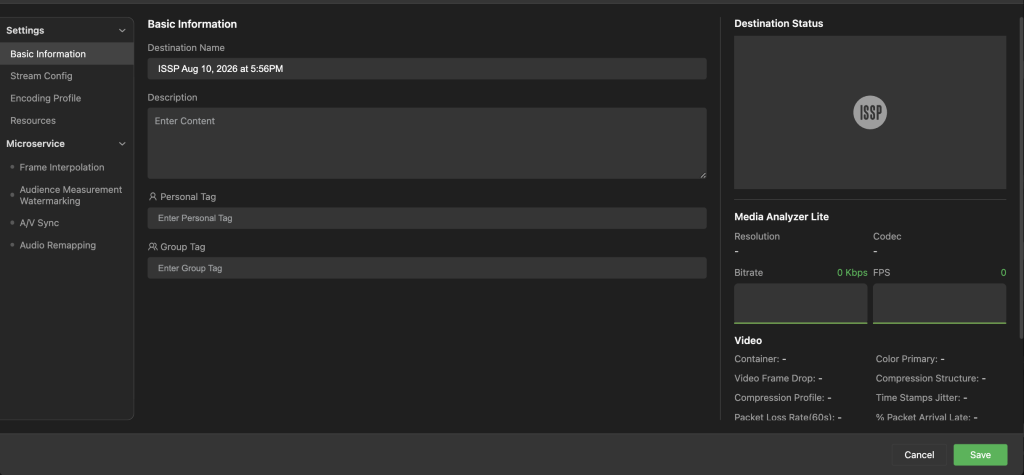
- Click the Save button at the bottom of the screen.
- Your new destination output blocks will display in the MediaHub Destination panel.
Selecting an encoding profile
720×576, 720×480, 854×480 are now supported as potential encoding profile resolution options.
To select an encoding profile:
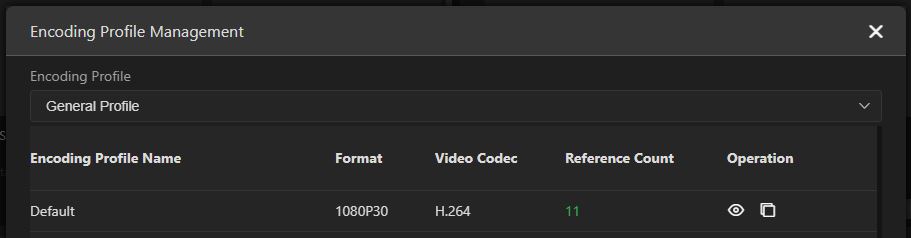
- Click the Encoding Profile icon in the Destination panel to open the Encoding Profile Management window.

Note: Selecting a category (e.g., General Profile or SDI Rendering Profile or Multi Encoding Profile) from the Encoding Profile drop-down menu filters and displays the encoding profiles in that category.
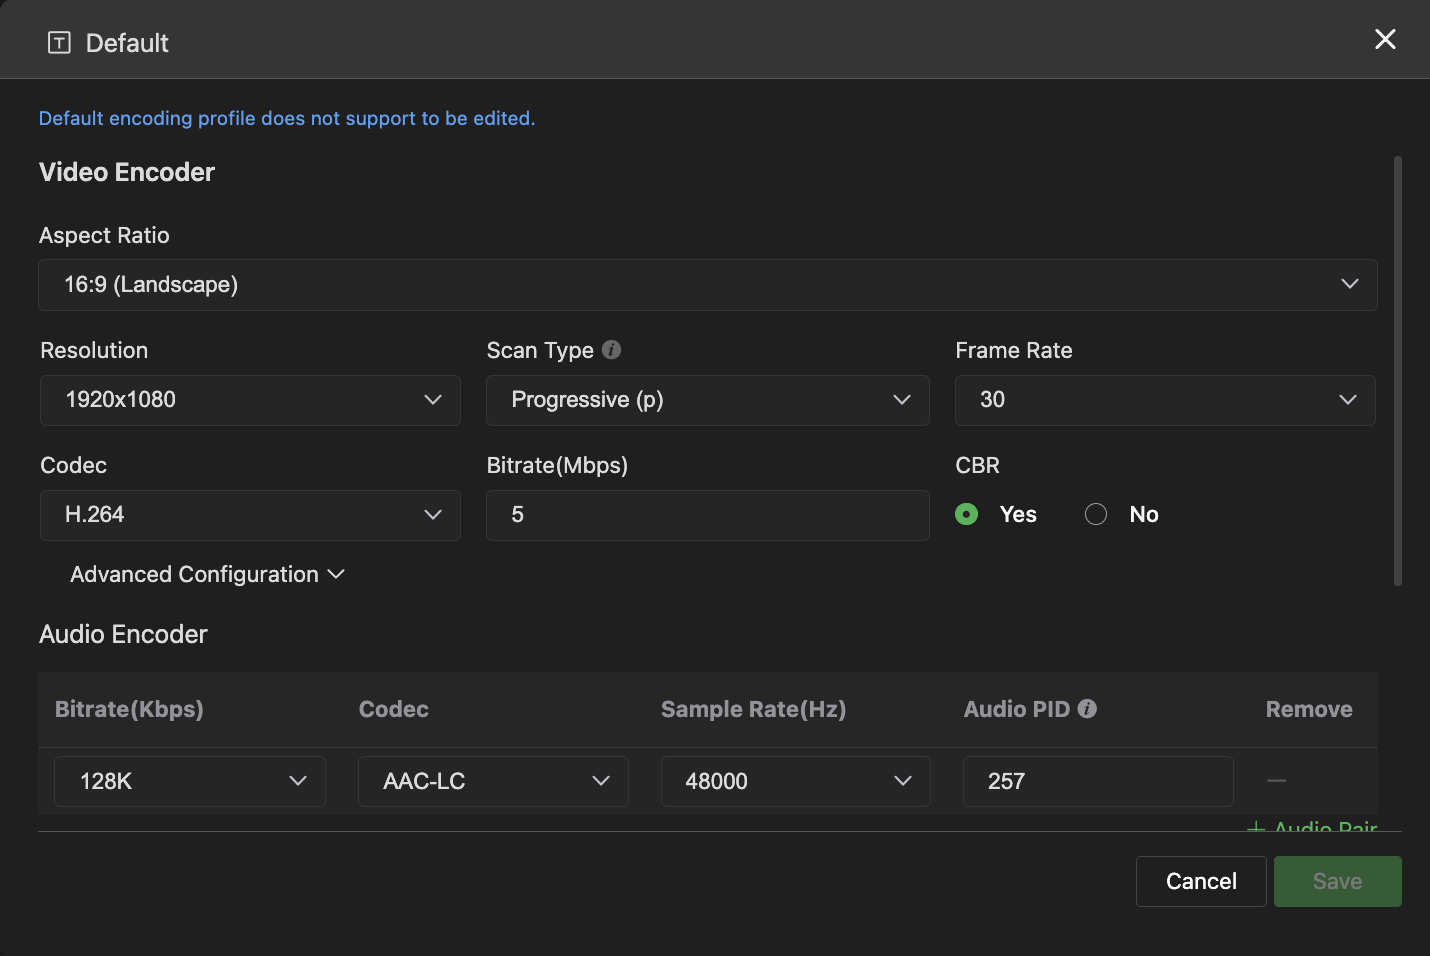
Note: The Default encoding profile can’t be edited and saved with another name. A new profile must be created.
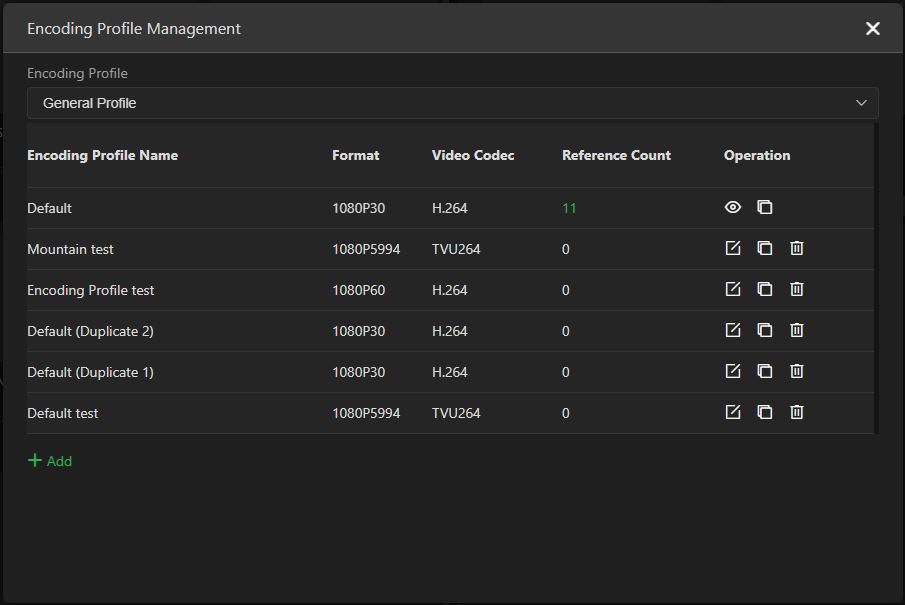
- Click the Default profile eye icon in the Operations column.
- The default Video Encoder profile will display.
Creating a customized encoding profile
To create a custom encoding profile:
- Click the green + Add to create your new customized Encoding Profile with a new name.
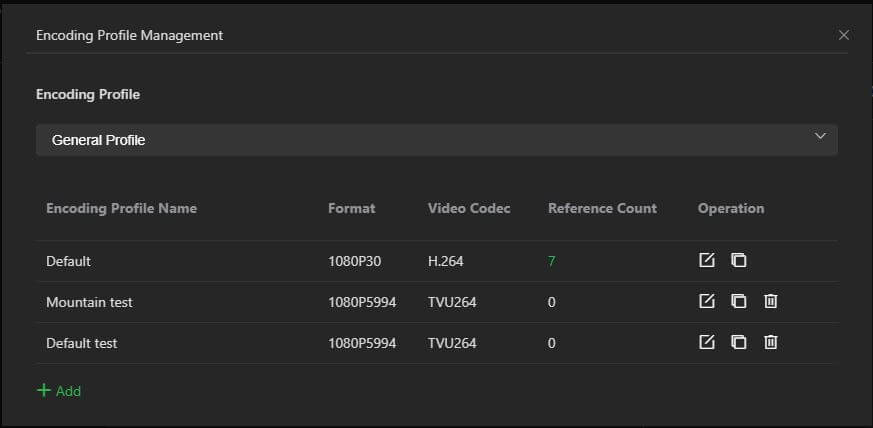
- Enter a new Profile Name, then click the green checkmark.
- Select your Video and Audio Encoder parameters and click Save.
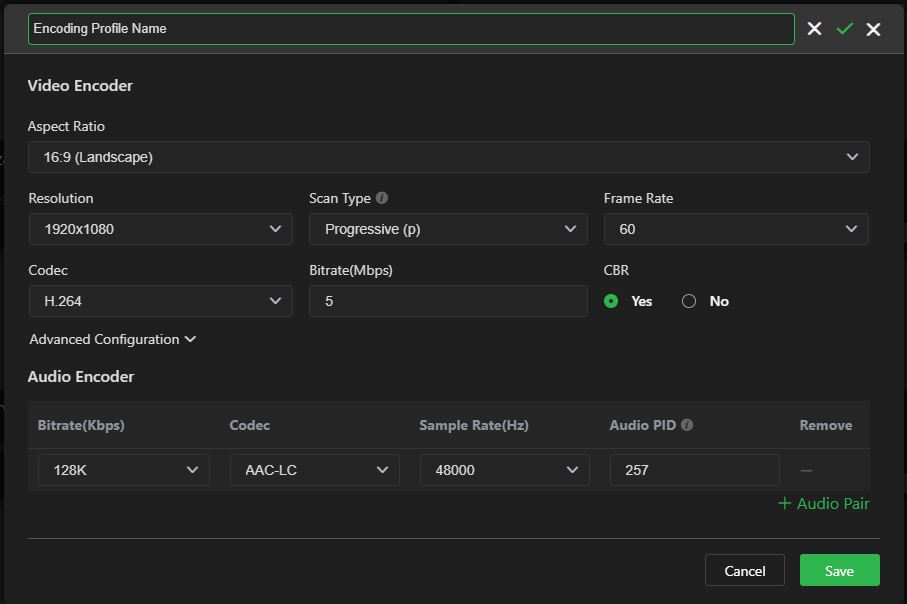
- Your new profile will be displayed in the Encoding Profile Management list. Close the window to continue.
Enabling SDI Output Timecode Overlay
Timecode burn-in defaults are Off in MediaHub 2.1.7.
- Navigate to Destinations and open your SDI Output configuration.
- Expand Video & Overlay Settings.
- Check Enable Timecode Overlay if on-screen timecode burn-in is required for monitoring.
- Save the destination profile.
Adding multiple source destinations
Adding multiple source destinations is handled through its object-oriented, drag-and-drop interface. This allows for “one-to-many” routing, where a single input can be distributed to an unlimited number of endpoints simultaneously.
To add multiple source destinations:
- To populate the + Destination panel, click the + Destination or green box in the left panel to create your first output destination.
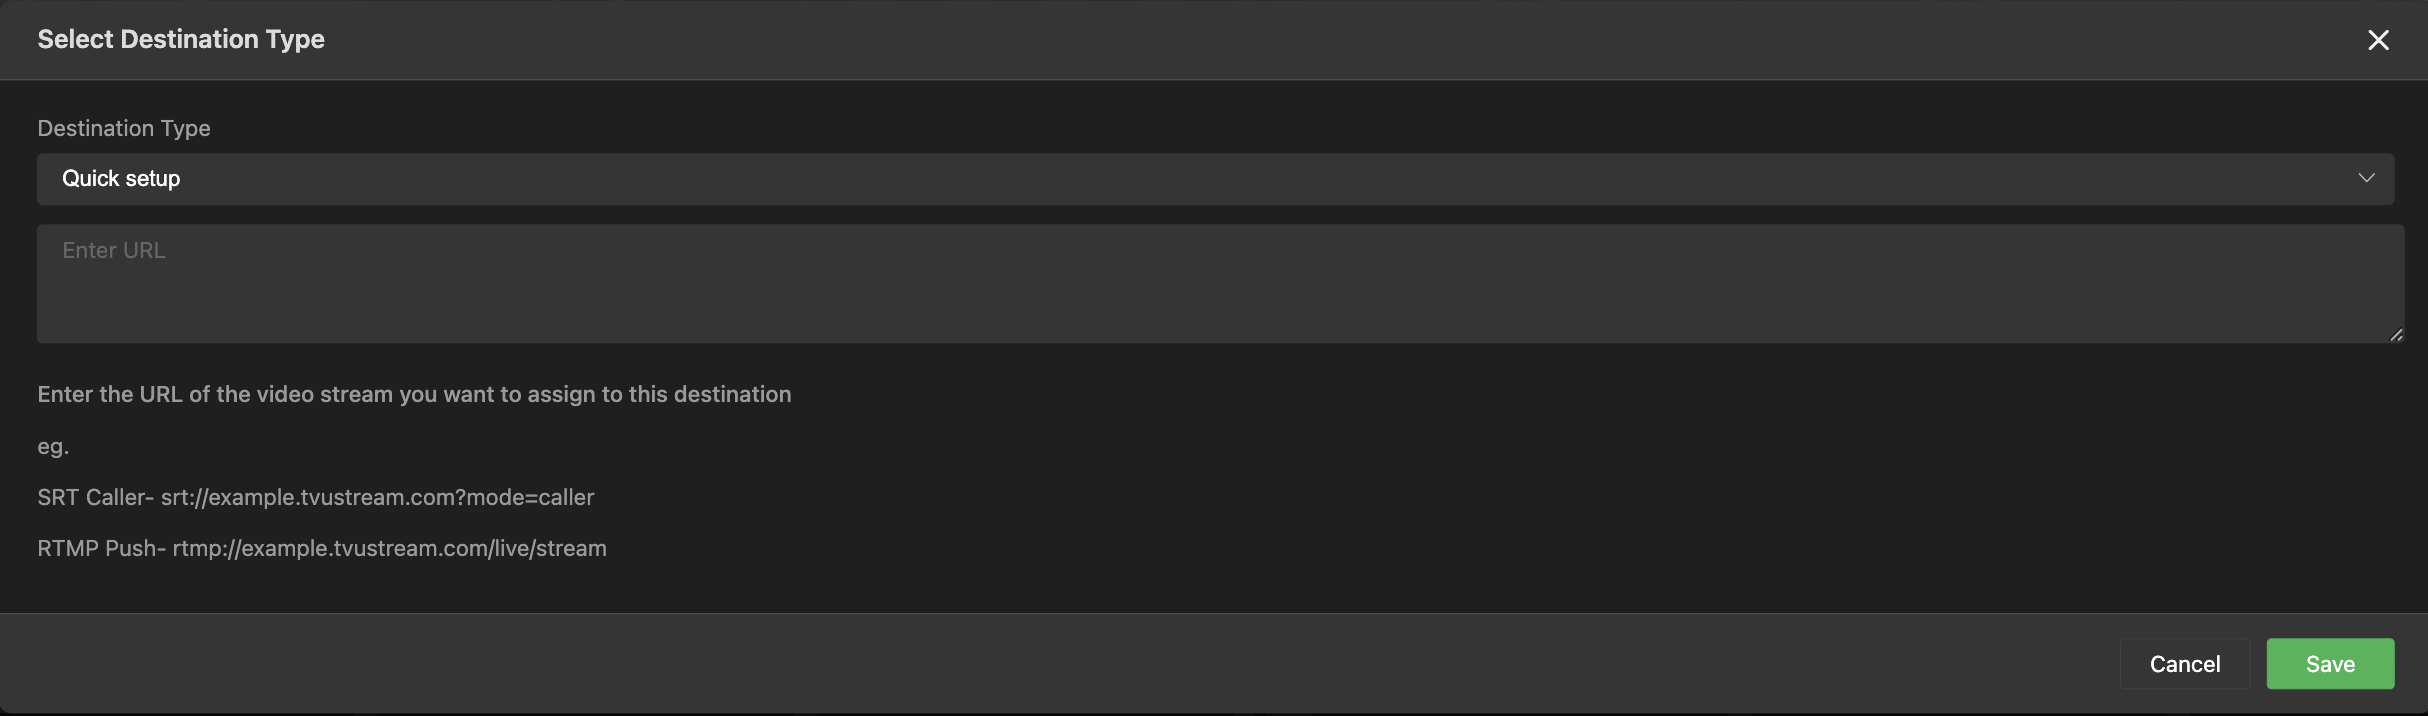
- The Destination Type menu will display.
- Select your Output Type from the drop-down menu.
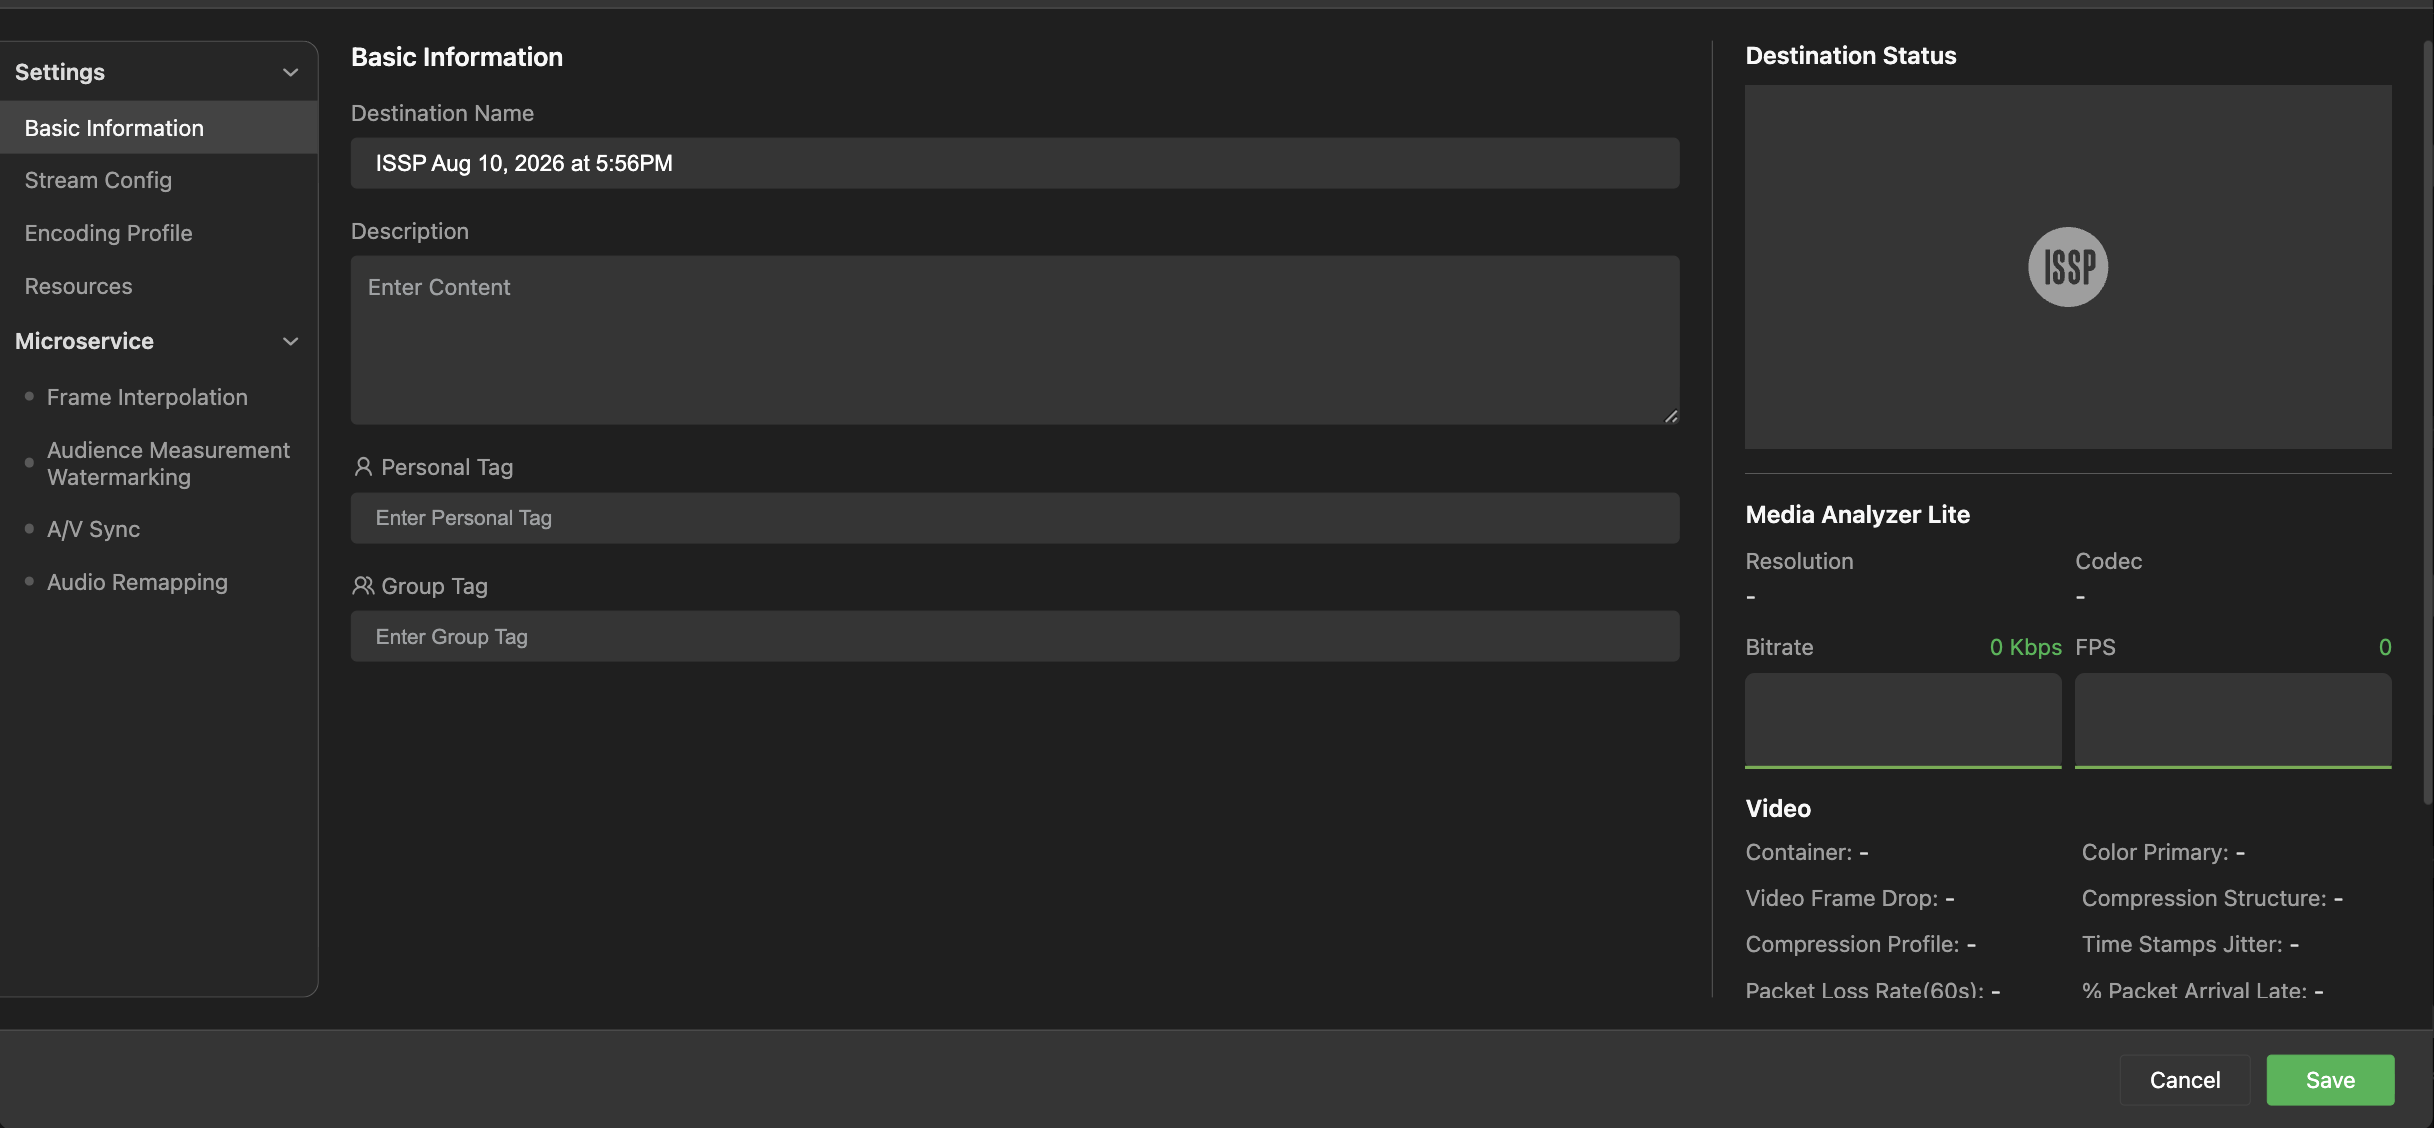
- The Destination Configuration window opens.
- Click Name & Tags to enter a source name, description, and tags.
- Add each required output by selecting its protocol (e.g., RTMP for Facebook, HLS for a website, or SRT for a professional receiver) and entering the necessary credentials.
- Click Save at the bottom of the panel.
Previewing a source before going live
To preview a source before adding it to the destination panel:
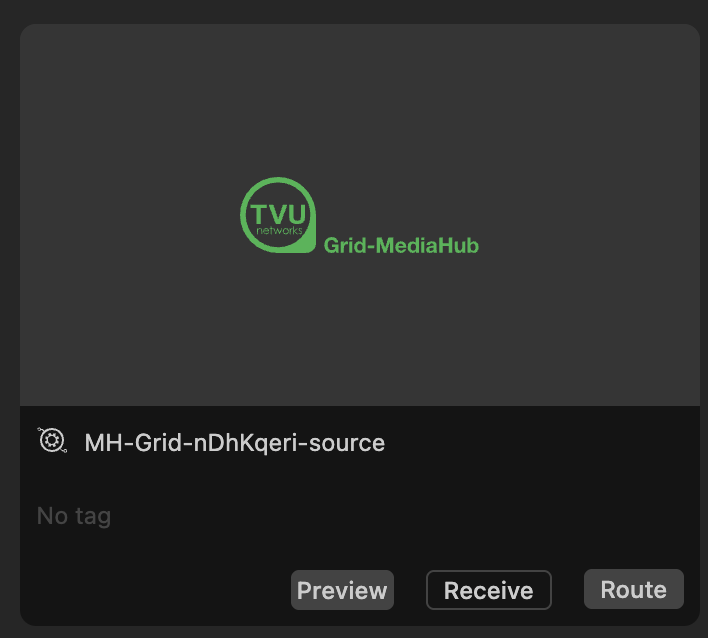
- Hover your mouse over the source block Preview button. The start button will be displayed.
- Click the Start button.
Adding sources to your destinations
To add sources to your Destination panel:
- Click and drag a source from the source panel to your output destination block or click the Route button on the source, and select outputs to route.
- The source will automatically start decoding to go live. An orange notification will be displayed during this time.
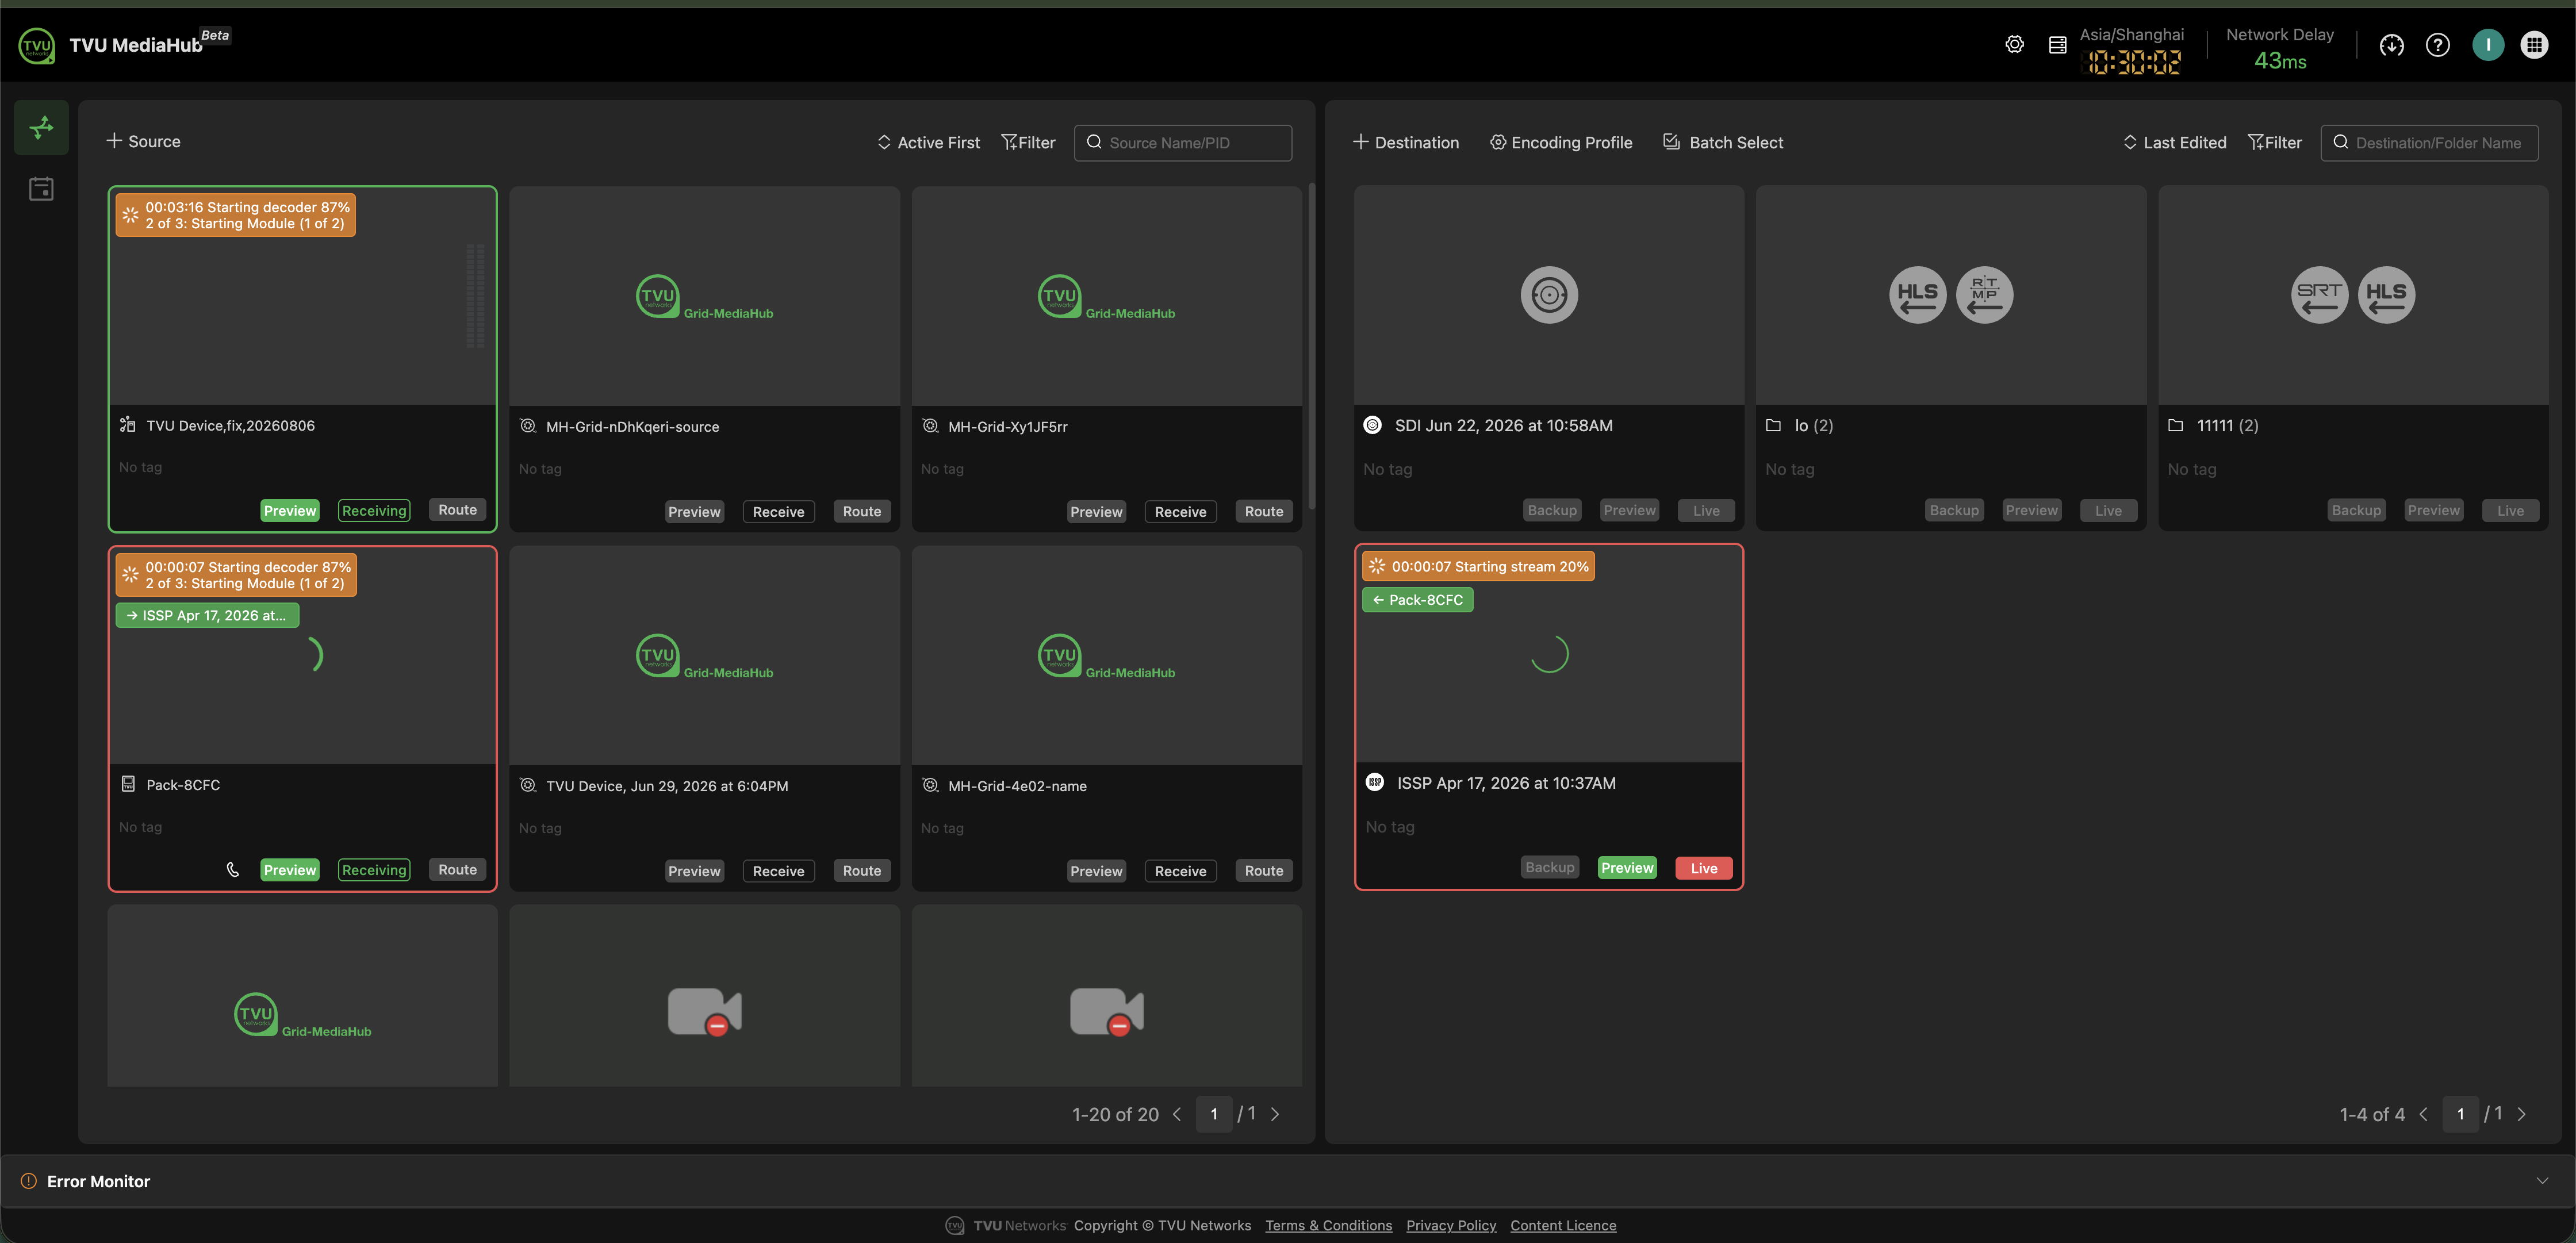
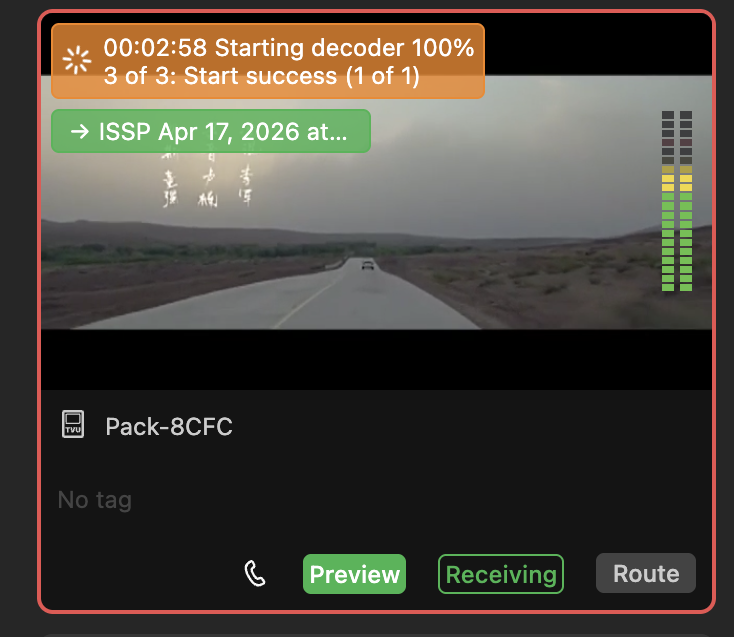
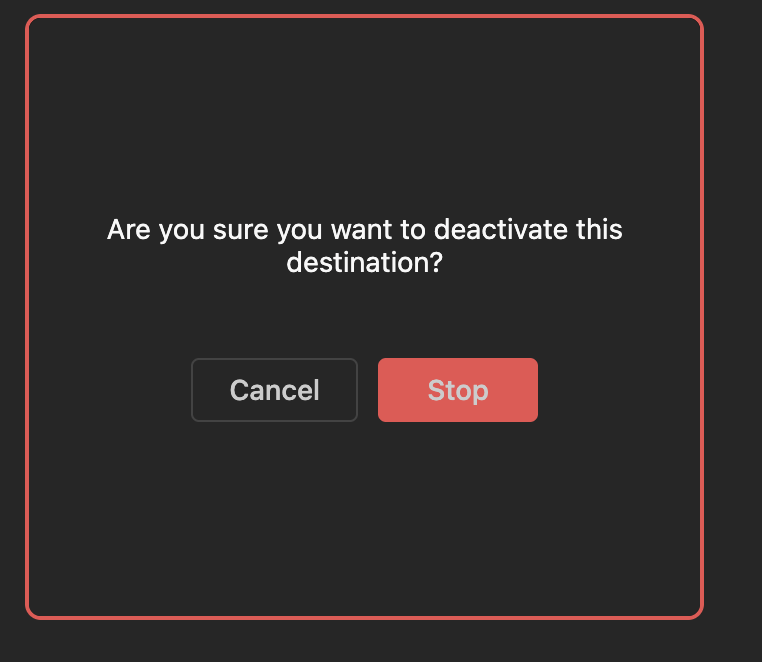
- When the source is decoded and live, the user can stop going live by hovering the mouse over the red Live button and clicking the Stop button in the Destination block.

- A confirmation message will appear.
- Click Stop to deactivate the destination.
Tag feature – Destinations
To add Personal and Group tags to your Destinations:
- Click a destination block in the Destination panel.
- The Destination configuration window opens.
- Scroll down the Details panel.
- Create a Personal Tag if you want the tag to be visible only to you. Click Group Tag if you want the tag to be visible to other users in your group who have access to the object it’s assigned to.
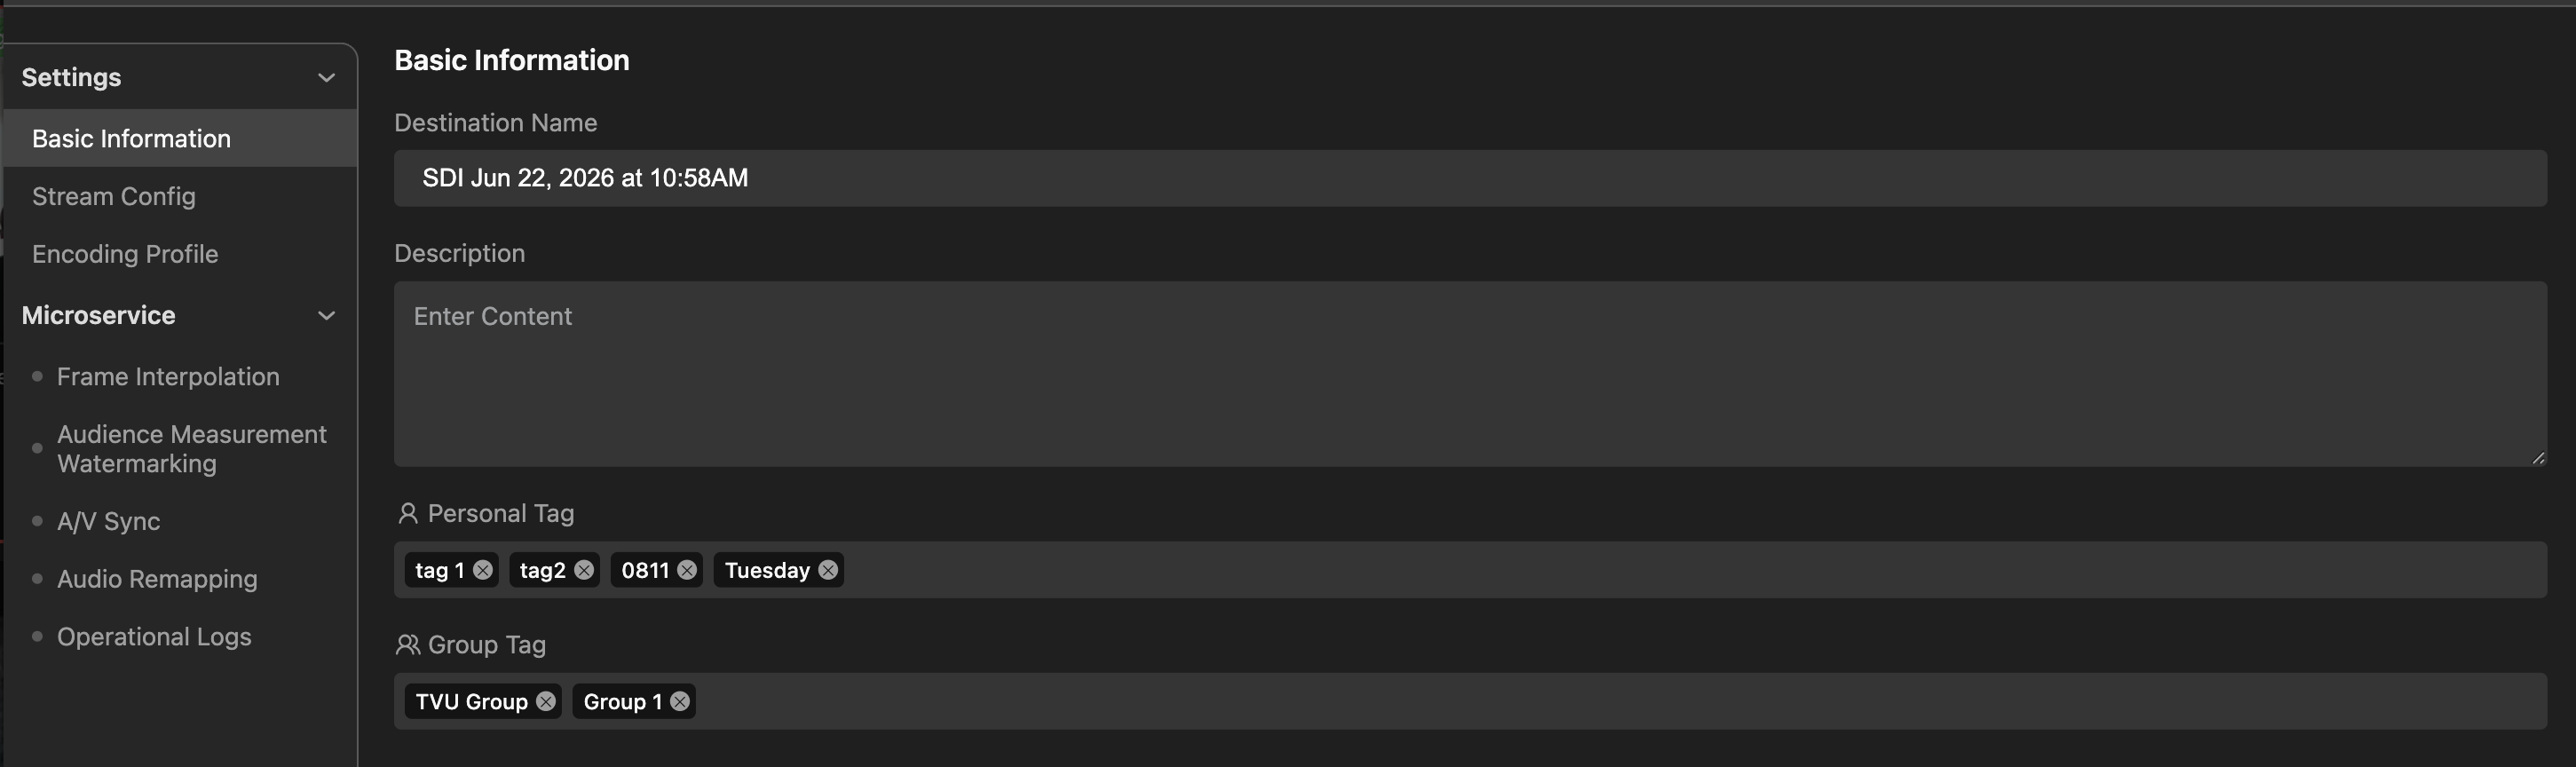
- Click the tag type field and enter the Tag Name(s). To confirm your entries, click Save.
- Your new tags display in the Destination block.
- Click the three-dot icon to display a list of created tags.
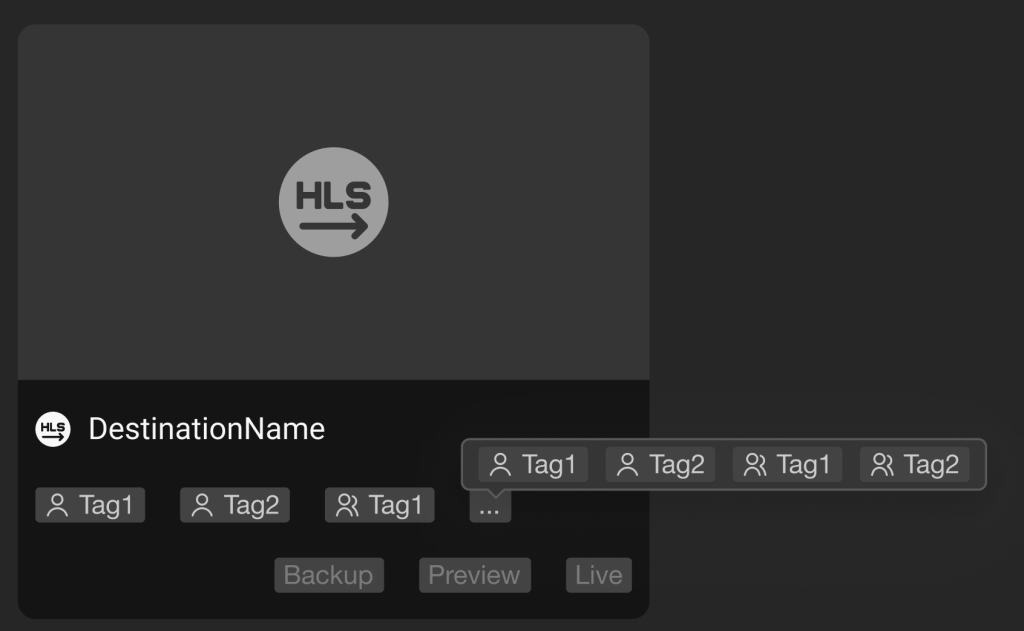
Destination panel filter feature
The Filter icon in the Destination panel allows users to filter the source destination outputs displayed by the tag name. Users can use their “Created by Me” tags or by selecting a Destination type.
To use the destination filter feature:
- Click Filter in the Destination panel.
- The Filter menu opens.
- Enter a Tag name in the Search field to locate and display a specific object.
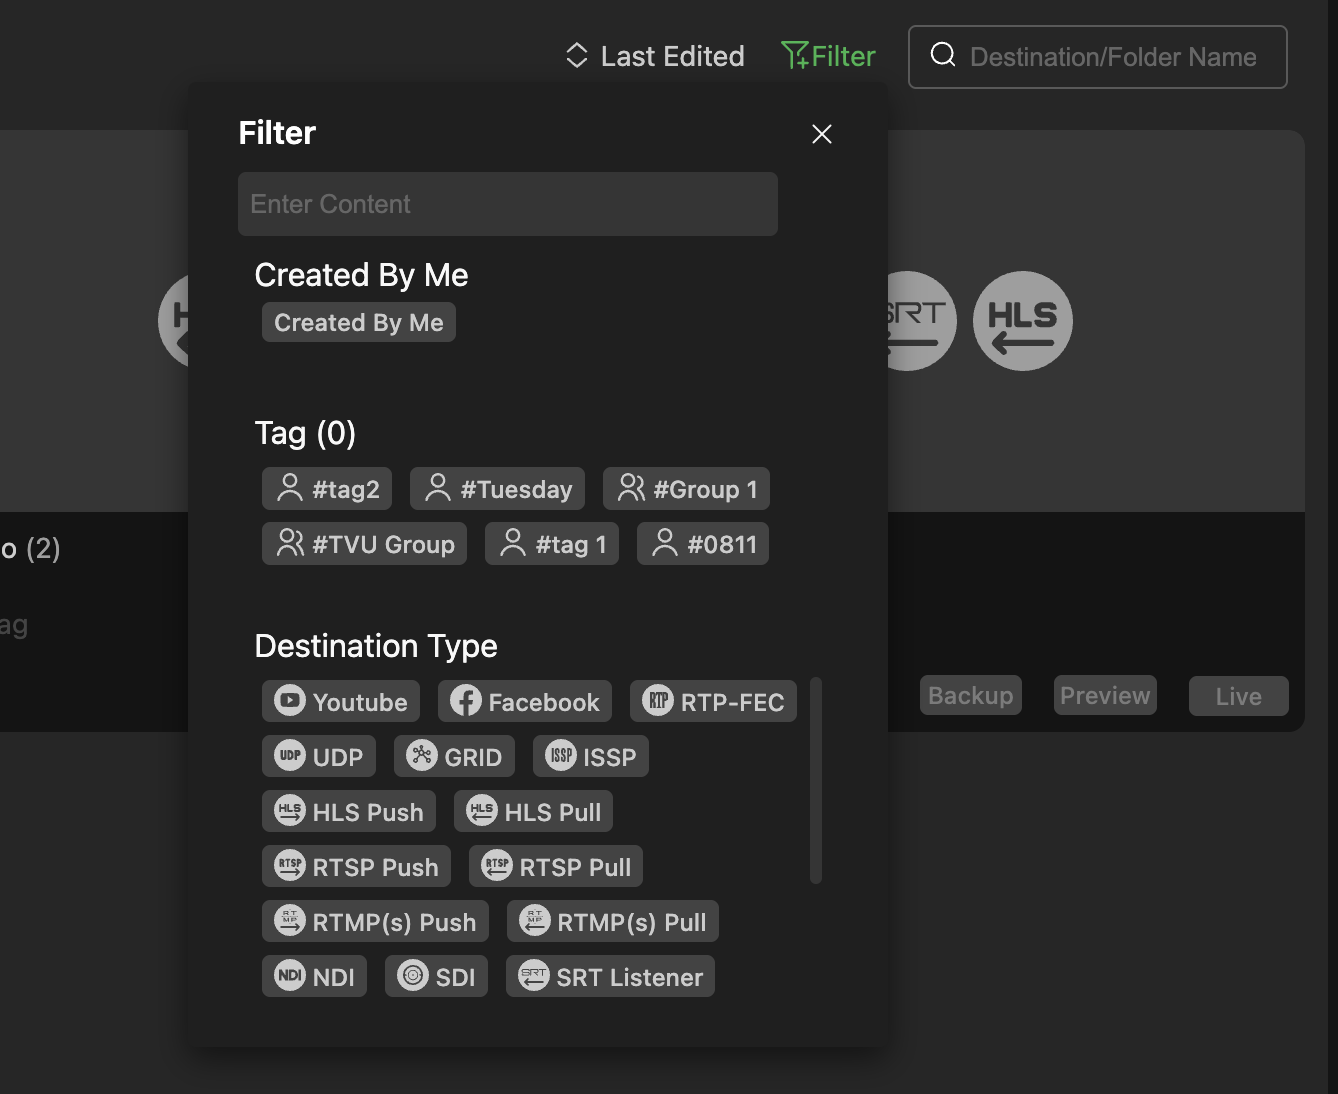
- Select a Destination Type, Personal, or Group tag to filter and display your selection(s).
- Click Filter again to hide the menu.
Live First Destination filter feature
The Live First icon in the Destination panel allows users to filter the source destinations displayed by Live First, Last Edited, Last Created, and Alphanumeric.
To use the Live first filter feature:
- Click Live First in the Destination panel.
- The Filter menu opens.
- Make a selection from the menu.
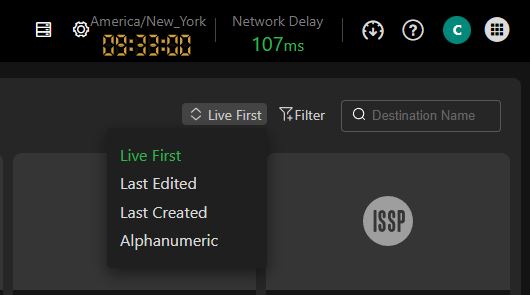
- Click Live First again to hide the menu.
Editing a MediaHub Destination before going live
Note: The destination parameters can only be edited before going live.
To edit a MediaHub Destination parameter before going live:
- Click a destination block in the Destination panel.
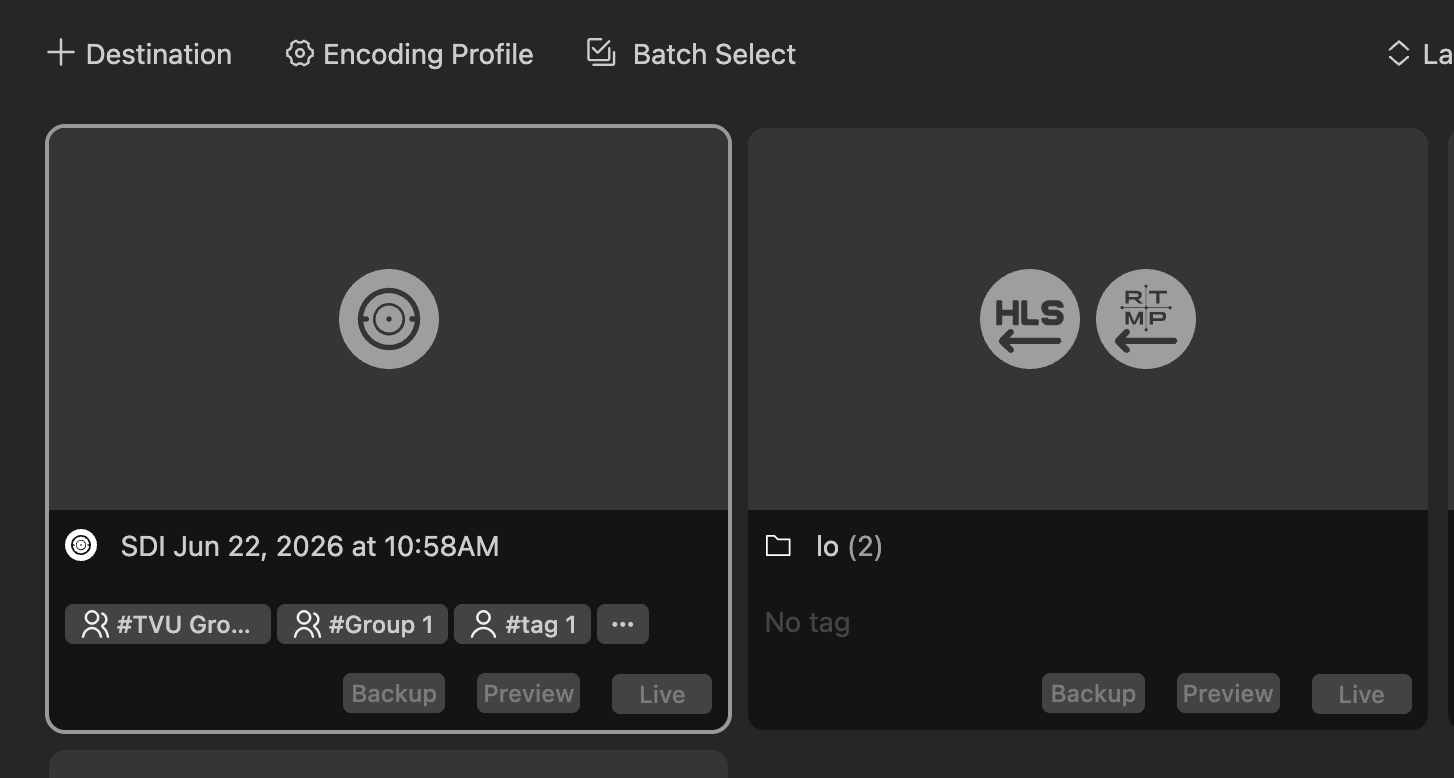
- The Destination Configuration page opens.
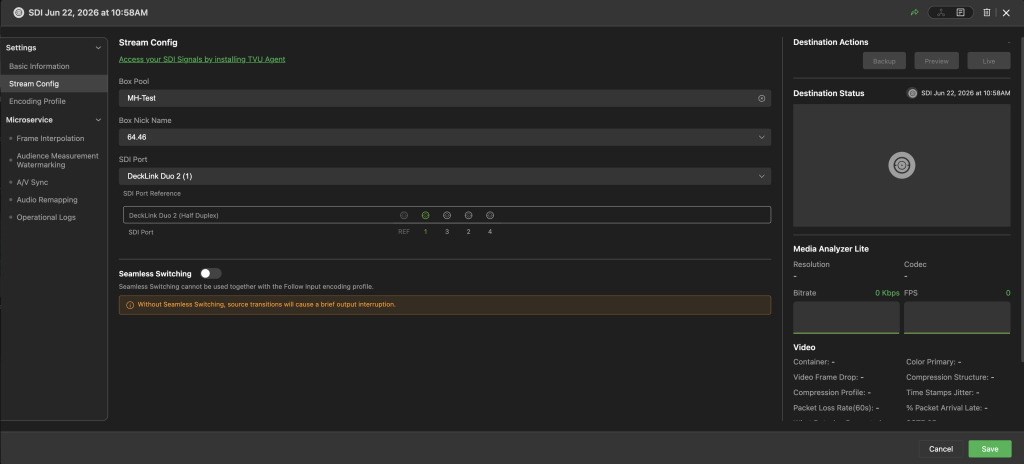
- Make your changes and click Save.
Ingesting and routing TVU MediaMesh sources
MediaMesh Global Shared Memory (GSM) pipelines built in MediaMesh are directly routable in MediaHub without additional encode or transport hops.
To ingest and route MediaMesh sources:
- Build the Processing Chain: In MediaMesh Build, create and start your processing pipeline (e.g., graphics insertion, AI upscaling, watermark).
- Navigate to MediaHub: Open the MediaHub console and navigate to Sources.
- Add a MediaMesh Source:
- Click + Source and select Source type TVU MediaMesh.
- Select the target MediaMesh workflow/processing node from the list.
- Drag or assign the MediaMesh source to your target destination or Object.
Taking your Source live
To take a source live:
- Drag and drop your source from the source panel into the destination output block or click the Route button to route a source to destinations. The message Starting the decoding process will display.
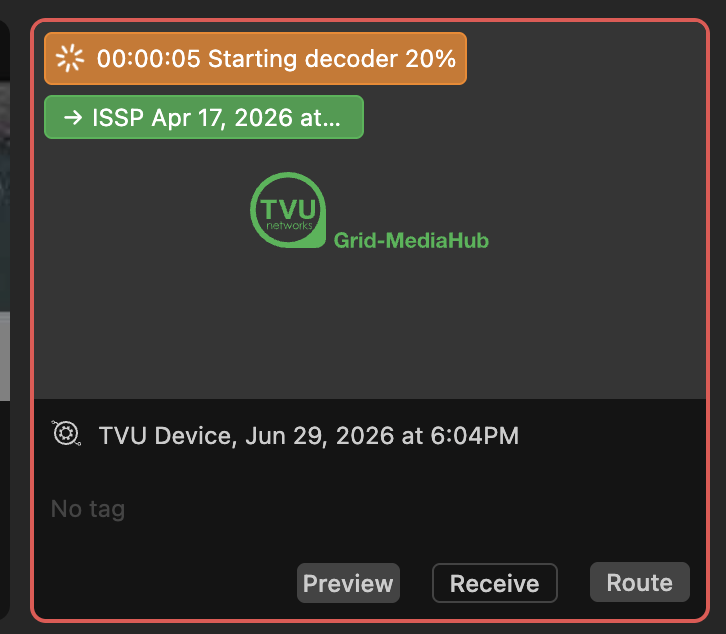
- The video will spin up in the Destination output block.
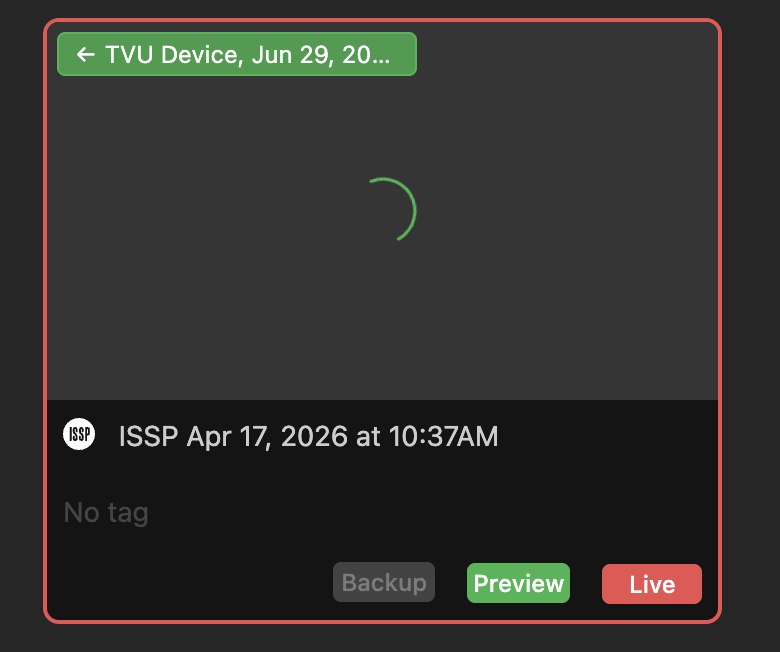
- To stop the video, hover over the Live button and click Stop.
Restarting a source destination stream
To restart a stopped source destination stream:
Select the source in the Source panel, then drag and drop the source back into the Destination block.
Changing a Live destination source
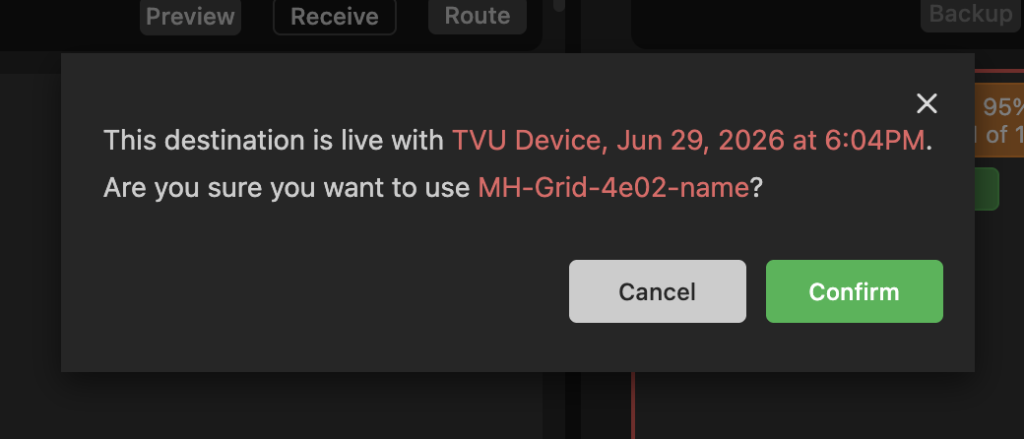
When you drag and drop your new source into the live destination block window and click the Confirm button to switch sources, the source releases the previous source from the decoder, connects the source, routes the signal, accesses the transcoder conversion, and scales the video in place.
To change a live source on demand, complete the following steps:
- Select a source from the source panel and drag and drop it into the output preview window.
- Click the Confirm button to switch sources.
Deleting a Destination
To remove a destination block from the Destination panel:
- Click the Destination block you want to remove.
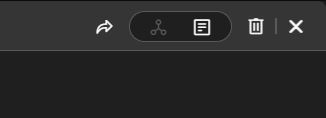
- Click the Trash icon at the top right of the window.
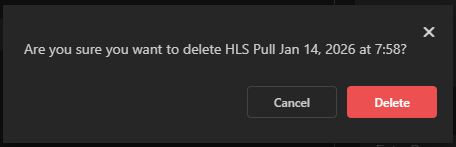
- A confirmation message appears, click Delete to proceed.
Routing Sources into a TVU Partyline Session
Connect live contributors and MediaHub sources directly into interactive Partyline sessions.
- Create/Open Partyline Destination:
- Go to Destinations > + Destination > Partyline.
- Enter session credentials / Partyline Room details.
- Route Source:
- Select any active MediaHub video source (SDI, SRT, HLS, etc.) and assign it to the Partyline destination.
- Monitor Session:
- Open Preview on the Partyline card to monitor participants and active feeds in a unified multiviewer layout.
Source sharing feature
The Share feature functions as a gateway for immediate distribution, allowing you to bridge content from any source to your chosen audience with minimal technical effort.
Source owners can share their sources with other users and groups. Shared sources can be customized with different users’ access rights.
To share a Source:
- Click a Source in the Source panel.
- Click the Share (arrow) icon at the top of the configuration window.
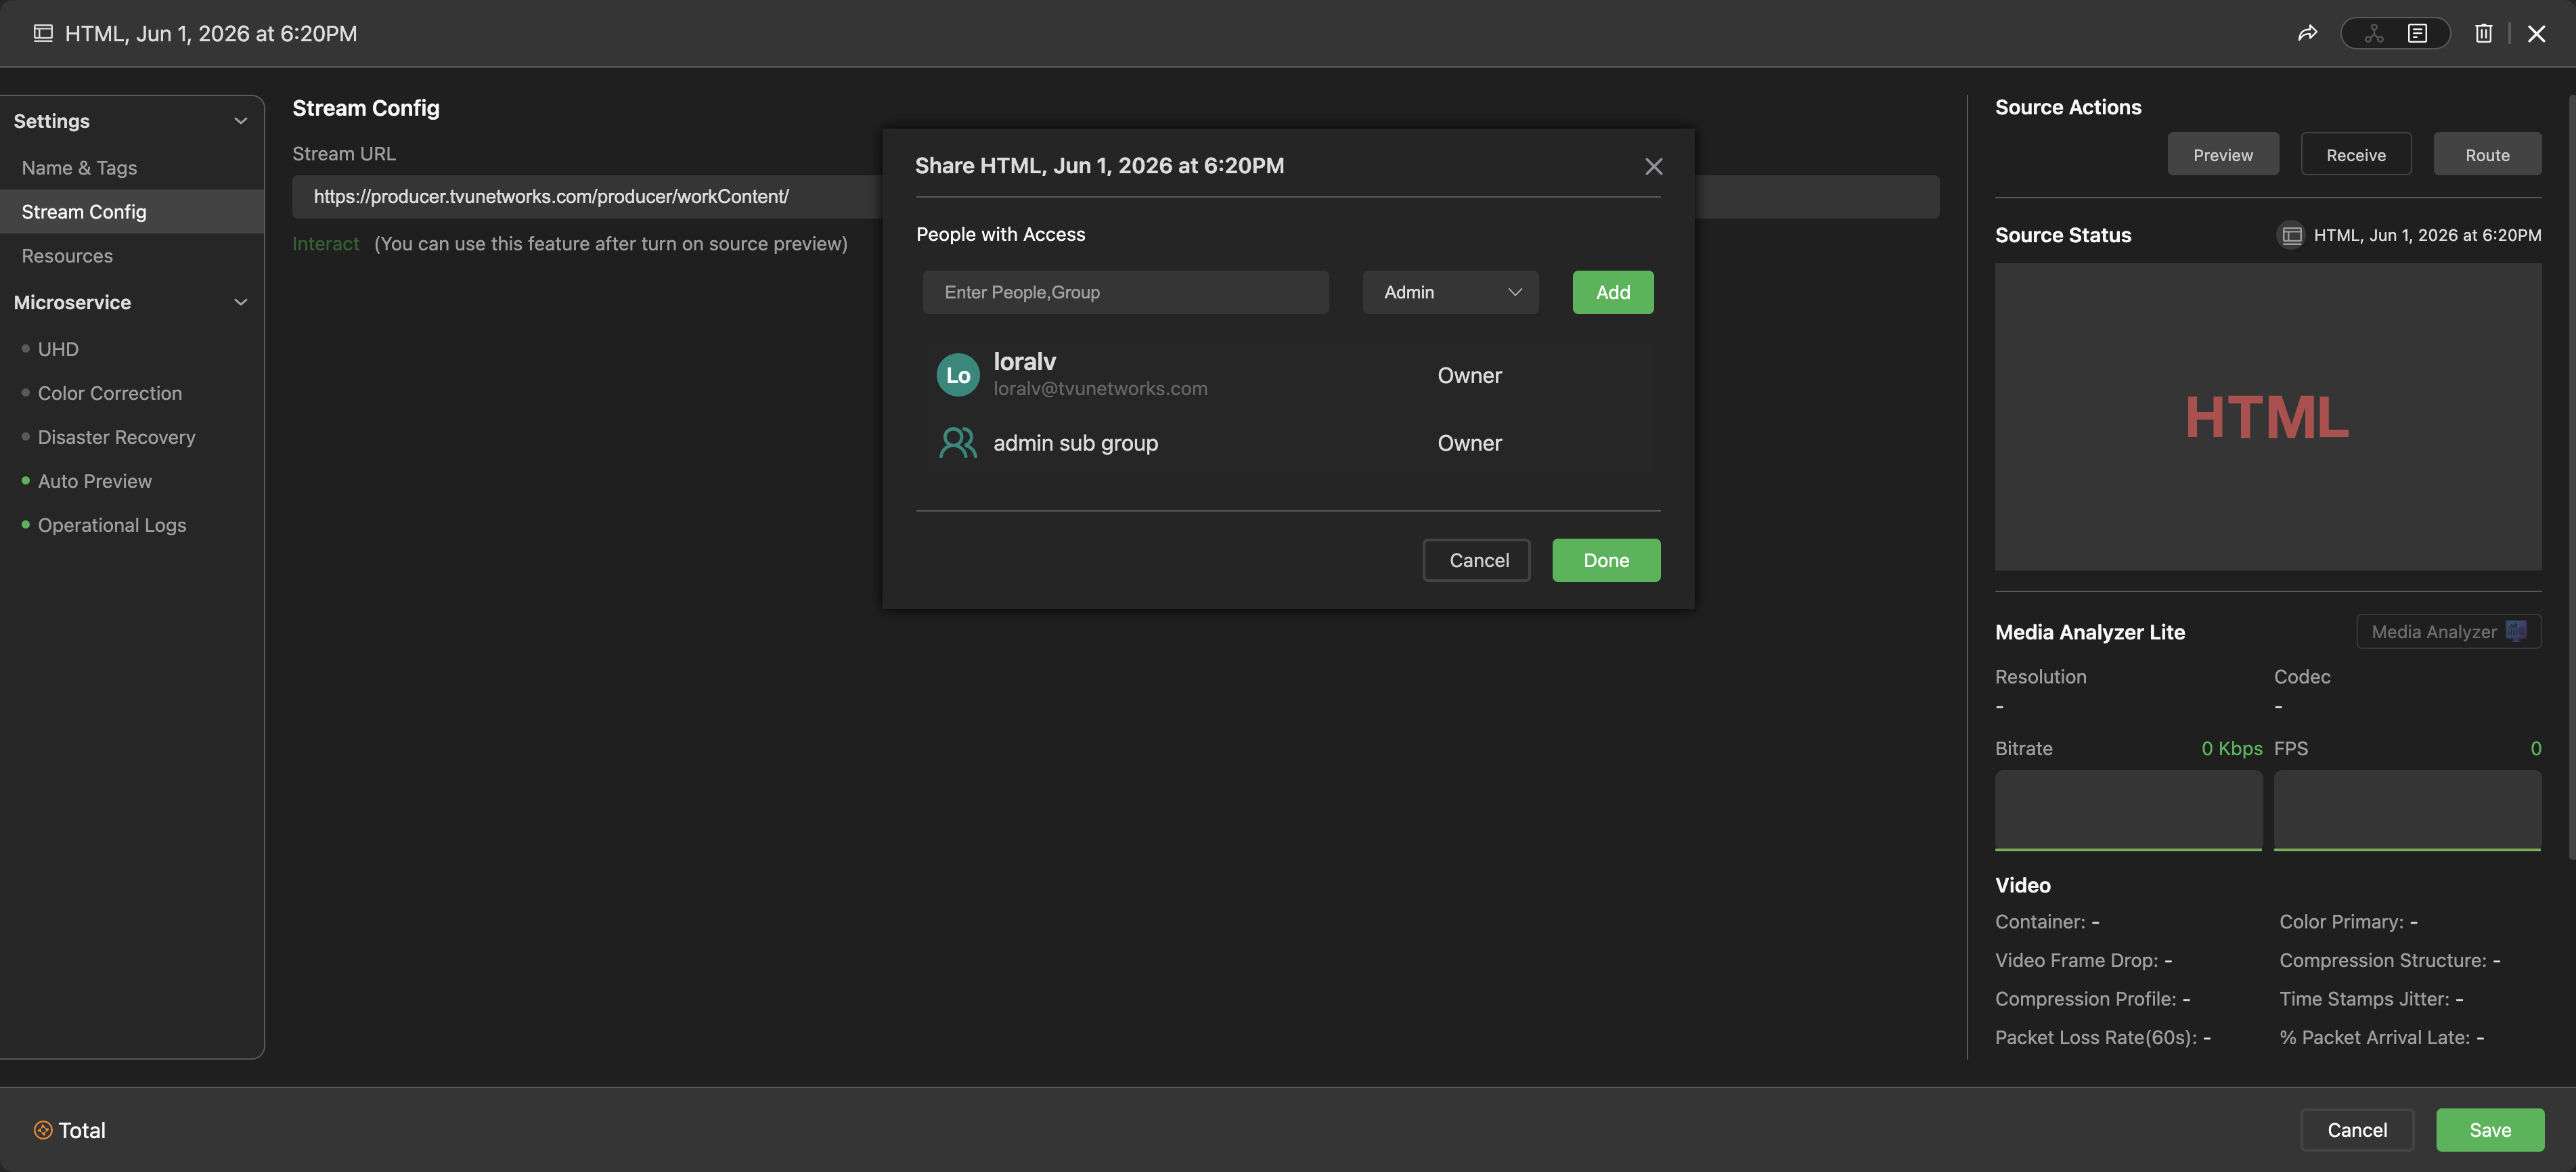
- Click the drop-down menu and select an Access right for the user.
- Enter the user’s email address or Group Name in the “People with Access” field.
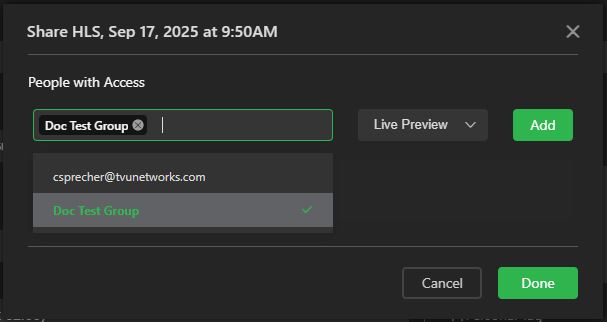
- Click Add, then Done.
Tag feature – Sources
Add custom tags to your sources to quickly find and manage associated resources.
To add Personal and Group tags to your source:
- Click a source in the + Source panel.
- The Source info panel displays.
- Go to the Name & Tags tab.
Core Tag Categories:
- Personal Tags: These are used by individual operators to categorize their own specific assets or sources. They help a single user quickly filter and find their own feeds in a workspace shared by many.
- Group Tags: These are used for team-level organization. By applying a Group Tag (e.g., “Main Stage” or “Court 1”), any member of the production team can filter for all sources related to that specific part of the production.
- Click the tag type and enter the Tag Name(s). To confirm your entries, click Save at the bottom of the source panel.
Source panel filter feature
The Filter icon in the MediaHub Source panel allows users to filter and display sources in the panel by type and tag name.
To use the filter source feature:
- Click Filter in the + Source panel.
- The Filter menu opens.
- Enter a source name in the Search field to locate and display a specific source.
- Selecting a source input type in the list filters and displays your selection(s).
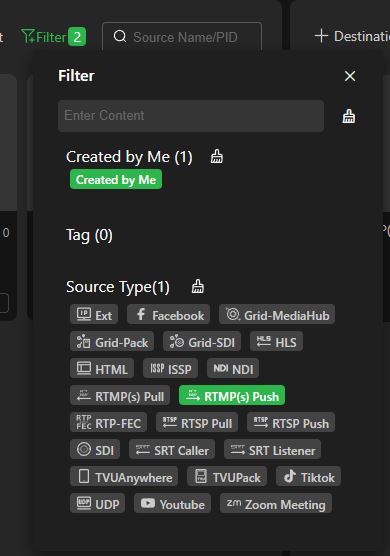
- Click Filter again to hide the menu.
Source activity filter feature
The Activity filter in the Source panel allows users to filter the sources displayed in the panel by Active First, Last Edited, Last Created, and Alphanumeric.
To use the source Activity filter feature:
- Click Active First in the + Source panel.
- The Filter menu opens.
- Make a selection from the menu.
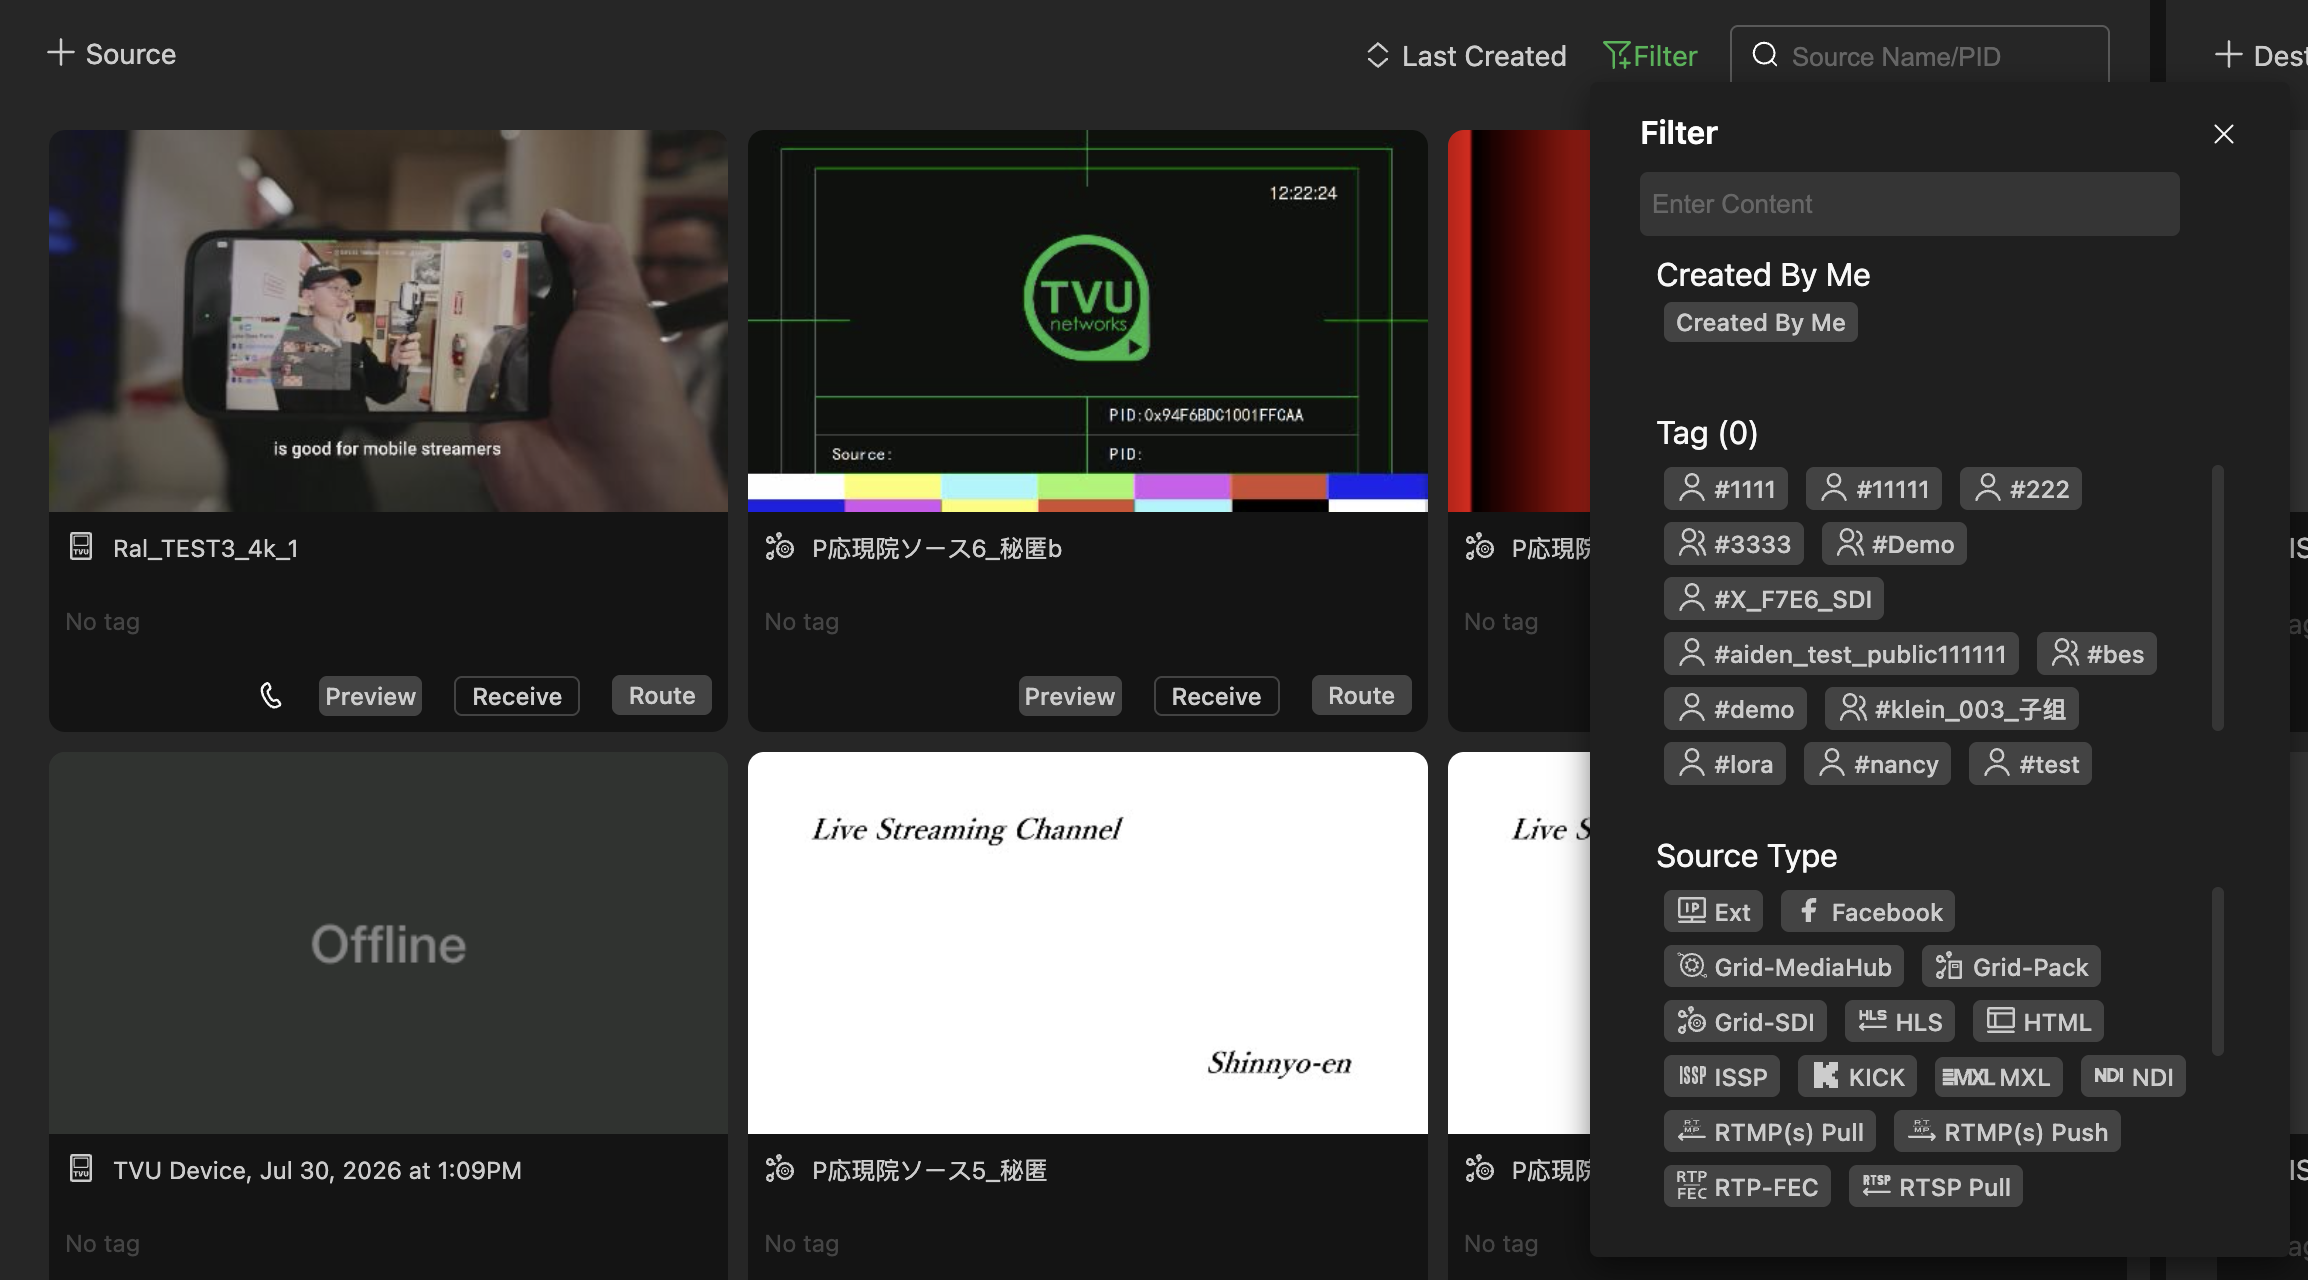
- Click Active First again to hide the menu.
Deleting Sources and destination output blocks
Complete the following steps to permanently delete a Source or destination block from your MediaHub user interface.
Deleting a Destination
To delete a destination block:
- Click a stopped destination output block in the Destination panel.
- The destination configuration window opens.
- Click the trash icon at the top of the window.
- The confirmation message will display.
- Click Delete.
Deleting a Source
To delete a Source:
- Ensure your destination block associated with the source is not live.
- Click a Source in the + Source panel.
- The Source configuration window will be displayed.
- Click the trash icon at the top of the window.
- The confirmation message will display.
- Click Delete.
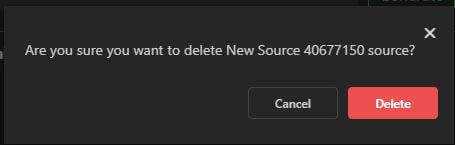
Managing Tokens
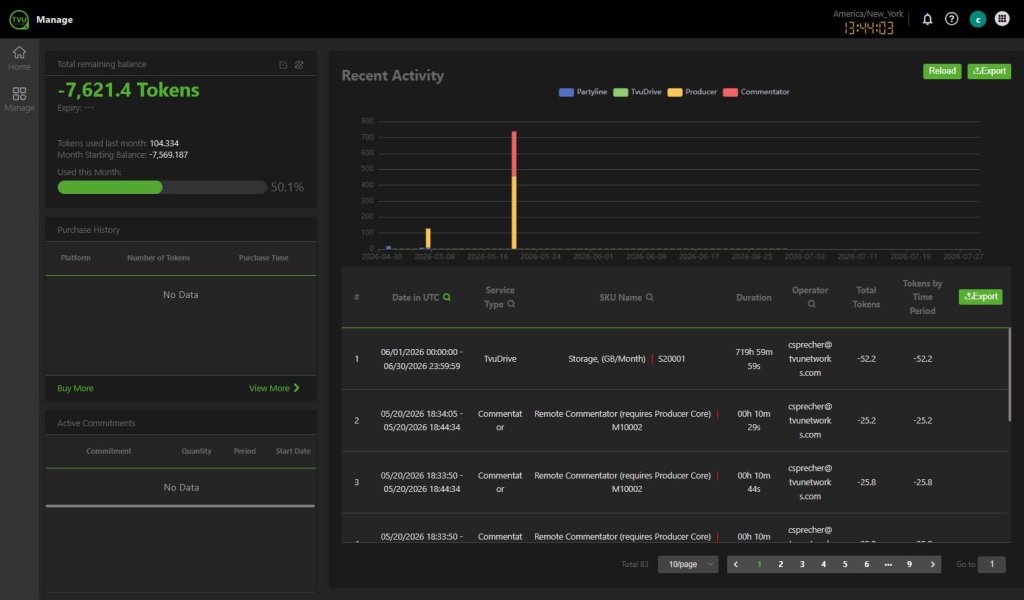
To purchase Tokens and view recent Token activity, complete the following steps:
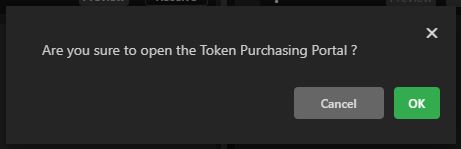
- Click the User preferences icon and select Token Purchasing Portal.
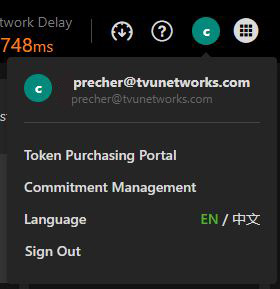
- A confirmation message appears. Click OK to proceed.
- TVU Home will open in a new tab.
- Click the Manage > Billing tab in the left column.
- The Manage Tokens window opens.
To exit MediaHub
To exit MediaHub:
- Stop all running programs in the Source and Destination panels.
- Click the User Preferences icon in the top navigation bar.
- Click Sign out.
Opt-in features overview
The opt-in features listed below are not enabled in the default, Project-based, modules described in Chapter 1. The “opt-in” features refer to specialized advanced processing tools and microservices that are not enabled by default but can be activated in the user interface to enhance video quality or workflow automation.
Note: Users must contact TVU Support to enable these features.
- InSync Advanced Frame Interpolation: The most prominent opt-in feature is the native integration of InSync Advanced Frame Interpolation. It’s advantages are simple activation, motion-compensated conversion, deinterlacing, and standards conversion.
- Self-hosted Static IP: Static IP assignments are region-specific and can only be requested by Group Admins. Contact support for more information.
- UHD Processing: As seen in your earlier configuration window, UHD (4K) encoding support is a selectable microservice toggle for high-resolution workflows.
- TVU Pack mode (opt-in): The TVU Pack has been added as a new output destination type for MediaHub. Users will be able to send videos to TVU Packs as either a Return Video Feed, or Voice over IP (VoIP).
- Redundancy & Failover (opt-in): The software monitors signal health. If an input feed drops, it can be programmed to automatically switch to a backup source (e.g., a “Slate” or a secondary SRT feed).
- Color correction feature: TVU MediaHub color correction is part of the platform’s advanced video processing toolset, designed to ensure that any IP or SDI source meets professional broadcast standards. The platform provides both manual and AI-powered tools to manage signal integrity.
- Workflow builder: MediaHub introduces an optional UX and graphically-based workflow that better matches how a significant amount of users operate.
- VLAN service: For specific networking needs, users can enable VLAN Service through the receiver software integration.
- Advanced CBR output for Listener and Caller: We have introduced an Advanced CBR output option that has already shown a significant reduction in continuity error counts and improved overall SRT compliance.
- Open API Integration: For advanced users, MediaHub offers an opt-in for open API connectivity, allowing third-party tools to handle scheduling and monitoring.
Workflow and AI Microservices
While many core functions are automated, several operational features can be considered opt-in depending on the production’s needs:
- AI-Driven Active Search: Users can opt into using Active Search profiles that automate actions like creating video clips, sending notifications, or applying tags based on specific AI-detected criteria.
- Cloud Recording: Instant capture of live feeds for archival or rebroadcast can be activated as a specific destination microservice.
- Scheduling: Operators can opt to use the Scheduling tool to preplan and automate routing operations in advance.
InSync Advanced Frame Interpolation
Activating this feature triggers a high-performance, CPU-based processing layer that provides several professional-grade benefits:
- Advanced Motion Compensation: It provides high-end motion-compensated frame rate conversion, which is particularly useful for smooth transitions between 50fps and 60fps in live sports.
- High-Quality Deinterlacing: Seamlessly handles traditional interlaced formats (like 1080i) by converting them into modern progressive workflows (like 1080p) without typical visual artifacts.
- Low-Latency Conversion: Unlike hardware converters that can add several seconds of delay, this integrated service maintains a sub-second latency (approximately one second).
- Cost Efficiency: Since it is embedded in the MediaHub UI, it eliminates the need for expensive external standards conversion hardware.
Enabling InSync Advanced Frame Interpolation
To find and enable these enhancement tools for your source, follow these steps within the workspace:
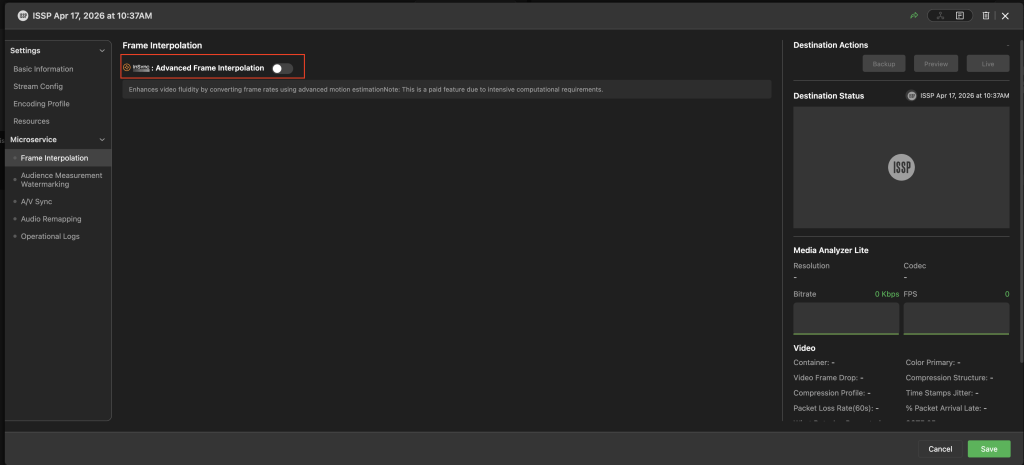
- Click on the specific Destination block in the right panel that requires enhancement. The configuration window opens.
- Within the configuration window, look for the Microservice section in the right panel.
- To Enable the Service, move the InSync: Advanced Frame Interpolation slider to the right until green.
- Configure the encoding profile settings (If needed): Once enabled, you can define your target parameters, such as converting from 50fps to 60fps or switching from interlaced to progressive scan modes.
Note: the default Encoding profile cannot be configured. If needed, a new encoding profile can be created.
Workflow builder
workflow builder. While MediaHub and Workflow Studio are distinct tools, they are part of the same unified ecosystem, allowing you to move between routing and advanced workflow orchestration.
The Workflow builder assists users and support by providing troubleshooting tools to assist with a specific input or output.
How to access Workflow Studio
To access Workflow Studio from MediaHub:
- Select a Source block in the Source panel.
- The Source configuration window opens. Click the Workflow builder service icon at the top right of the window.
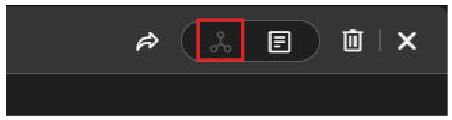
- The Workflow Studio page opens in a new tab.
- The Workflow Studio page shows a graphical representation of the underlying modules that are running and their status.
Configuring Disaster Recovery and Failover
To manage backup routing with the restructured Automatic and Manual failover controls.
- Open your target destination’s configuration and scroll to Disaster Recovery.
- Select Mode under Automatic Detection:
- Off (Manual Only): Failover triggers only when an operator explicitly clicks the backup switch button.
- Black-Frame Detection: Automatically switches when video drops or sustained black frames are detected.
- Bitrate Threshold: Automatically switches when the primary stream bitrate drops below the configured limit.
- Assign Backup Source: Select the secondary/backup source from the picker.
- Configure Auto-Recovery: Toggle whether to switch back automatically once the primary stream returns healthy.
- Save the configuration. Use the manual switch button on the live card to trigger instant failover at any time.
Passthrough Transport Option
The encoding profile drop-down menu now includes an improved “passthrough” transmission option. This option allows output without PID re-mapping or re-muxing. Users can identify which outputs support passthrough.
Ingesting and Demuxing MPTS (Multi-Program Transport Streams) over SRT
To receive multi-service streams and break out individual services:
- Go to Sources > + Source > SRT.
- Enter the stream URL/port carrying the MPTS feed.
- Select a Stream Mode:
- ISDB-T Broadcast: Select Passthrough mode to carry the mux undecoded.
- Standard DVB: Enable MPTS Demux.
- Select and Rename Services:
- Choose which program/service IDs (PIDs) to ingest.
- Rename each service and confirm the preview tile for each extracted program before routing.
Multi-Receiver SRT with Whitelisting
To distribute a single SRT output to up to 10 independent receivers with access control.
- Go to Destinations > + Destination > SRT (Listener).
- Under Connection Settings, enable True Passthrough.
- Set Max Receivers (up to 10 concurrent connections).
- Enable Whitelist:
- Check Whitelisted Receivers Only.
- Enter the approved IP addresses or CIDR subnets allowed to connect.
- Save and start the destination. Unlisted IP connection attempts will be rejected.
Running AI Diagnostics on SRT Feeds
Users can Analyze degrading or failing SRT streams using the Boundary AI Agent.
To run diagnostics on SRT feeds:
- Verify Prerequisites: Ensure an administrator has enabled AI Diagnostics under Group Settings.
- Access Diagnostics:
- Open the SRT Source or SRT Destination card/monitoring view.
- Click the AI Diagnostics panel tab.
- Run a Query:
- Select a suggested query (e.g., “Why is this feed dropping frames?”) or type a question in natural language.
- Review Hypotheses & Metrics:
- The AI agent evaluates transport stream metrics (PAT/PMT, continuity counter, PCR jitter) and libsrt statistics (RTT, retransmissions, buffer fill).
- Review the confidence-ranked diagnostic output to isolate whether faults are upstream, internal, or downstream.
TVU Agent installation
The TVU Agent is a lightweight software module used across all TVU SaaS products, including MediaHub and MediaMesh. It enables your local hardware to connect to the cloud, allowing seamless resource usage and control.
Users will first need to contact TVU Support to install the Agent. As a MediaHub user, the SDI Input source does not require TVU hardware to enable a device’s SDI input or output.
TVU Agent installation includes the following steps:
- Step 1 – Log in to the TVU Home user interface
- Step 2 – TVU Agent Installation
- Step 3 – Execute the installation command
- Step 4 – Activating the TVU Agent
- Creating additional Box Pools
- Box Pool port mapping
- MediaHub verification and testing
- Troubleshooting
TVU Home
In the TVU Networks ecosystem, TVU Home (often accessed via home.tvunetworks.com) serves as the centralized management portal and unified authentication layer for all TVU cloud-native services, including MediaHub.
The integration is designed to move the user from “buying a product” to “managing a workflow.”
Here is how MediaHub integrates with TVU Home:
Single Sign-on SSO and Unified Access
TVU Home acts as the gateway. Once you log in to TVU Home, you have immediate access to the MediaHub interface without secondary logins. This integration ensures that:
- Permission Syncing: User roles and permissions defined in TVU Home (e.g., Admin, Operator, Guest) automatically apply to MediaHub routing capabilities.
- Resource Centralization: All your available “sources” (like TVU One backpacks or TVU Anywhere apps) registered under your TVU Home account automatically appear as available input pins in the MediaHub interface.
Resource & License Management
MediaHub introduces a utility-based (SaaS) pricing model, and TVU Home is where this is managed:
- Core Allocation: From the Home portal, you can monitor and manage how many processing cores are allocated to MediaHub.
- On-Demand Billing: You can track your “pay-as-you-go” usage (per-minute routing) through the billing and subscription modules within TVU Home.
Ecosystem “Bridge” Functionality
TVU Home allows MediaHub to act as the “bridge” between other TVU apps:
- TVU Search: You can route a signal in MediaHub and, via the TVU Home back end, immediately see that feed appear in TVU Search for AI-driven clipping and transcription.
- TVU Producer: From the Home dashboard, you can launch TVU Producer and use MediaHub to feed it with diverse IP sources (SRT, NDI, or RTMP) that were converted or bridged in the Hub.
- TVU Command Center: MediaHub’s status, health alerts, and signal analytics are aggregated into the Command Center view available within the Home portal.
- Partyline Integration: Any MediaHub source can join a TVU Partyline session as a participant, functioning as a real-time communication channel and custom multiviewer.
- Dedicated VoIP Source Object: Create, configure, and monitor standalone VoIP contributors on agent devices (recommended hardware: ART USB Dual Pre audio interface).
- TVU MediaMesh integration: MediaMesh Global Shared Memory is now a direct, routable source in MediaHub. Workflows built in MediaMesh route with zero additional encoding steps, extra transport hops, or point-to-point bridging.
- Grass Valley AMPP Integration over MXL: Includes bidirectional signal exchange between MediaHub and AMPP. Supports automatic flow discovery so operators can select AMPP sources directly by name within the MediaHub interface.
Exchanging Feeds with Grass Valley AMPP over MXL
MediaHub supports bidirectional integration using automatic flow discovery over MXL.
To ingest from AMPP into MediaHub:
- In MediaHub, go to Sources > Add Source > Grass Valley AMPP / MXL.
- MediaHub will auto-discover flows published by AMPP. Select the desired AMPP flow name from the dropdown.
- Configure naming and click Save. The AMPP feed will appear as a routable source.
Sending from MediaHub to AMPP:
- Go to Destinations > Add Destination > Grass Valley AMPP / MXL.
- Select your device/host and configure the output parameters.
- In the AMPP environment (e.g., Maverik X, Playout X), select the published MediaHub stream name as an input.
TVU MediaHub QSUG Rev D EN 10-2026 – © Copyright 2026 TVU Networks Corporation. All rights reserved in all media.
Related tips
