Contents
- Introduction and overview
- Audio Mixer features
- Step 1 – Sign up or register for a TVU Producer account
- Step 2 – Start your Producer session
- Creating a program
- Basic Audio Mixer functionality
- Advanced Audio Mixer functionality
- Advanced Audio mixer interface
- Multi-audio channel feature
- Advanced Audio Mixer user experience behavior
- Mute control
- Group Audio feature
- Purchasing TVU Producer
TVU Producer Advanced Audio Mixer User Guide
Advanced Audio Mixer Overview
The Audio Mixer is a dedicated interface embedded into the TVU Producer user interface. Its feature allows audio operators to mix audio for the TVU Producer program separately from the video and graphics operations.
The Audio Mixer interface opens in a separate tab, allowing the individual operator to adjust the volume. The basic functions include adjusting each input source’s volume or fader level and mixing selected audio sources.
The Advanced Audio Mixer Panel allows TVU Producer users to manage all input levels and master output complemented with remote commentary in real-time.
Advanced capabilities serve multiple collaborators or users working to produce a single live show. The operator primarily focuses on using all the advanced capabilities provided in the audio mixer.
Audio Mixer features
Audio Mixer enables the operator to perform the following advanced operations:
- Monitor each video and audio feed for production.
- Adjust all audio input levels as well as the master output.
- Adjust pans (audio gain) for each channel.
- Mute each channel.
- Assign channels for each group for simple management of multiple sources.
- Allows Audio Follow Video (AFV) by source for all pairs in a multi-channel source.
- Allows AFV for Custom Sources.
- Link faders across output pairs.
User Guide contents
This TVU Producer Audio Mixer Quick Start User Guide provides a general overview of the basic and advanced features and interface behaviors.
This user guide provides instructions to perform the following tasks:
- Sign up or register for a TVU Producer account
- Logging into TVU Producer
- How to use the Audio Mixer
Step 1 – Sign up or register for a TVU Producer account
Notes:
- The Free trial includes 20 hours of usage, including streaming. No credit card is required, and access is valid for 30 days.
- To purchase TVU Producer, go to “Purchasing TVU Producer” for more information.
To sign up or register for the TVU Producer free trial, complete the following steps:
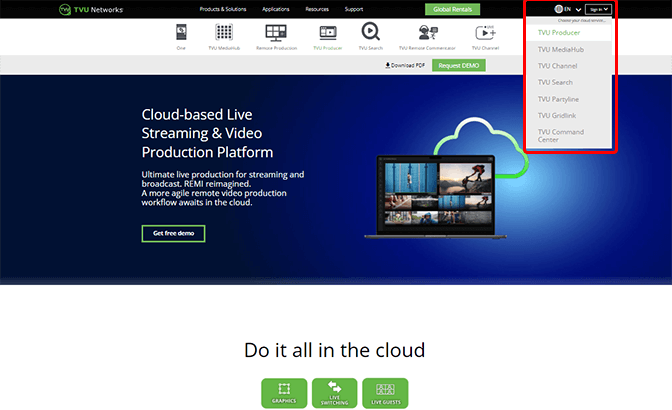
- Open a web browser window and enter: https://www.tvunetworks.com/products/tvu-producer-cloud-production/
- Click the Sign up/Login icon in the page’s top right corner and select TVU Producer.
The Producer Sign in pop-up window displays. Click Sign Up, and the “Get started for free today” window displays.

- Enter your Name, email, and Password, and click Get Started now.
- Check your email and enter the six-digit code, then click Verify.
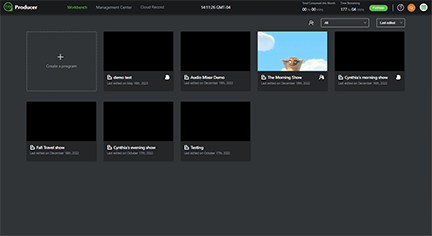
- The TVU Producer Workbench opens. Continue to “Creating a program.”
Step 2 – Signing in to your Producer account
To Sign in to your TVU Producer account, complete the following steps:
- Open a browser tab and enter: https://www.tvunetworks.com/products/tvu-producer-cloud-production/
- Click the green Sign up/Login in the page’s top right corner.
The Producer Sign-in pop-up window displays.
- Enter the following information:
- User ID: e-mail address
- Password: Your Password
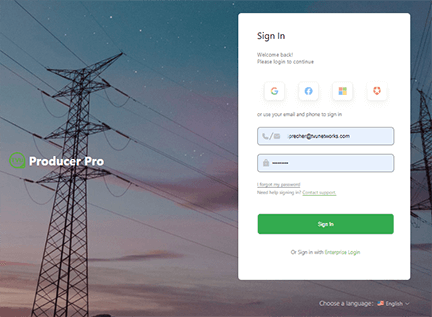
- Click Sign In. The Producer Workbench user interface displays. Continue with “Creating a Program.”
Creating a program
To create a program, complete the following steps:
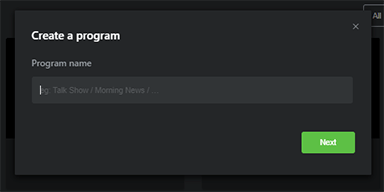
- The Workbench tab displays by default. Click + Create a Program.
- In the Create a program pop-up window, Enter a Program name for your production and click Next.
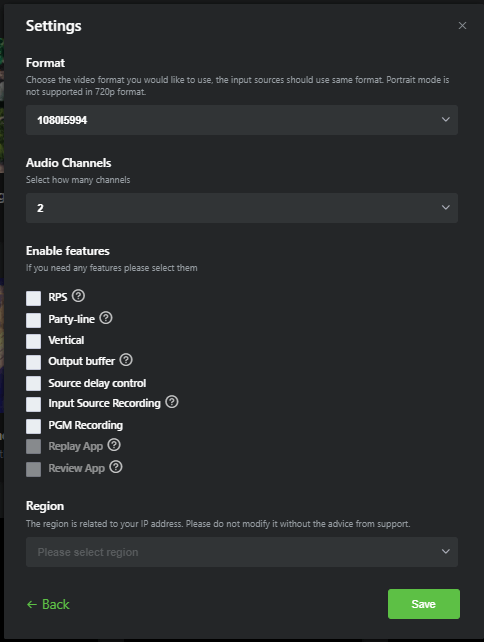
- The Settings window opens.
- Choose the video format you would like to use from the Format drop-down menu.
Note: If you choose a specific Video Format for the Live Show, all your input feeds need to match with this program format for your live switching to be accurate. Please ensure all your input video formats are one and the same. You can separately choose your Output format when you want to go live.
- To enable the multi-channel audio feature, click the Audio Channel drop-down menu and select 2, 4, 6, or 8 output channels for your Producer project.

- Select the desired feature checkbox(es) for your live production, select a Region, and click Save.
Features:
- RPS: Whenever the RPS feature is enabled, the first 6x slots of your production will be reserved as RPS sources only.
- Partyline: Enabling this option automatically forces all TVU Anywhere to join a party. Producer PGM will be in Video Return by default, and UI previews will use RTIL stream coming directly from the device.
- Vertical: Enable this feature to allow Producer to output your source in vertical (portrait) mode.
- Output buffer: The Output Buffer allows a time buffer (up to 300 seconds) to be set between what is viewed in the Live Output Program and the actual video being encoded for output. (ISSP/RTMP/Social media output is supported)
This is primarily so the operator can censor the live source for any issues in the program (such as profanity). If an issue occurs, you have time to react and can switch to a replacement video/image. - Follower mode: Enable this feature to define programs following the main program. Use the Configure link to define which sources follow the main program. Choosing this feature means this production is the main production.
- Source delay control: Enable this feature to set a delay in ms for a producer source.
- Input Source Recording: Enable this feature to select which source you want to be recorded. You can find the recordings in Cloud Record->Remote Recording.
- PGM Recording: Enable this feature to allow recording functionality.
- Replay: Enable this feature to allow replay functionality. Replay is not a standard feature and must be enabled by TVU Support before it can be used. Contact support@tvunetworks.com for more information about the Replay App and testing the feature.
- Review: Enable this feature to allow review functionality. Review is not a standard feature and must be enabled by TVU Support before it can be used. Contact support@tvunetworks.com for more information about the Review App and testing the feature.
Note: The region is related to your IP address and is preset.
- Click Start to start your program in TVU Producer.
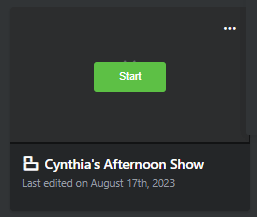
- To change a program setting, click the three dots “…” in the program window and click Settings. Make your changes and click Save.
Basic Audio Mixer functionality
Basic audio mixer functionality is embedded into the Producer User Interface. Each input source has a dedicated audio speaker icon that enables the operator to view, raise, and lower the volume of the audio channel.
Note: The basic audio mixer feature is enabled by default.
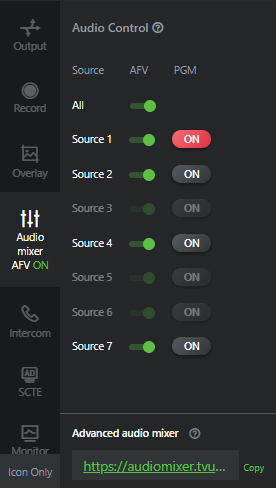
Audio control
The Audio Mixer tab is located in the left navigation menu. Click the tab to open the Audio Control panel. The Audio Control panel displays the Source, AVF controls, and indicates when a source is being output in Producer.
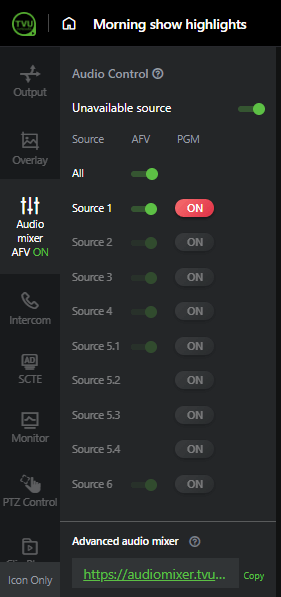
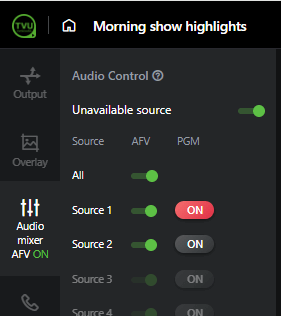
- The Audio Follow Video mode (AFV) switch is enabled by default, allowing the input source cut to live broadcast/PGM to have its sound channel cut along with it.
- If the AFV switch is disabled/off, the sound for live streaming is selected by choosing an alternate audio channel source.
To choose an alternate audio channel source, complete the following steps:
- Click the Audio Mixer tab.
The Audio Control panel opens.
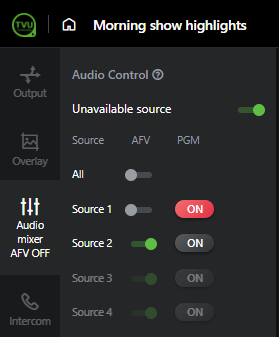
- Move the Audio Follows Video (AVF) switch to the left to disable it. The Audio tab displays AFV/OFF.
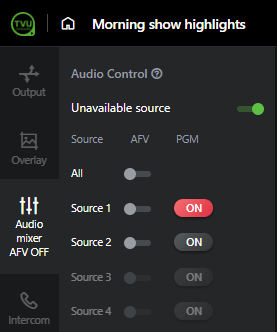
- The Audio Control panel displays audio sources. Move the AFV slider to the right of an available audio source. When an audio source is enabled and being output in Producer, the ON button displays red.
- Alternatively, you can move the All slider to the right to enable or to the left to disable all audio sources.
- To adjust the volume control for each source, click the speaker icon and move the slider.
Advanced Audio Mixer functionality
To switch to the ‘advanced’ audio mixer functionality, complete the following steps:
- Click the Audio mixer icon in the left panel. The Audio Control menu displays.
Note: the menu options for the advanced Audio Mixer functions display.
- Click Copy at the bottom of the Audio Control panel.

- Open a browser window, paste the URL in the address bar, and press Enter. Alternatively, you can click the URL to open the advanced version of the Audio Mixer in a new browser window.
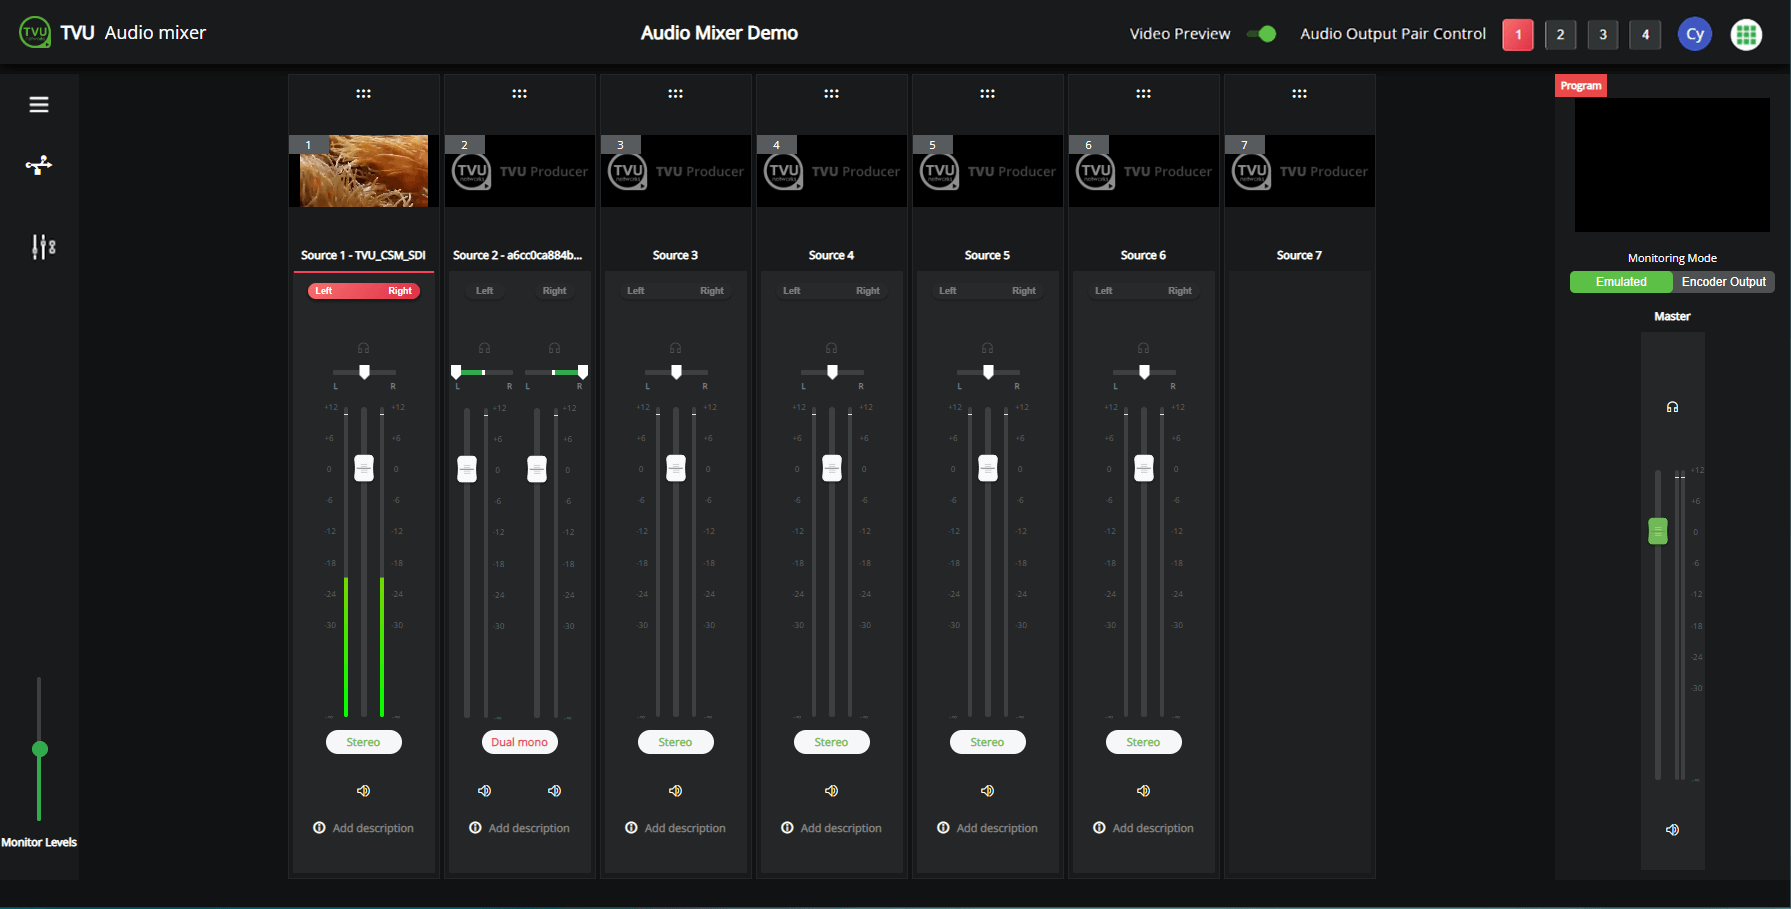
Advanced Audio mixer interface
The TVU Audio mixer user interface displays.
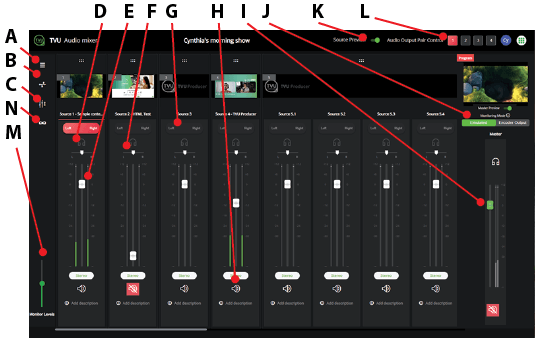
The Advanced Audio Mixer has the following controls:
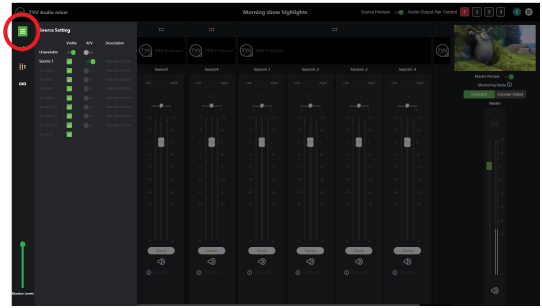
(A) Audio Mixer source settings icon: This icon opens the Source Setting menu where the event producer can manage your input sources and their AFV settings. You can also add a source description to each input source.
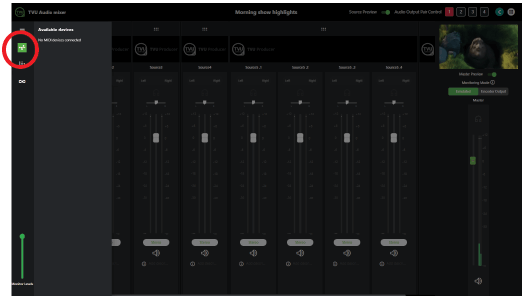
(B) Audio Mixer MIDI device icon: This icon displays the status of available and connected MIDI devices.
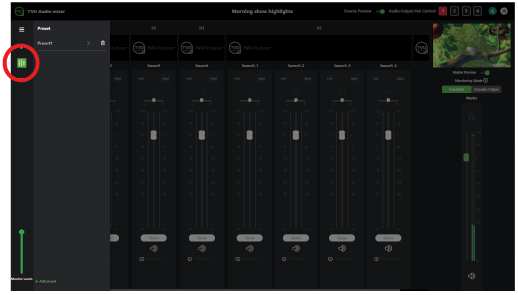
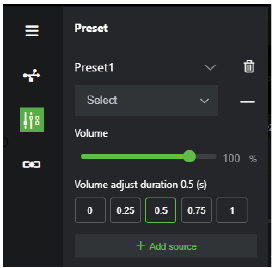
(C) Preset panel icon: This icon opens the Preset panel where the event producer can configure the audio volume and volume adjustment duration for a specific source.
(D) Headphone control icon: This icon allows the event producer to control the input source of headphones or sound monitoring.
(E) Fader level control: Use this slider to control the fader level for input sources independently.
(F) Pan control: Use this slider to pan the audio channel from left to right.
(G) Audio usage Indicator: Audio usage is indicated in red when enabled or gray when disabled for each input source
(H) Mute icon: Use the Mute (speaker) icon to mute the input source audio.
(I) Master slider: This slider controls the overall audio level setting for the event.
(J) Monitoring modes: Monitoring modes allows the event producer to monitor the emulated and Encoder output. If you are monitoring the encoded output, there will be some delay between audio and video depending on your internet condition.
(K) Video Preview toggle: Use this toggle to enable or disable the video previews of running sources.
(L) Audio Output Pair Control: Select the Audio Output Pair Control buttons to configure up to 4 pairs of audio channels. This feature is useful for multi-language outputs.
(M) Monitor Levels setting: The volume for each pair of output channels can be adjusted or muted using the Master output level control slider in the Audio mix panel.
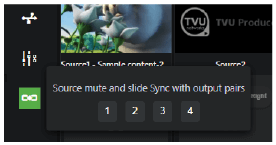
(N) Source mute and slide sync with output pairs menu: All of the audio mixing controls are available for the event. The audio mixer engineer can work with up to 4 output pairs. Each output pair has a dedicated independent audio panel. Each input source can have up to 4 audio pairs. Each pair can be controlled independently.
Left panel controls:
The Audio Mixer source settings menu displays visible and unavailable sources. In this menu, you can add a description to each source displayed at the bottom of each input source.
AFV is disabled by default for the remote commentator. All commentators that join are enabled and mixed to the output pair number 1 by default.
The MIDI device menu displays available and connected MIDI devices.
Audio Presets can be configured and saved for each source in the Preset panel.
The Source mute and slide sync with output pairs menu displays selectable output pairs that correspond with the Audio Output Pair Control and allows you to mute the source from the Audio mixer.
Multi-audio channel feature
This feature supports 2, 4, 6, or 8 embedded output audio channels in Producer. The Audio mix option in Producer allows up to 4 pairs of audio channels to be configured by selecting a number in the Audio Output Pair Control feature in the Audio mix panel. This feature is useful for multi-language outputs.
A user can independently adjust the volume of the audio output channels assigned to each pair. The volume for each pair of output channels can be adjusted or muted using the Master output level control slider in the Audio mix panel.
To set up multiple audio output channels in Producer, complete the following steps:
- Select a source in the Producer User Interface and click the Advanced Audio Mixer icon in the left panel. The Audio Mixer panel opens.
- Click the URL at the bottom of the panel to open the Audio Mixer interface.
- Locate the “Audio Output Pair Control” at the top-right corner of the interface. Channel setting number 1 is selected by default.

- Click the Left-Right buttons in the audio source panel to select the audio source channels you want to pair to setting 1.
Note: Refer to “Advanced Audio Mixer user experience behavior” on page 7 for information about stereo and dual mono settings.
- Adjust the individual source audio settings for channel 1. Then, adjust the Master audio level in the left panel to the desired setting.
- Click channel setting 2 and repeat steps 7 and 8, respectively, to pair up to 4 channels (with a maximum of 8 outputs).
- To adjust your audio channel paired settings, click the appropriate Audio Output Pair Control channel number to display your settings.
Advanced Audio Mixer user experience behavior
The following two types of audio sources are supported in the Advanced Audio Mixer interface:
- Stereo – Stereo has one channel and includes one fader, one pan control, and two audio level indicators. When stereo is selected, both left and right indicators illuminate together to indicate one channel.
- Dual mono – Dual mono has a left and right channel and includes two fader controls, two pan controls, and two audio level indicators. When dual mono is selected, both left and right indicators illuminate separately to indicate two channels.
The ‘Stereo and Dual-mono channel examples’ figure shows the Stereo and dual mono channels:
- Source 1 indicates Stereo (one channel)
- Source 2 shows Dual mono (left and right channels)
The Fader level indicator ranges from -∞ to +12
Note: The following stereo and dual-mono channel example is shown to highlight the differences.

Audio usage indicators are displayed in red at the bottom of the panel.

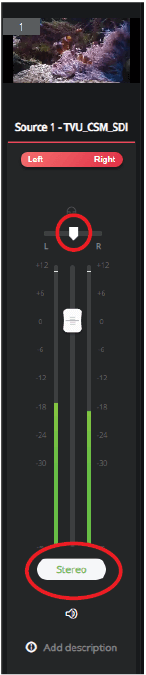
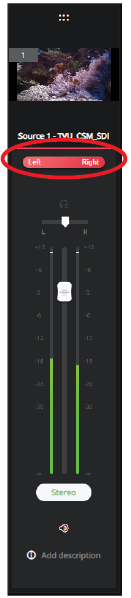
Stereo audio source
The Stereo audio source has only one fader and one balance control (or Pan control), as shown below.
- The fader level indicator range is from -∞ to +12.
- Balance control ranges from 0 to 100. The balance is set to 50 (middle).
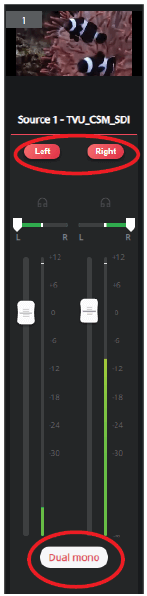
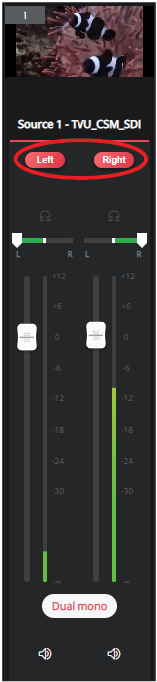
Dual-mono audio source
The Dual-mono audio source has two faders and two pan controls. One fader controls the left channel, and the other controls the right channel. The two channels operate independently.
- Each channel has an independent fader level indicator showing ranges from -∞ to +12.
- The pan control slide ranges from 0 to 100. The left pan control setting is 0, and the right pan control setting is 100.
Headphone control and sound monitoring
The headphone icon allows the operator to monitor a specific audio channel.
Fader level control
The fader level indicators show the appropriate status from the basic mixer. When the Audio Mixer displays for the first time, the fader level indicators must be set to the appropriate volume or gain even though sound monitoring is switched.
This will provide the audio operator with real-time results, ensuring all audio channel volumes are correctly working. The operator can then adjust the gains of specific audio channels as desired.
Audio usage indicator and enable/disable functions
The audio usage and enable/disable indicator button at the top of the panel (turns red or grey).
The Audio usage button (one for each channel in the input source) indicates which audio channels are used or enabled.
- When the audio switch is ON or enabled, it turns red
- When the audio switch is OFF or disabled, it turns grey
When live sources are switched, the audio usage indicator (in red) is applied to the newly switched input source and the channels. If PIP is enabled on a live source, then both these input sources, which are going to program output, will indicate usage when their left and right channel indicators turn red.
Notes:
- If AFV is enabled, the audio usage is read-only. Customers cannot enable audio on more than one channel.
- If AFV is disabled, the operator can click on the audio usage button to switch between grey (disabled) to red (enabled) or red (enabled) to grey (disabled).
If the customer changes the audio usage on two different channels to Red, those two audio channels will go to program output.
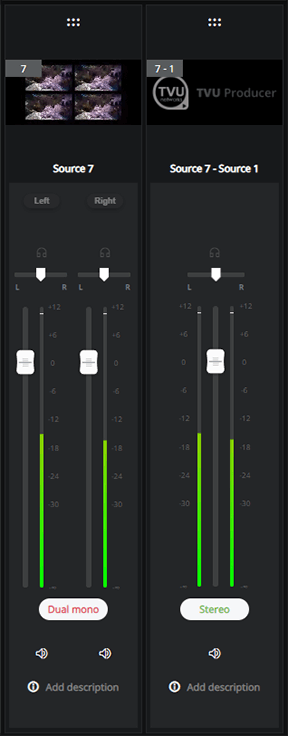
Audio control for quad mode
When the quad mode (input source 7) is selected, it behaves like any other source.
The audio usage indicator is ON for source 7 (and is only lit up for source 7), and whatever the presetting was for its source still applies.
Monitor level control
The Monitor level control in the audio mixer controls the volume of the Audio Mixer tab in the Chrome browser.

Mute control
The Mute control allows the end-user to silence the audio channel completely. This will also silence the channel output audio.
Note: Mute can be used in both use-cases, when AFV is ON or OFF.
When AFV is ON, the user can mute the stereo source channel or both dual-mono source channels. When the mute icon is switched ON for the ‘Source’ chosen to go to Program output, the master volume is also muted.
In the following example, AFV is enabled. Video source 6 is chosen to go to program output. When both channels are muted for this specific audio source, the master volume is entirely muted on the program output. Group audio is not enabled in the following ‘Use-case example.’

Mute functionality works similarly if AFV is OFF and the Group Audio feature is enabled.
In the use-case example, the user can use the mute functionality associated with the group directly. When using the mute icon related to Group 1 or Group 2, the user can mute all the audio sources assigned to Group 1 or Group 2.
The user can also mute one of the audio channels chosen for Group 1, which will silence only that specific channel.
Group Audio feature
The Group Audio functionality is enabled only when AFV is OFF. Users cannot choose groups in AFV mode.
The Group Audio feature enables users to assign audio channels to specific groups. The Audio Mixer Panel supports two groups.
To use the Group Audio feature, complete the following steps:
- Open the Advanced Audio Mixer panel.
- Assign each desired audio channel in each respective audio source (whether a stereo source or dual mono) to group 1 or 2.
- Choose the desired channels and assign them to either Group 1 or Group 2.
Note: Selecting audio channels for specific groups can be completed initially without enabling the group audio functionality.
- To change the Group Audio setting, select Group 1 or Group 2 in the program output panel. Then, click the ON button in the Audio panel above Group Audio.
Note: Users can switch either group or both groups simultaneously to manage and control all of the audio channels and sources associated with a specific group.
- If desired, a user can dynamically assign new channels to either of the groups.
Note: the ‘ON” Audio Button can be enabled only after assigning at least one audio channel. If the user has not assigned any audio sources to either group, the user cannot switch ON the group audio.
In the following ‘Channel and input source example,’ channel 2 of input source 1 is assigned to Group 2. In addition, the two audio channels of input source 3 are also assigned to Group 2. The User interface will allow the user to switch on the Group 2 control and then reduce the fader levels of all the associated channels using the Group fader controls.
Note: Enabling the group feature will not have any impact on the current master volume functionality.
Purchasing TVU Producer
After registering for the 30-day (20 hour) trial period, a user can purchase Producer online using PayPal. To purchase a TVU Producer subscription, sign in to your trial account and click the Purchase button in the top main navigation bar.
We empower publishers, broadcasters, and enterprises to deliver the broadcast to the widest audience on any platform, anywhere on the globe, by transforming your PC into a live production control room. You can innovate and create your live event into a unique next-generation experience.
There are two ways to purchase TVU Producer:
- Online at https://TVUNetworks.com
- The TVU sales team can set up a monthly pricing schedule for customers who do not prefer to pay online by contacting TVU Sales by Phone at +1 650.440.4812 or email at support@tvunetworks.com
© Copyright 2024 TVU Networks Corporation. All rights reserved in all media.
TVU Producer Audio Mixer QSUG Rev F EN 09-2024