TVU Router Portal Quick Start User Guide
This guide provides step-by-step instructions for accessing the Router Portal through your TVU Home account or by signing in to the TVU Router Portal. In the TVU Home user interface, users can view real-time router usage and perform advanced device control, such as port mapping and router server configuration.
Router Portal controls and functions
The Router Portal has three main operational pages, each allowing users to access their router usage and event settings:
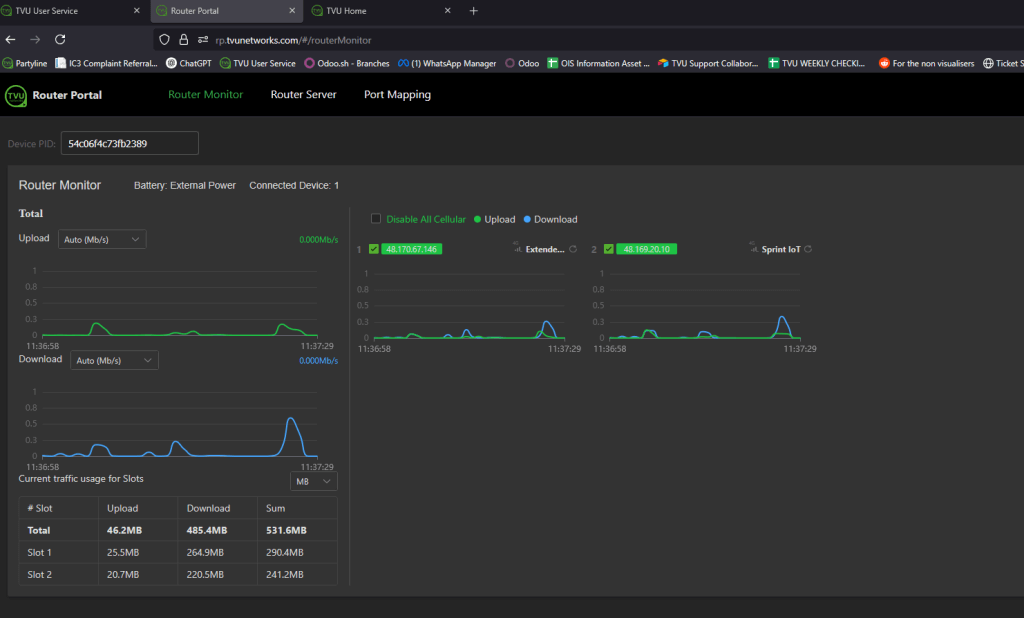
Router Monitor – The Router Monitor page allows a user to monitor their router’s:
- Connected devices
- Battery usage
- Total upload (Mb/s
- Total download (Mb/s)
- Current traffic usage for slots (KB)
Router Server – The Router Server page allows a user to:
- Configure their Router Server network setting
- Enable Ethernet host
- Switch the mode to (Layer 2)
Port Mapping – The Port Mapping page allows a user to:
- Add port mapping
- Configure port mapping
Benefits
Router monitoring is essential for maintaining a healthy network infrastructure, ensuring optimal performance, and quickly addressing any issues.
TVUs Router Portal:
- Enhances network reliability by preventing outages.
- Improves troubleshooting efficiency by providing detailed performance metrics.
- Reduces manual monitoring efforts, allowing IT staff to focus on critical tasks.
Before you begin
Users must contact TVU Support to bind their device to the Router Portal and enable the router features.
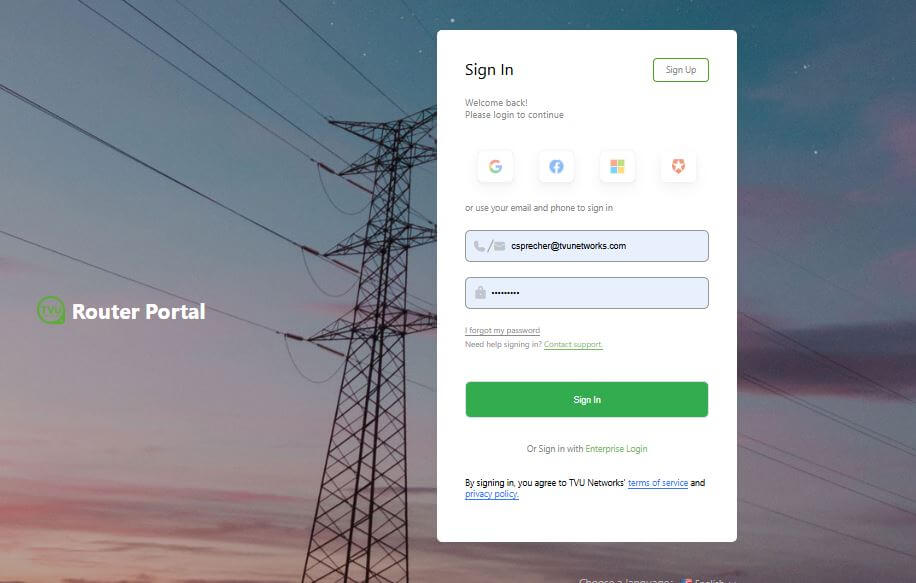
Accessing the Router Portal
There are two methods you can use to access the Router Portal:
- Select Router Portal from the TVU Services waffle menu in the TVU Home user interface.
- Enter the Router Portal URL and sign in with your TVU credentials.
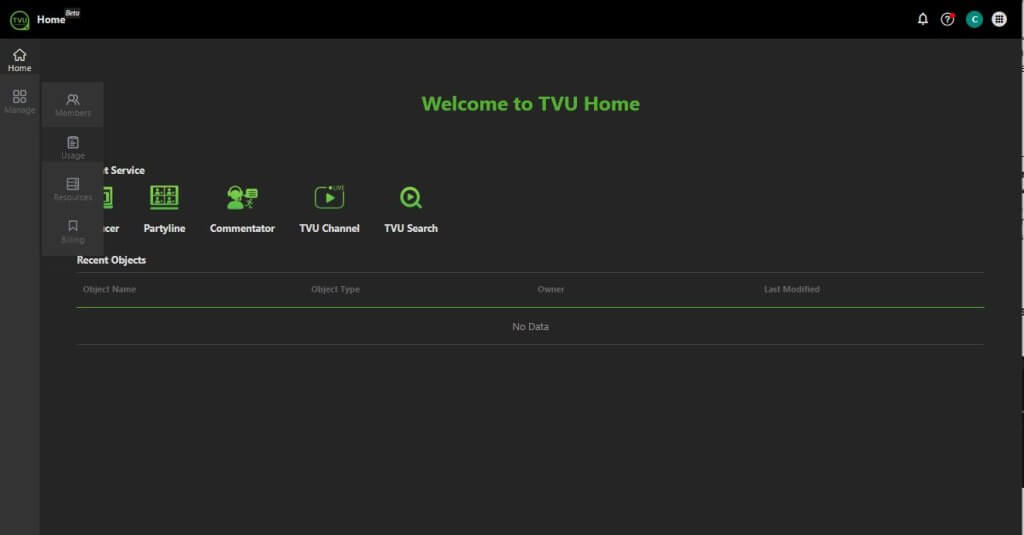
TVU Home
Users can view detailed router usage information in the TVU Home web interface and open the TVU Router Portal from the TVU Services waffle menu. To log in to the TVU Home user interface:
- Open a Web browser tab and enter: https://home.tvunetworks.com/tvu-home/#/home
- Click Enter.
- The Home Sign-in page displays.

- Enter your User ID and Password.
- Click Sign In.
- The TVU Home page will display. Click the Manage tab in the left navigation panel, then click Usage.
- The Usage page will display..
- Click View More in the TVU Router Usage panel.

- A detailed Usage and device list will be displayed.
- In the bottom panel, locate your device in the list.
- Click the device’s Config button to perform additional Advanced controls.
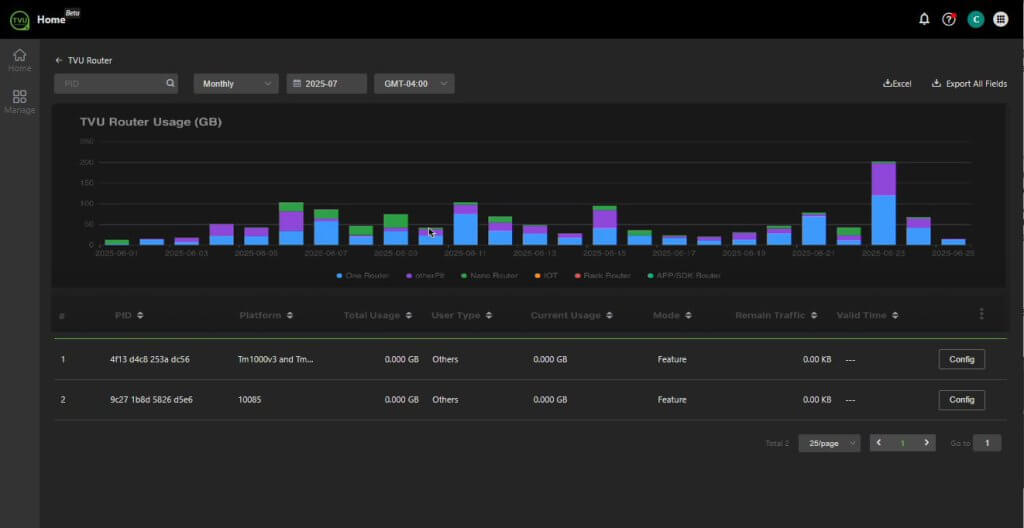
- The Router Portal page will open as a sliding panel from right to left.
- Continue to “Router Monitor.”
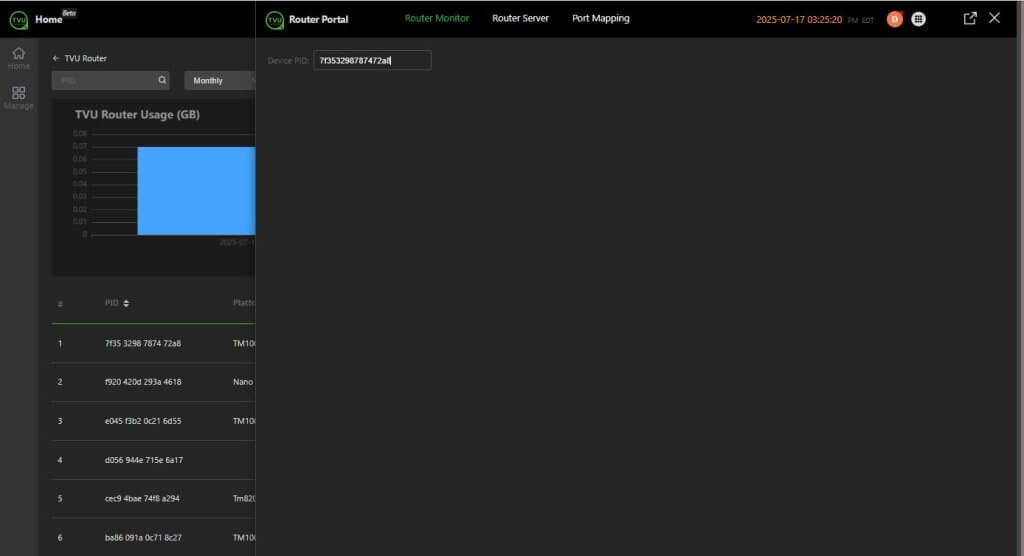
Entering the Router Portal URL
The TVU Router Portal interface allows users to connect to and configure your router, manage the settings, and view its real-time usage data.
To only access the Router Portal via URL:
- Open a browser window and enter: https://rp.tvunetworks.com/#/routerMonitor
- Log in to the TVU Router Portal using your TVU credentials.
- The Router Portal’s Router Monitor page will be displayed.
- Continue to “Router Monitor.”
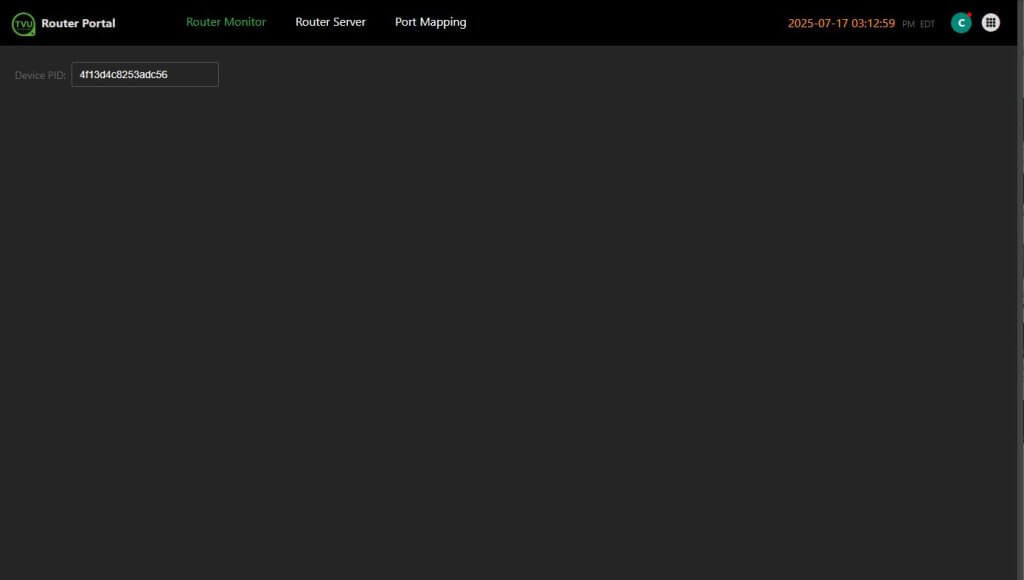
Router Monitor
TVU’s Router monitor interface is designed to manage the performance of network routers. It tracks their health, helping to identify issues like bandwidth usage, traffic bottlenecks, and device failures. It provides alerts and insights to ensure optimal network performance and reliability.
- Enter the Device PID.
- The Router Monitor’s device usage page will be displayed. Here, you can monitor all aspects of your router’s usage.
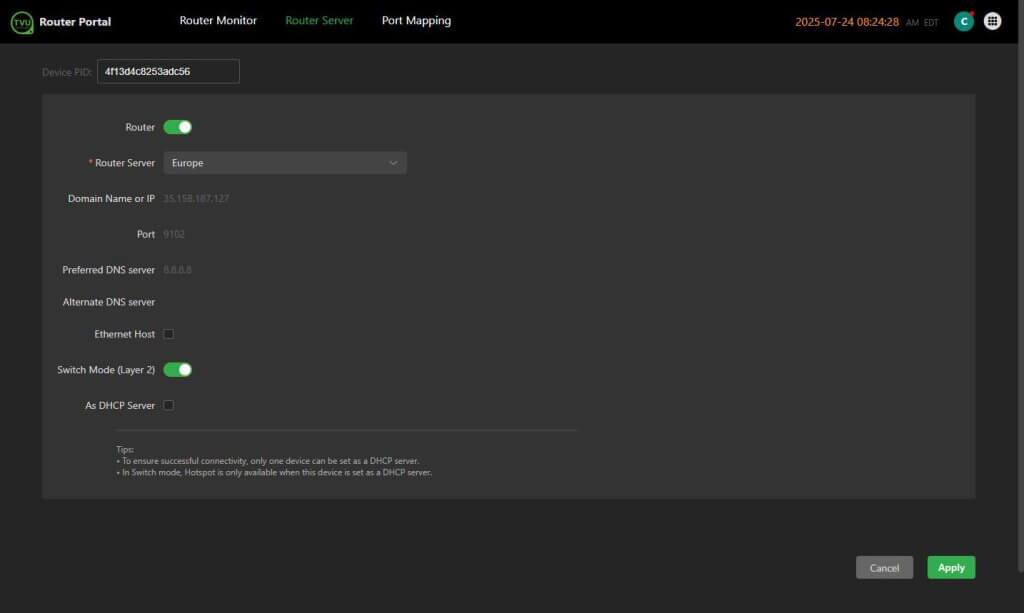
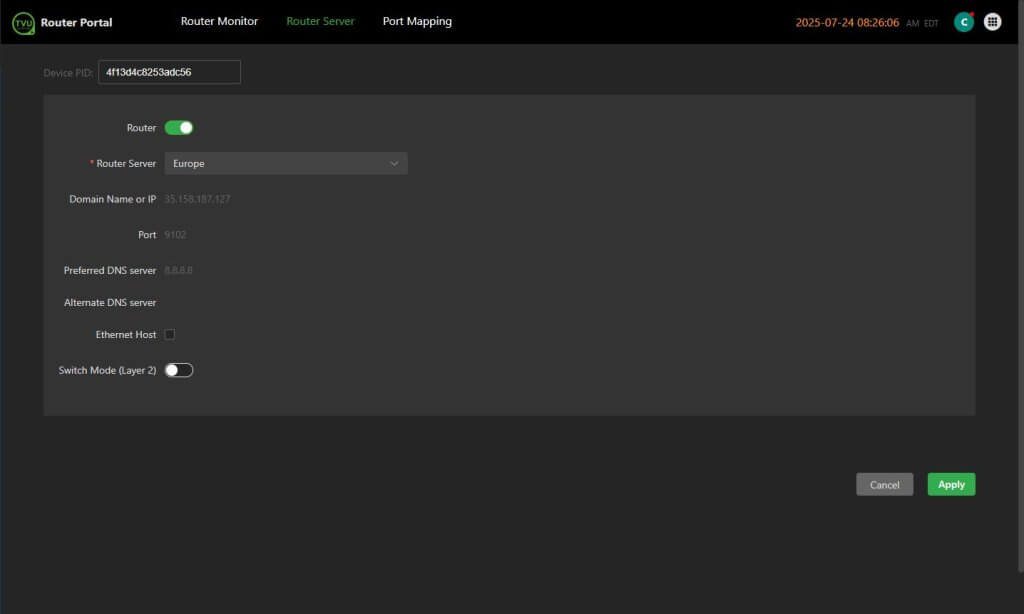
Router Server
A router server connects multiple networks and manages the flow of data between them by forwarding data packets to their intended destinations. It acts as a dispatcher, ensuring that information travels efficiently across the network.
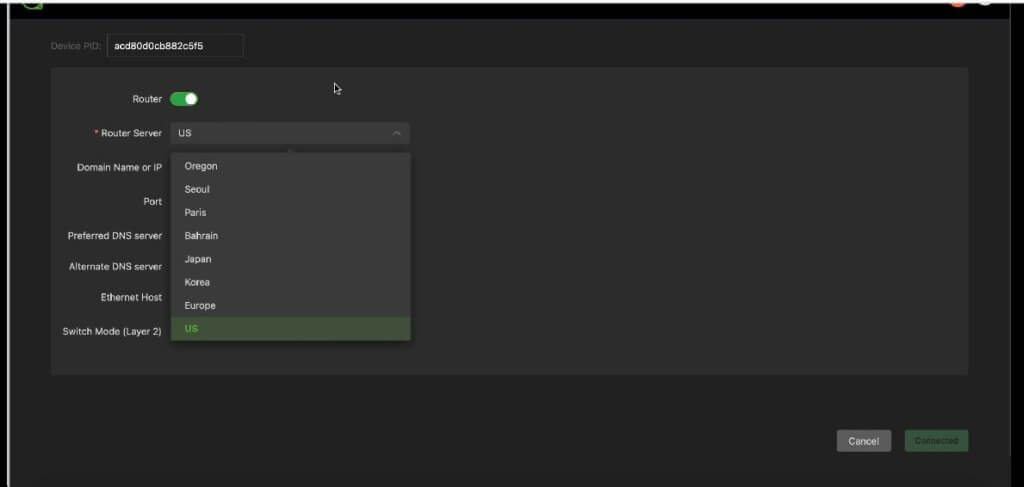
To configure your Router Server:
- Click Router Server in the top navigation panel.
- The Router Server page will display.
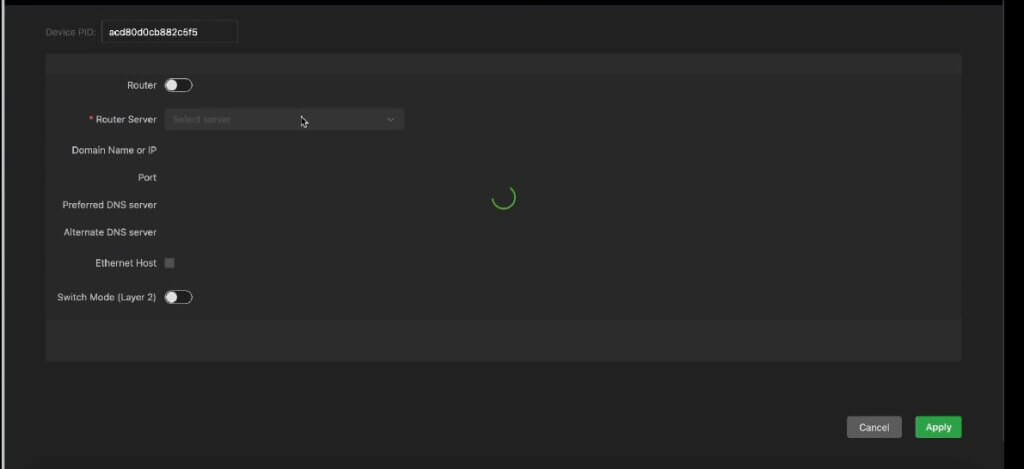
- Enable the Router slider.
- Select a Router Server network location from the drop-down menu.
Switch Mode
Layer 2 switches forward data based on the destination MAC address, while layer 3 switches forward data based on the destination IP address. Some switches can do both. A MAC address is a permanent identifier for each piece of hardware and is only used inside a given network.
However, most switches are layer 2 switches. Layer 2 switches most often connect to the devices in their networks using Ethernet cables.
- When Switch Mode (Layer 2) is enabled, an “As DHCP server” option and the following “Warning” message will display.
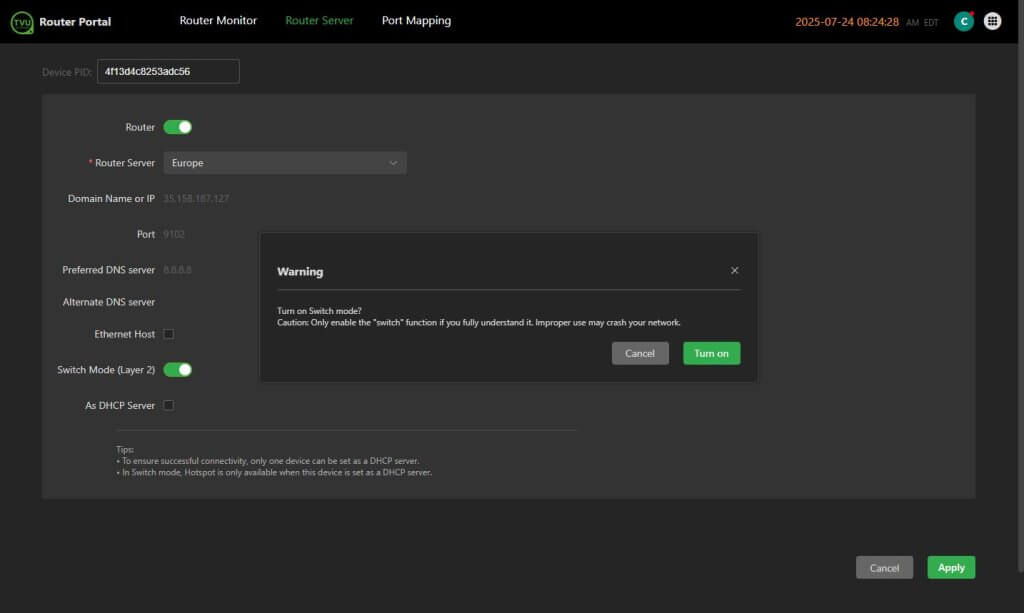
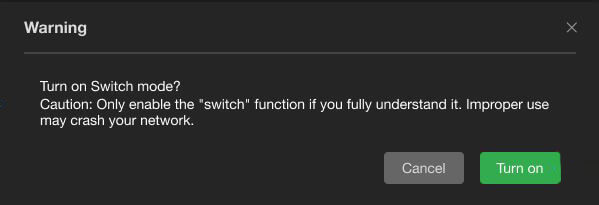
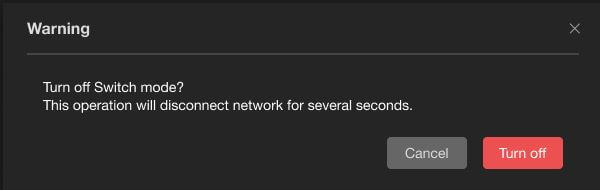
- The Warning message, Cancel, Turn On, and Turn Off operations are as follows.
Turning On Switch Mode:
- Click the Turn On button to save your changes and turn on Switch Mode.
- Click the Cancel button if you are not making changes. In this case, Switch Mode stays off.
Turning Off Switch mode:
- Click the Turn Off button to save your changes and turn off Switch Mode.
- Click the Cancel button if you make no changes and want Switch Mode to stay on.
- Click Apply at the bottom of the page to save the settings on the page.
DHCP Server
The As DHCP Server router setting allows the router to automatically assign IP addresses and other network configuration parameters to devices on the network, simplifying the process of connecting devices without manual configuration. This helps manage IP address allocation efficiently and reduces the risk of errors.
- To enable As DHCP Server, click the checkbox.
Note: To ensure successful connectivity, only one device can be set as a DHCP server.
Note: When in Switch mode, Hotspot is only available when this device is set as a DHCP server.
- When disabling As DHCP Server, a Warning message will be displayed.
- Click Apply at the bottom of the page to save your settings.
Ethernet Host
The Ethernet host router setting typically allows you to configure the IP address and other network settings for a device on a network, enabling it to communicate effectively with other devices and access the internet. This setting is crucial for ensuring that data packets are routed correctly to and from the device.
To enable an Ethernet Host:
- Click the Ethernet Host checkbox.
- Click Apply at the bottom of the page to save your settings.
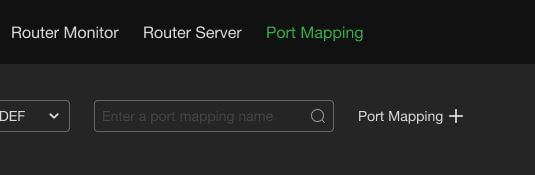
Port mapping
Port mapping is a network configuration setting that redirects traffic arriving at a specific port on your router’s public IP address to a specific device’s private IP address and port within your local network.
The port mapping page allows users to configure port mapping on their router.
To configure ports:
- Connect to a server and enable the pop-up.
- Click Port Mapping in the top navigation panel.
- Click Port Mapping + at the top of the page.
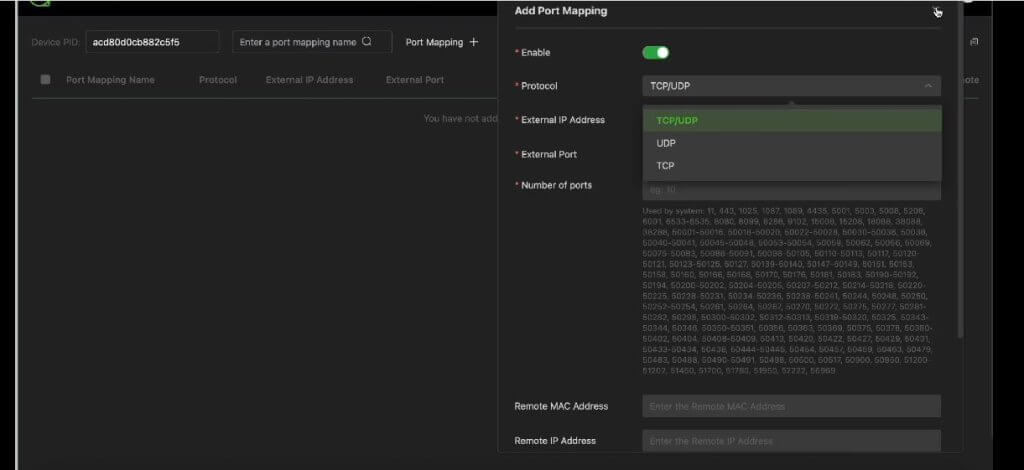
- The Add Port Mapping pop-up window will be displayed.
- Enable the slider.
- Select a Protocol.
- Enter an External IP Address.
- Select an External Port.
- Enter the Number of ports.
- Enter the Remote MAC Address if applicable.
- Enter the Remote IP Address if applicable.
© Copyright 2025 TVU Networks Corporation, All rights reserved in all media.
Document Part Number: TVU Router Portal QSUG Rev A EN 08-2025